
Indulge in the ultimate summer delight with these exquisite Chocolate Sprinkle Cookie Ice Cream Sandwiches. Crafted for blissful cooling on a sweltering day, these treats feature two soft, delightfully chewy chocolate cookies, generously adorned with vibrant rainbow sprinkles, encasing a luscious filling of your favorite ice cream. The cookies, with their rich cocoa flavor and brownie-like texture, strike a perfect balance – soft enough for an effortless bite, yet firm enough to hold the entire decadent sandwich together. Their versatile flavor profile makes them an ideal partner for a myriad of ice cream varieties, from the timeless simplicity of classic vanilla to more adventurous choices. And, of course, the burst of colorful sprinkles adds an extra layer of fun and visual appeal, making every bite a celebration.
These homemade ice cream sandwiches aren’t just a dessert; they’re an experience. Imagine sinking your teeth into a cool, creamy center, perfectly complemented by the rich, slightly crisp, and chewy chocolate cookie. Each element is designed to work in harmony, creating a symphony of textures and flavors that will transport you to a state of pure summer joy. Whether you’re hosting a backyard barbecue, planning a birthday party, or simply seeking a personal treat to beat the heat, these chocolate sprinkle cookie ice cream sandwiches are guaranteed to impress and satisfy.

The Inspiration Behind This Irresistible Treat
My recent birthday celebration served as the perfect catalyst for creating these delightful ice cream sandwiches. When brainstorming the ideal ice cream flavor to accompany the festive occasion, birthday cake was the obvious and most fitting choice. To elevate the birthday theme even further, I decided to mix extra rainbow sprinkles directly into the ice cream, mirroring the joyful chaos of confetti. This combination brings to mind the legendary “Birthday Cake Remix” from Cold Stone Creamery – a masterful blend of creamy cake batter ice cream, rich chocolatey brownie chunks, and a generous shower of sprinkles. If you’ve had the pleasure of tasting that iconic creation, you’ll instantly understand the irresistible magic of this flavor profile.
For those who haven’t yet experienced the sheer delight of the Cold Stone classic, these homemade ice cream sandwiches offer an incredible opportunity to recreate those cherished flavors right in your own kitchen. Picture this: a deeply chocolatey cookie, perfectly paired with a sweet, celebratory birthday cake ice cream, all brought to life with a playful scattering of sprinkles. It’s more than just a dessert; it’s a portable party, the ultimate summer birthday treat that captures the essence of celebration in every single bite. The blend of rich chocolate and vibrant cake batter notes, enhanced by the subtle crunch and visual pop of sprinkles, makes these sandwiches an unforgettable indulgence for any occasion, not just birthdays!

Key Ingredients for the Perfect Chocolate Sprinkle Cookie Ice Cream Sandwiches
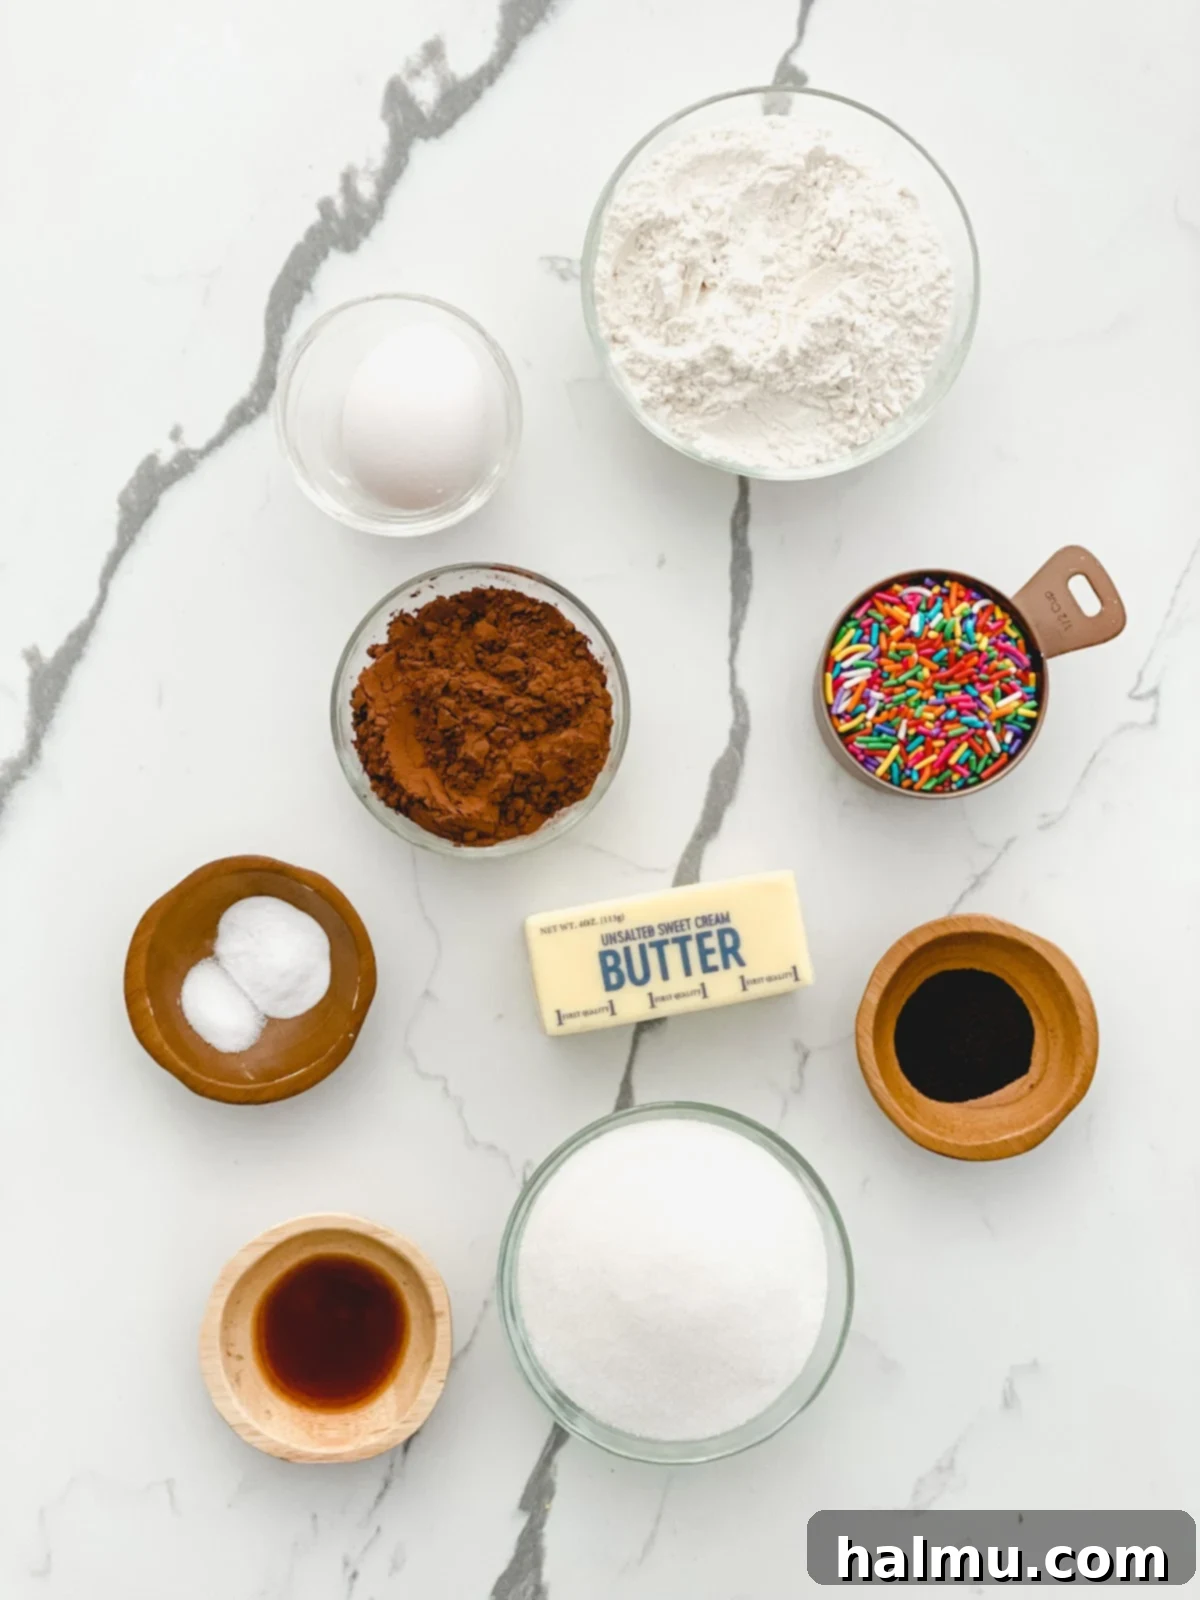
Crafting these sensational ice cream sandwiches requires a thoughtful selection of ingredients, each playing a crucial role in achieving the desired taste and texture. Here’s a detailed look at what makes these cookies and sandwiches truly special:
- Unsalted Butter: The foundation of our chewy cookies begins with melted unsalted butter. Using melted butter is a deliberate choice, as it contributes to a slightly crisp exterior while ensuring a wonderfully soft and chewy center. This texture is absolutely essential for the “buns” of our ice cream sandwich, providing the perfect balance of resilience and tenderness to hold the frozen filling without becoming too hard or crumbly when chilled.
- Granulated Sugar: Beyond sweetness, granulated sugar plays a vital role in the cookie’s structure and spread. It interacts with the melted butter to create a tender crumb and contributes to the slight crispness at the edges, ensuring the cookies have the ideal foundation for an ice cream sandwich.
- Large Egg (Room Temperature): An egg acts as a binder, bringing all the cookie ingredients together and adding moisture. Using a room temperature egg is important for emulsification, allowing it to incorporate more smoothly with the butter and sugar, resulting in a more uniform and tender cookie dough.
- Vanilla Extract: A classic flavor enhancer, vanilla extract deepens the chocolate notes and adds a warm, inviting aroma to the cookies. Don’t skip this, as it rounds out the overall flavor profile beautifully.
- All-Purpose Flour: The primary structural component of our cookies. All-purpose flour provides the necessary body and chewiness. Measuring it correctly (preferably by weight) is key to preventing dry or overly dense cookies.
- Cocoa Powder: For that rich, deep chocolate flavor, cocoa powder is indispensable. I recommend using a good quality unsweetened cocoa powder for the best results, as it delivers an intense chocolate experience that stands up perfectly against the sweetness of the ice cream.
- Instant Espresso Powder (Optional, but Recommended): While entirely optional, a touch of instant espresso powder works wonders. It doesn’t make the cookies taste like coffee; instead, it subtly amplifies the natural bitterness and depth of the cocoa powder, making the chocolate flavor more profound and preventing it from getting lost when paired with a creamy ice cream filling. Even if you’re not a coffee drinker, I highly encourage you to try this secret ingredient!
- Baking Soda: This leavening agent helps the cookies rise slightly and contributes to their soft, chewy texture. It reacts with the acidic cocoa powder to create a tender crumb.
- Salt: A pinch of salt is crucial for balancing the sweetness and enhancing all the other flavors in the cookie. It brings out the richness of the chocolate and prevents the cookies from tasting bland.
- Rainbow Sprinkles (“Jimmies”): For this recipe, the type of sprinkle matters significantly. You absolutely want to use “jimmies” sprinkles, which are elongated and soft, as opposed to nonpareils (the tiny, crunchy spheres) or other shapes. Jimmies hold up beautifully on top of the cookies before baking, maintaining their color and shape. Crucially, they also have a much softer texture, preventing any unwanted crunchiness on the cookie’s exterior, especially when cold. I also love adding a couple of scoops directly into the ice cream filling for an extra pop of color and celebratory feel.
- Ice Cream: The star of the sandwich! While a good old-fashioned vanilla ice cream makes for a classic and utterly delicious combo, feel free to get creative and experiment with your favorite flavors. As mentioned, I’m particularly fond of Tillamook’s Birthday Cake ice cream; its creamy texture and festive flavor pair exceptionally well with the rich chocolate cookie. (Not sponsored, but truly a fan!) Don’t hesitate to explore other options like mint chip, strawberry, or even salted caramel for a different twist. Adding a few extra sprinkles to your chosen ice cream flavor will always make it more fun!
Step-by-Step Guide: How to Craft Your Own Ice Cream Sandwiches
Making these delightful ice cream sandwiches is a straightforward process, broken down into manageable steps to ensure perfect results every time. Follow along to create your ultimate summer treat:
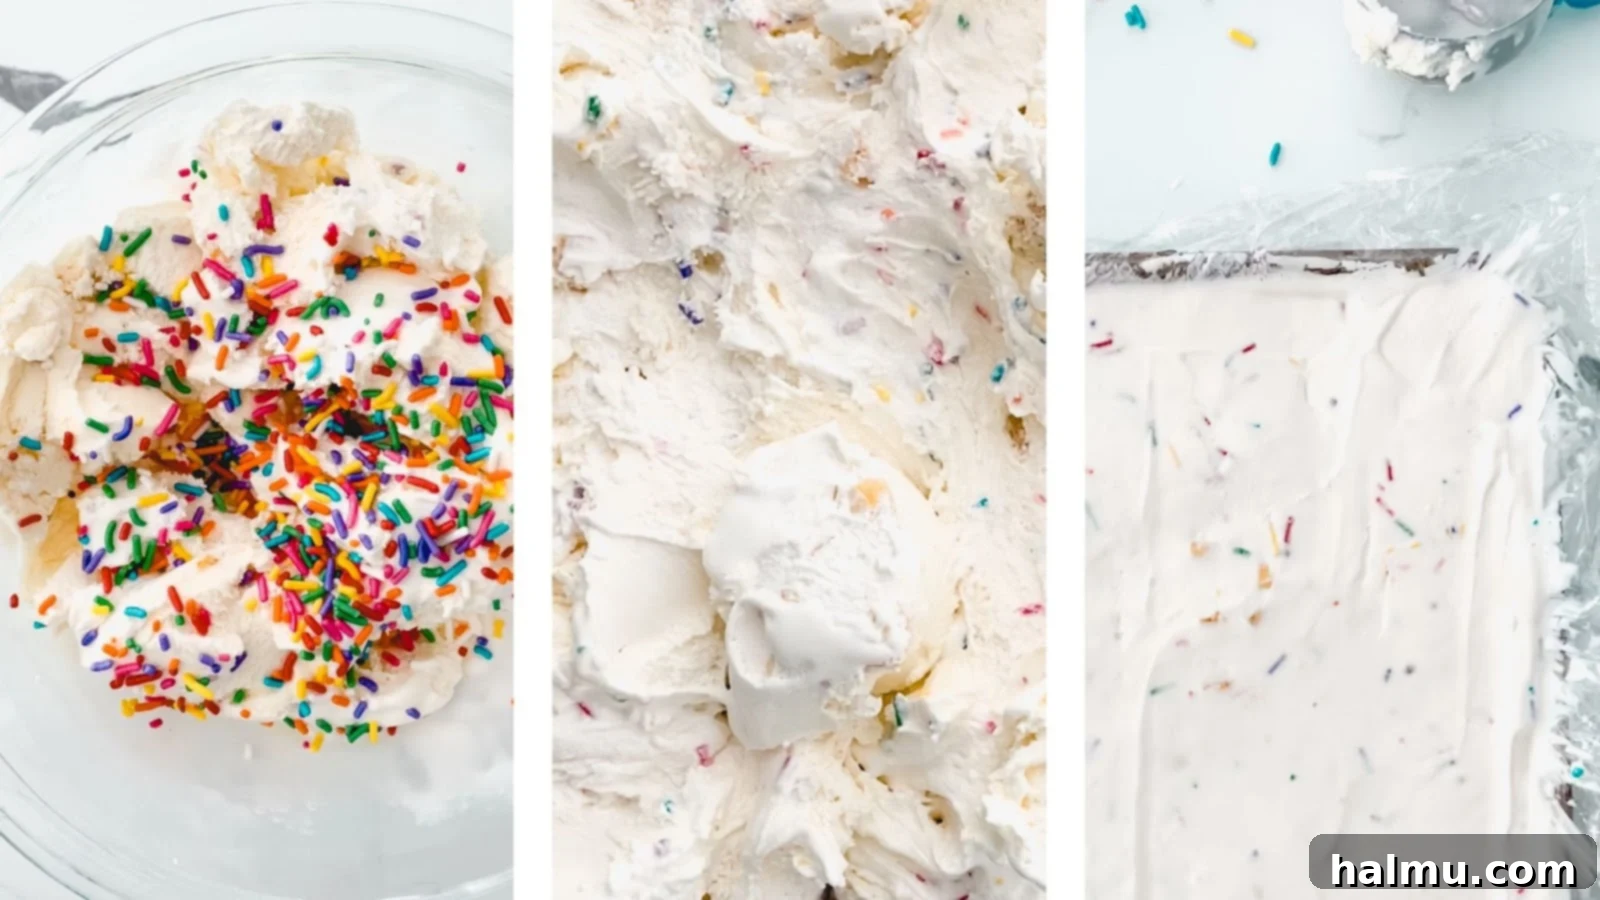
- Prepare the Ice Cream for Shaping. Begin by taking your chosen ice cream out of the freezer and letting it sit at room temperature for approximately 5 minutes. This brief softening period is key; it allows the ice cream to become pliable enough to work with, making it much easier to spread. Transfer the slightly softened ice cream to a bowl and use a sturdy wooden spoon or spatula to break it up and mix it thoroughly until it reaches a smooth, spreadable consistency. At this stage, it’s also the perfect moment to stir in some extra rainbow sprinkles, if desired, for an added festive touch. Next, line a small sheet pan with plastic wrap, ensuring there’s ample overhang on all sides. Spread the ice cream evenly across the pan, aiming for about a ½-inch thickness, and smooth the top as much as possible with an offset spatula. Once spread, use the excess plastic wrap to completely cover the ice cream. Place the pan in the freezer for at least 3 hours, or ideally, overnight. The goal is to have the ice cream frozen solid, which is crucial for clean, precise cuts later.
- Bake the Chocolate Sprinkle Cookies and Chill the Dough. One of the best aspects of this cookie dough is how quickly it comes together – no electric mixer required! In a large mixing bowl, whisk together the cooled melted butter and granulated sugar for about a minute until well combined. Then, incorporate the room temperature egg and vanilla extract, mixing until everything is fully integrated. In a separate bowl, combine your dry ingredients: all-purpose flour, cocoa powder, optional espresso powder, baking soda, and salt. Gradually fold these dry ingredients into the wet mixture using a spatula, mixing just until no streaks of flour remain to avoid overworking the dough. Scoop the dough into uniform balls using a 3-Tablespoon cookie scoop. For the most vibrant and visible sprinkle effect, dip the top (rounded part) of each cookie dough ball directly into a bowl of rainbow sprinkles, gently pressing them in. I experimented with mixing the sprinkles into the dough, but their colors didn’t pop as much against the dark cocoa, making external application the superior choice for visual appeal. Arrange the sprinkled dough balls on a parchment-lined pan and refrigerate for a minimum of 30 minutes. This chilling period is essential as it firms up the dough, preventing excessive spread during baking and allowing the flavors to meld beautifully. Preheat your oven to 350°F (175°C) and line two baking sheets with parchment paper or silicone mats. Place the chilled cookie dough scoops on the prepared sheets, ensuring at least 2 inches of space between them. Bake for 10-12 minutes, or until the edges are set but the centers remain slightly soft. Once baked, allow the cookies to cool completely on the baking sheets before handling, then transfer them to a wire rack to finish cooling. This complete cooling is vital; attempting to assemble sandwiches with warm cookies will cause the ice cream to melt instantly.

- Cut the Ice Cream Discs. Once your ice cream has thoroughly frozen solid on the sheet pan, it’s time to create the perfect discs. Unwrap the frozen ice cream block and, working quickly to minimize melting, use a round metal cookie cutter to punch out individual ice cream discs. I find a 3 ½-inch cutter works best, as it’s ever-so-slightly smaller than the diameter of the baked cookies, creating a neat edge without ice cream oozing out too much. Speed is of the essence here; ice cream melts remarkably fast, especially at room temperature. If you find the discs starting to melt or become difficult to handle after cutting, immediately place them back on a pan (lined with parchment or plastic wrap) and pop them back into the freezer for 15-30 minutes to re-firm. This ensures they are perfectly solid and easy to work with during assembly.
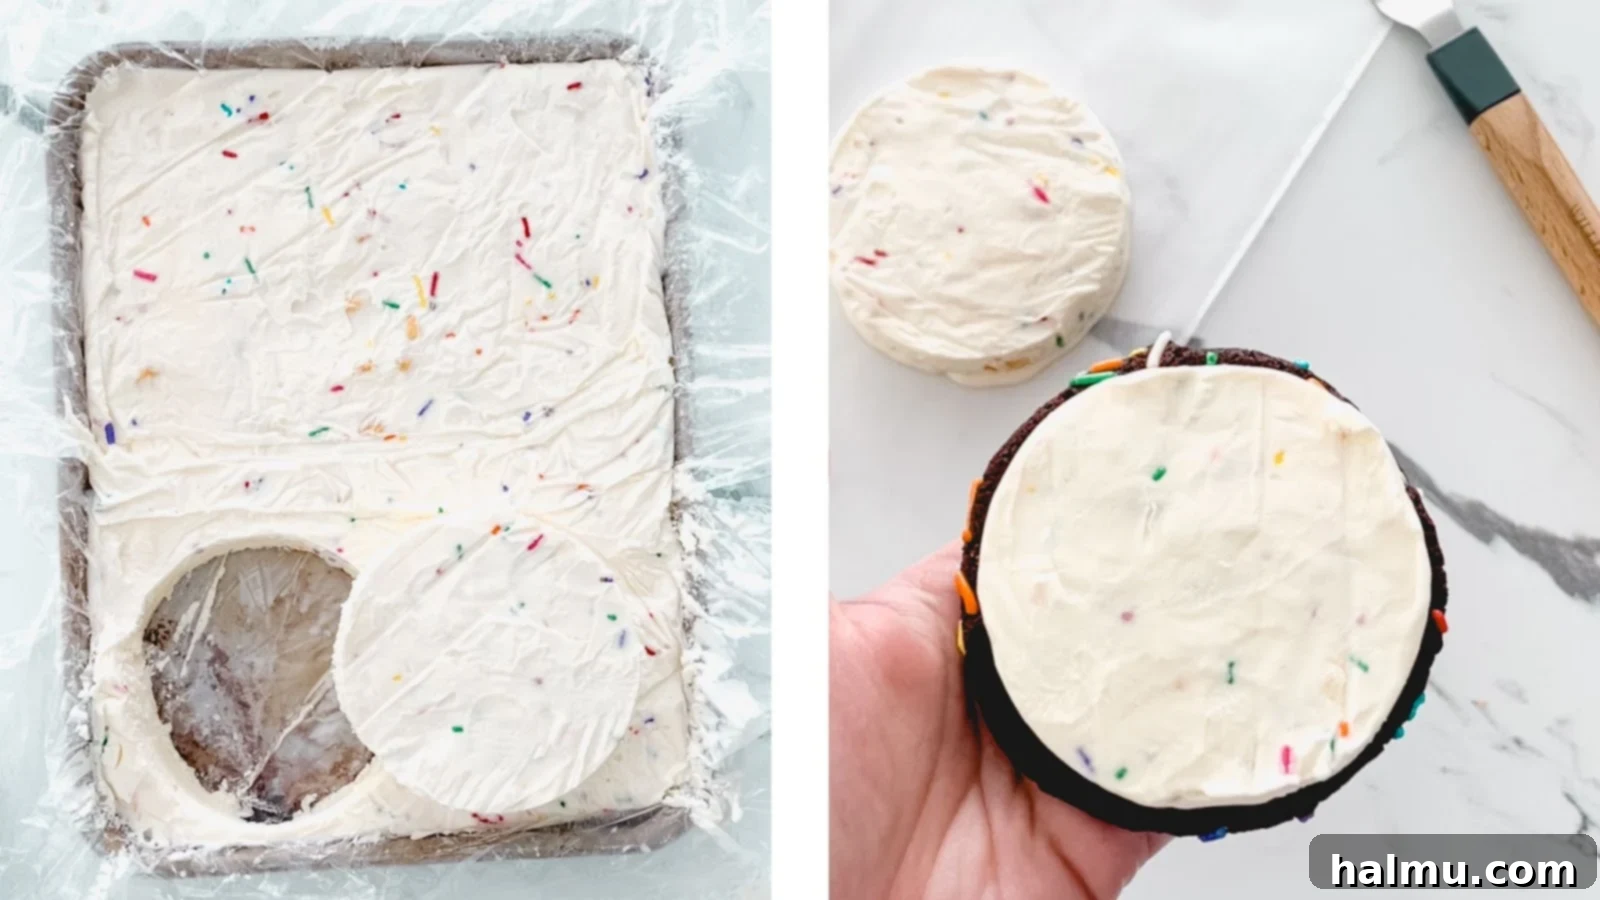
- Assemble Your Delicious Ice Cream Sandwiches. Now for the exciting part – assembly! Take one completely cooled chocolate sprinkle cookie and place an ice cream disc onto its flat, underside surface. Ensure the sprinkle-adorned side of the cookie is facing outwards. Gently top the ice cream disc with a second chocolate sprinkle cookie, again with the sprinkles facing out. Delicately press the two cookies together, just enough to secure the ice cream filling without crushing the cookies or forcing too much ice cream out. The result should be a beautiful, vibrant, and perfectly portioned ice cream sandwich. These sandwiches can be enjoyed immediately for a slightly softer, chewier cookie experience. Alternatively, if you plan to serve them later or want them firmer, place them back into the freezer, individually wrapped in plastic, until you are ready to indulge.

Expert Tips for Crafting the Best Chocolate Sprinkle Cookie Ice Cream Sandwiches
Achieving bakery-quality ice cream sandwiches at home is entirely possible with a few insider tips. Pay attention to these details for truly spectacular results:
- Always Chill the Cookie Dough. This step is non-negotiable for superior cookies. Chilling the dough does much more than just firm it up for easier handling. It allows the flour to fully hydrate, leading to a more tender and flavorful cookie. Furthermore, the cold butter in the dough melts more slowly in the oven, which results in less spread and thicker cookies—ideal for supporting a hefty scoop of ice cream. For this particular recipe, just 30 minutes in the refrigerator is enough to make a significant difference in both texture and taste. Don’t skip it!
- Ensure the Ice Cream is Frozen Solid. The key to clean, beautiful ice cream discs and easy assembly is having the ice cream rock-solid. After spreading it onto the pan, give it ample time in the freezer—at least 3 hours, but overnight is always best for optimal firmness. If, after cutting your discs, you notice they are softening too quickly or becoming difficult to manage, don’t hesitate to place them back on a parchment-lined pan and refreeze them for another hour or so. This will firm them up perfectly, making the assembly process much smoother and less messy, preventing your ice cream from turning into a runny puddle before it even makes it into the sandwich.
- Serve Right Away for Optimal Softness, or Freeze for Firmness. How you enjoy your ice cream sandwiches largely depends on your textural preference. My personal favorite way to eat them is right after assembling. At this point, the cookies are still at their softest and chewiest, offering a delightful contrast to the cold, creamy ice cream. While it might be a bit messier, the experience of biting into a freshly made sandwich is truly unparalleled. Of course, you can absolutely assemble these ahead of time and store them in the freezer. Just be aware that freezing them for an extended period will make the cookies firmer. The upside to pre-freezing is that the ice cream will melt much more slowly, making them easier to handle, especially if you’re serving them at a party. It also makes them incredibly easy to slice into halves or quarters if you’re sharing or want smaller portions. For storage, wrap each sandwich individually in plastic wrap before freezing to prevent freezer burn and keep them fresh.
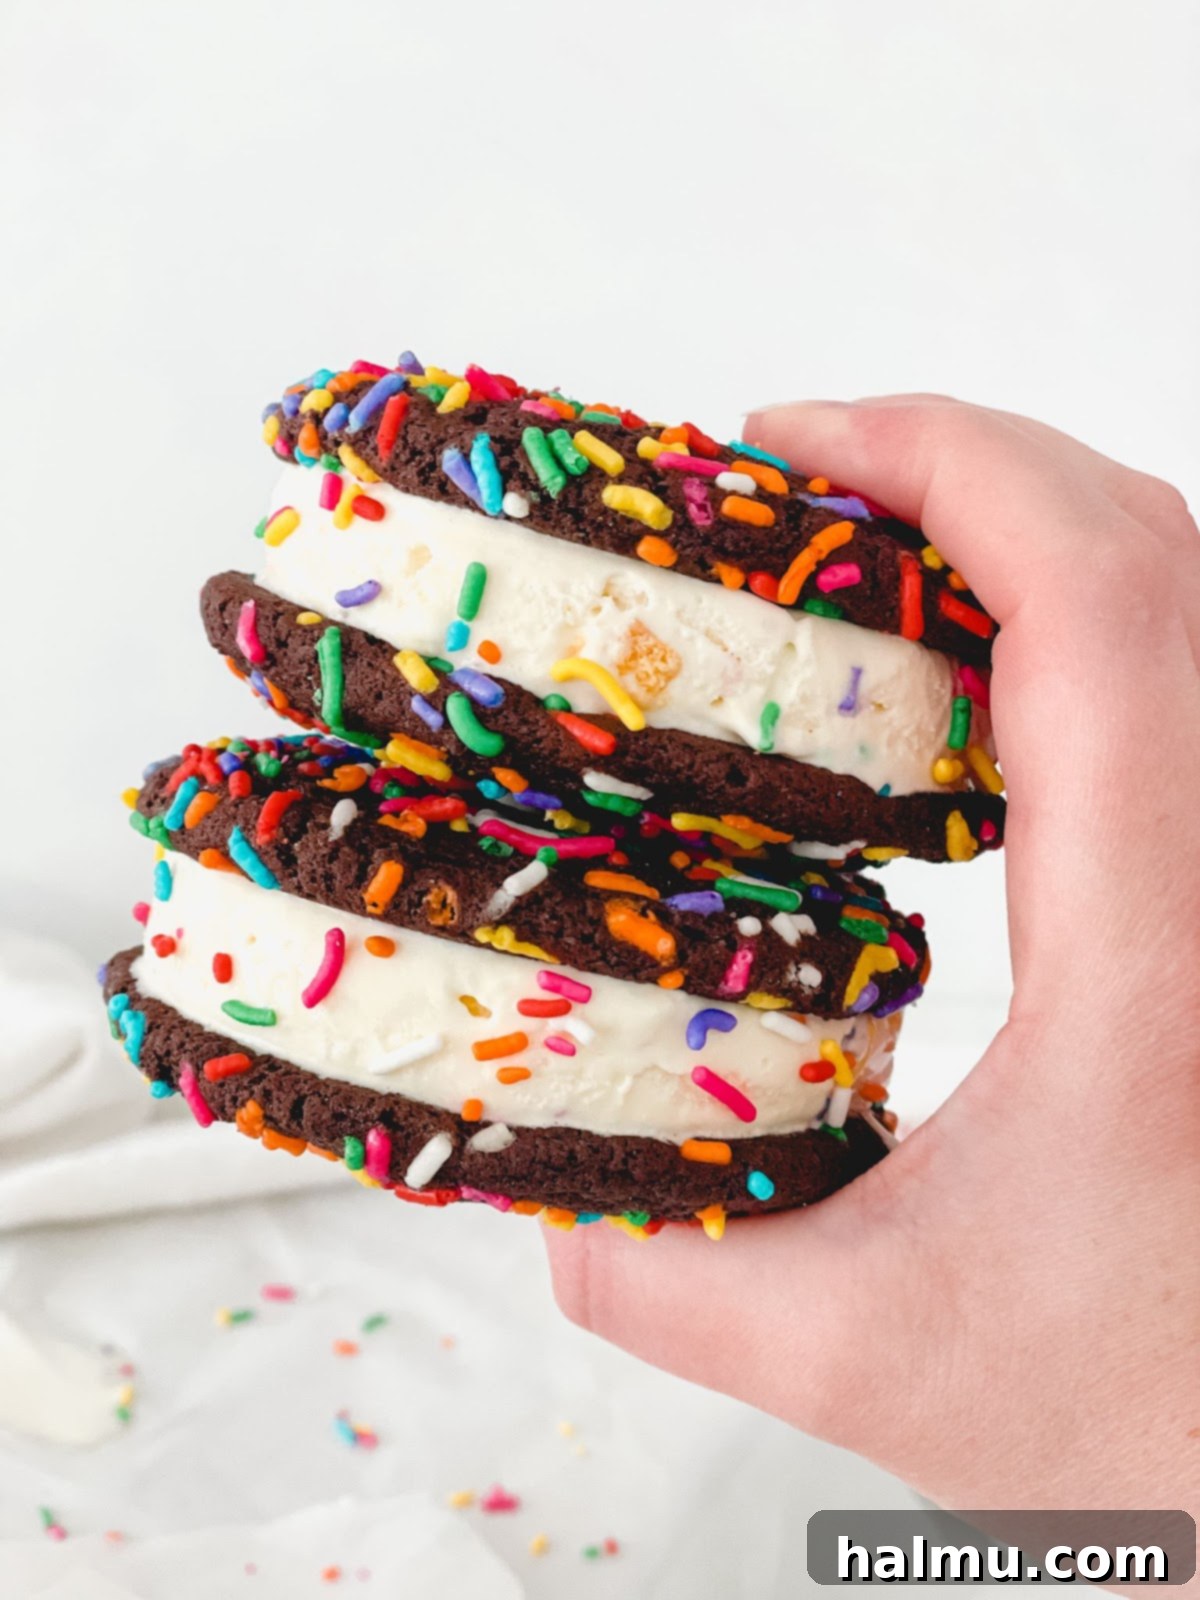
As summer officially arrives and the temperatures begin to climb, there’s truly no better way to cool down and treat yourself than with these incredible Chocolate Sprinkle Cookie Ice Cream Sandwiches. They offer a perfect blend of rich chocolate, creamy sweetness, and playful sprinkles, making them an instant favorite for all ages. Enjoy the process of baking and the sheer delight of indulging in these homemade masterpieces. Happy Baking!

Chocolate Sprinkle Cookie Ice Cream Sandwiches
These giant, mouthwatering Chocolate Sprinkle Cookie Ice Cream Sandwiches feature soft, chocolatey rainbow sprinkle cookies embracing your favorite ice cream. They are the perfect summer treat for a hot day!
Rachel
40 mins
12 mins
3 hrs
3 hrs 52 mins
4 large sandwiches
Ingredients
For the Chocolate Sprinkle Cookies
- ½ cup (113g) unsalted butter
- ⅔ cup (150g) granulated sugar
- 1 large egg, at room temperature
- 1 teaspoon vanilla extract
- 1 cup (130g) all-purpose flour
- ⅓ cup (35g) cocoa powder
- 1 teaspoon instant espresso powder, optional
- ½ teaspoon baking soda
- ¼ teaspoon salt
- ⅓ cup (70g) rainbow sprinkles
For the Ice Cream Sandwiches
- 1 ½ quarts ice cream, your favorite flavor
- 2 Tablespoons rainbow sprinkles, optional
Instructions
- Chocolate Sprinkle Cookies: Melt the butter and allow it to cool. In a large mixing bowl, add the melted butter and sugar. Whisk until thoroughly combined, about 1 minute.
- Mix in the egg and vanilla extract until fully combined. Add the flour, cocoa powder, espresso powder, baking soda, and salt to the bowl and fold them in using a spatula, just until combined.
- Scoop the cookies onto a small pan lined with parchment paper, using a 3 Tablespoon (size 24 or 1.33 oz.) cookie scoop. Dip the top / rounded part of each scoop of cookie dough into the rainbow sprinkles. Place back on the pan and refrigerate for 30 minutes before baking.
- Preheat oven to 350°F (175°C). Line 2 baking sheets with parchment paper or a silicone mat.
- Place the chilled cookie dough scoops on the prepared baking sheets, spacing them at least 2 inches apart. Bake for 10-12 minutes. Allow to cool completely before assembling sandwiches.
- Sandwich Assembly: Line a small baking sheet with plastic wrap so there is excess hanging over the sides. Set aside.
- Soften the ice cream at room temperature for about 5 minutes. Scoop the ice cream into a large bowl and break it up with a wooden spoon or spatula. Add the rainbow sprinkles and lightly mix, just until they are incorporated.
- Add the ice cream to the prepared pan and working quickly, spread it about ½ “ thick using an offset spatula, making it as flat and smooth as possible. Fold over the excess plastic wrap to cover the ice cream completely. Freeze for at least 3 hours or overnight.
- Once the ice cream is completely frozen, unwrap and cut circles using a 3 ½” round metal cutter (or any cutter that is slightly smaller than the cookies).
- Immediately add the ice cream disc to one cookie and top with another cookie, pressing down firmly but gently. Enjoy right away or freeze until ready to serve.
Notes
- Yield: This recipe will make 9 cookies, which translates to 4 ice cream sandwiches, with one extra cookie leftover for a baker’s treat!
- Ice Cream: Don’t discard the leftover scraps of ice cream after cutting the discs! You can re-freeze them and enjoy them in a bowl whenever a craving strikes.
- Storing: If you’re not planning to eat all the sandwiches immediately, I highly recommend wrapping each one individually in plastic wrap. This helps prevent freezer burn, maintains freshness, and makes it easy to grab a single sandwich whenever you’re ready to enjoy it.
