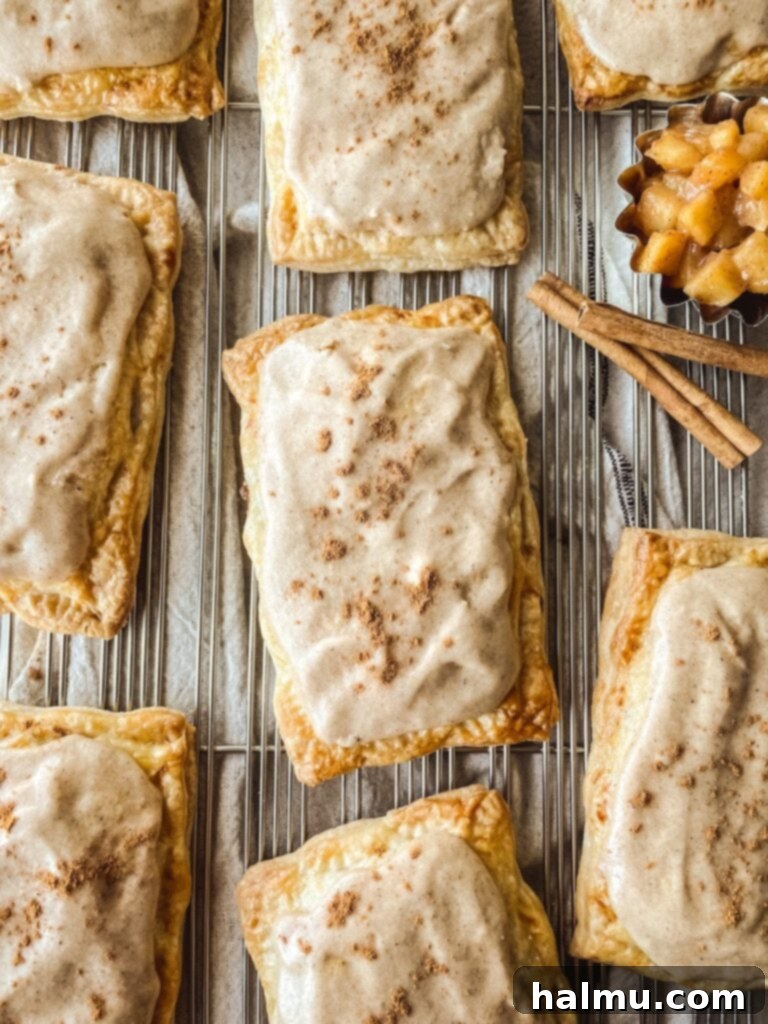
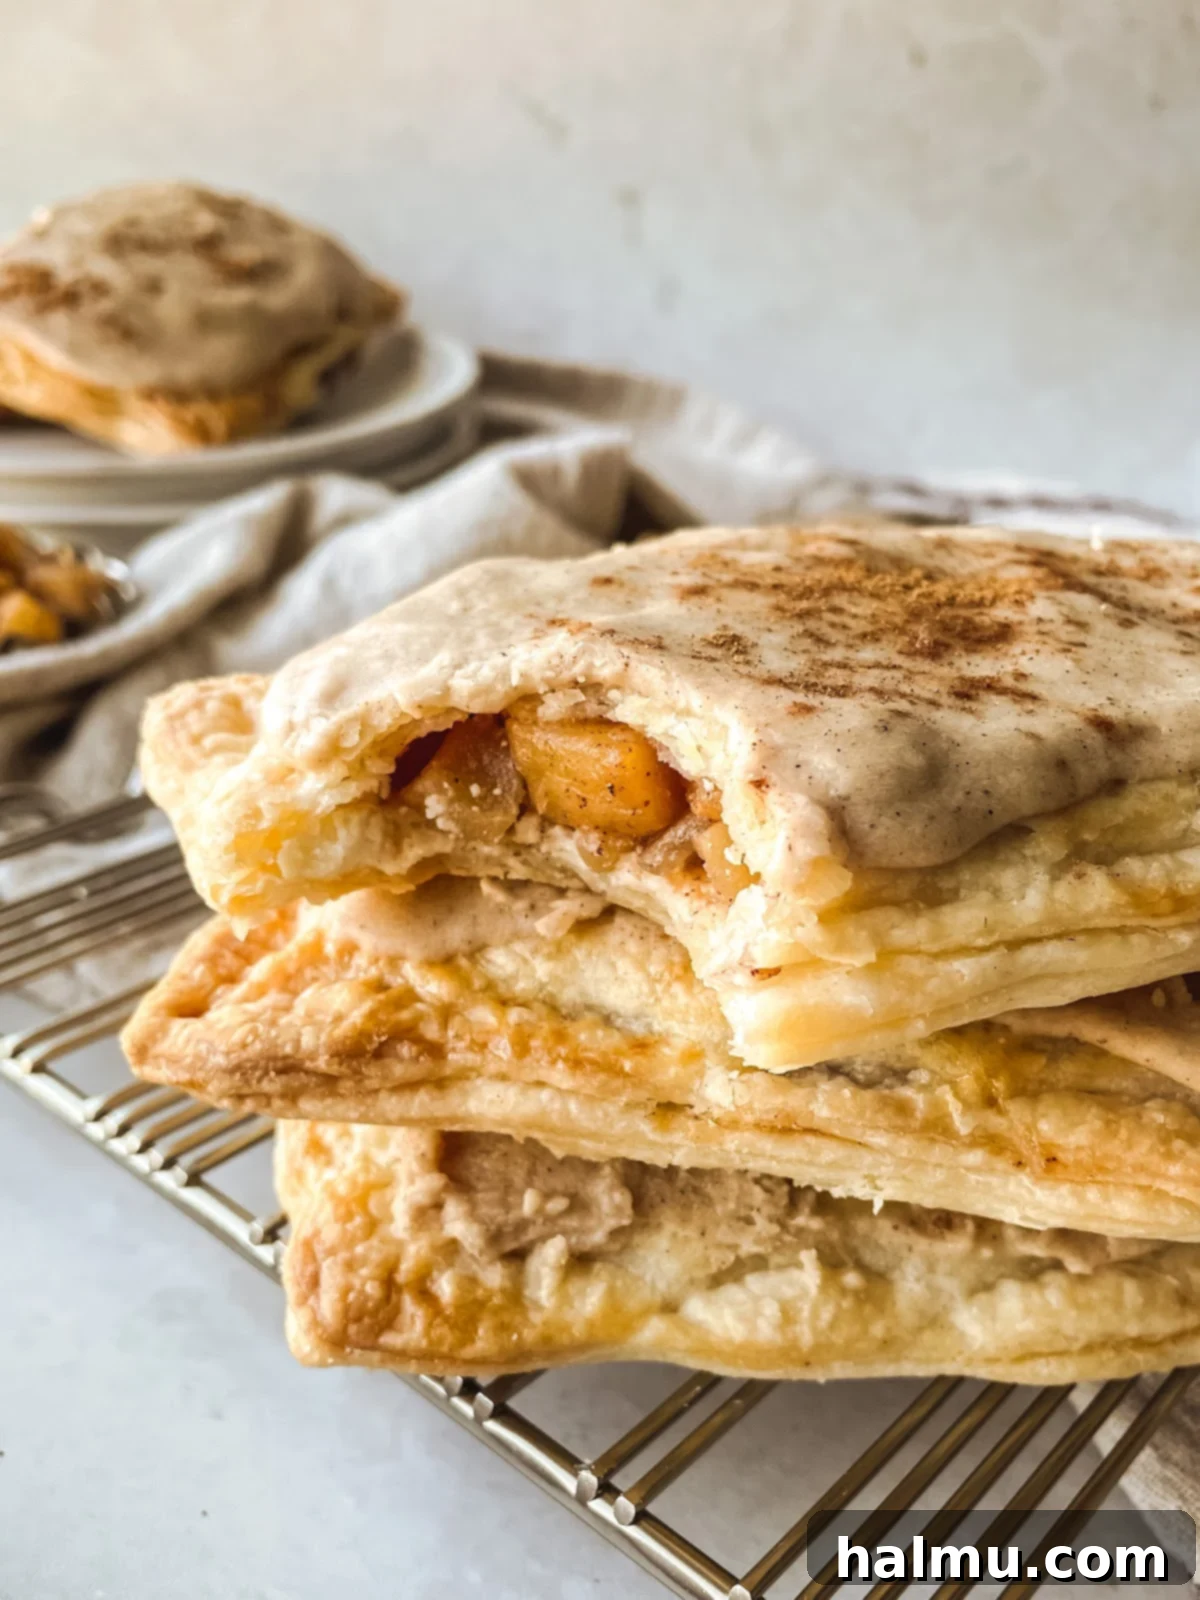
Indulge in a truly elevated breakfast experience with these delightful Homemade Apple Cheesecake Pop-Tarts. Forget the bland, store-bought versions of your childhood; these scratch-made toaster pastries are a harmonious blend of flaky, buttery pie crust, rich cream cheese, and a vibrant apple pie filling, all crowned with a luscious cinnamon maple glaze. They are reminiscent of the nostalgic brown sugar cinnamon pop-tarts but with an exquisite, gourmet twist that will undoubtedly become a new family favorite. This recipe transforms a simple treat into a sophisticated dessert or a decadent breakfast.
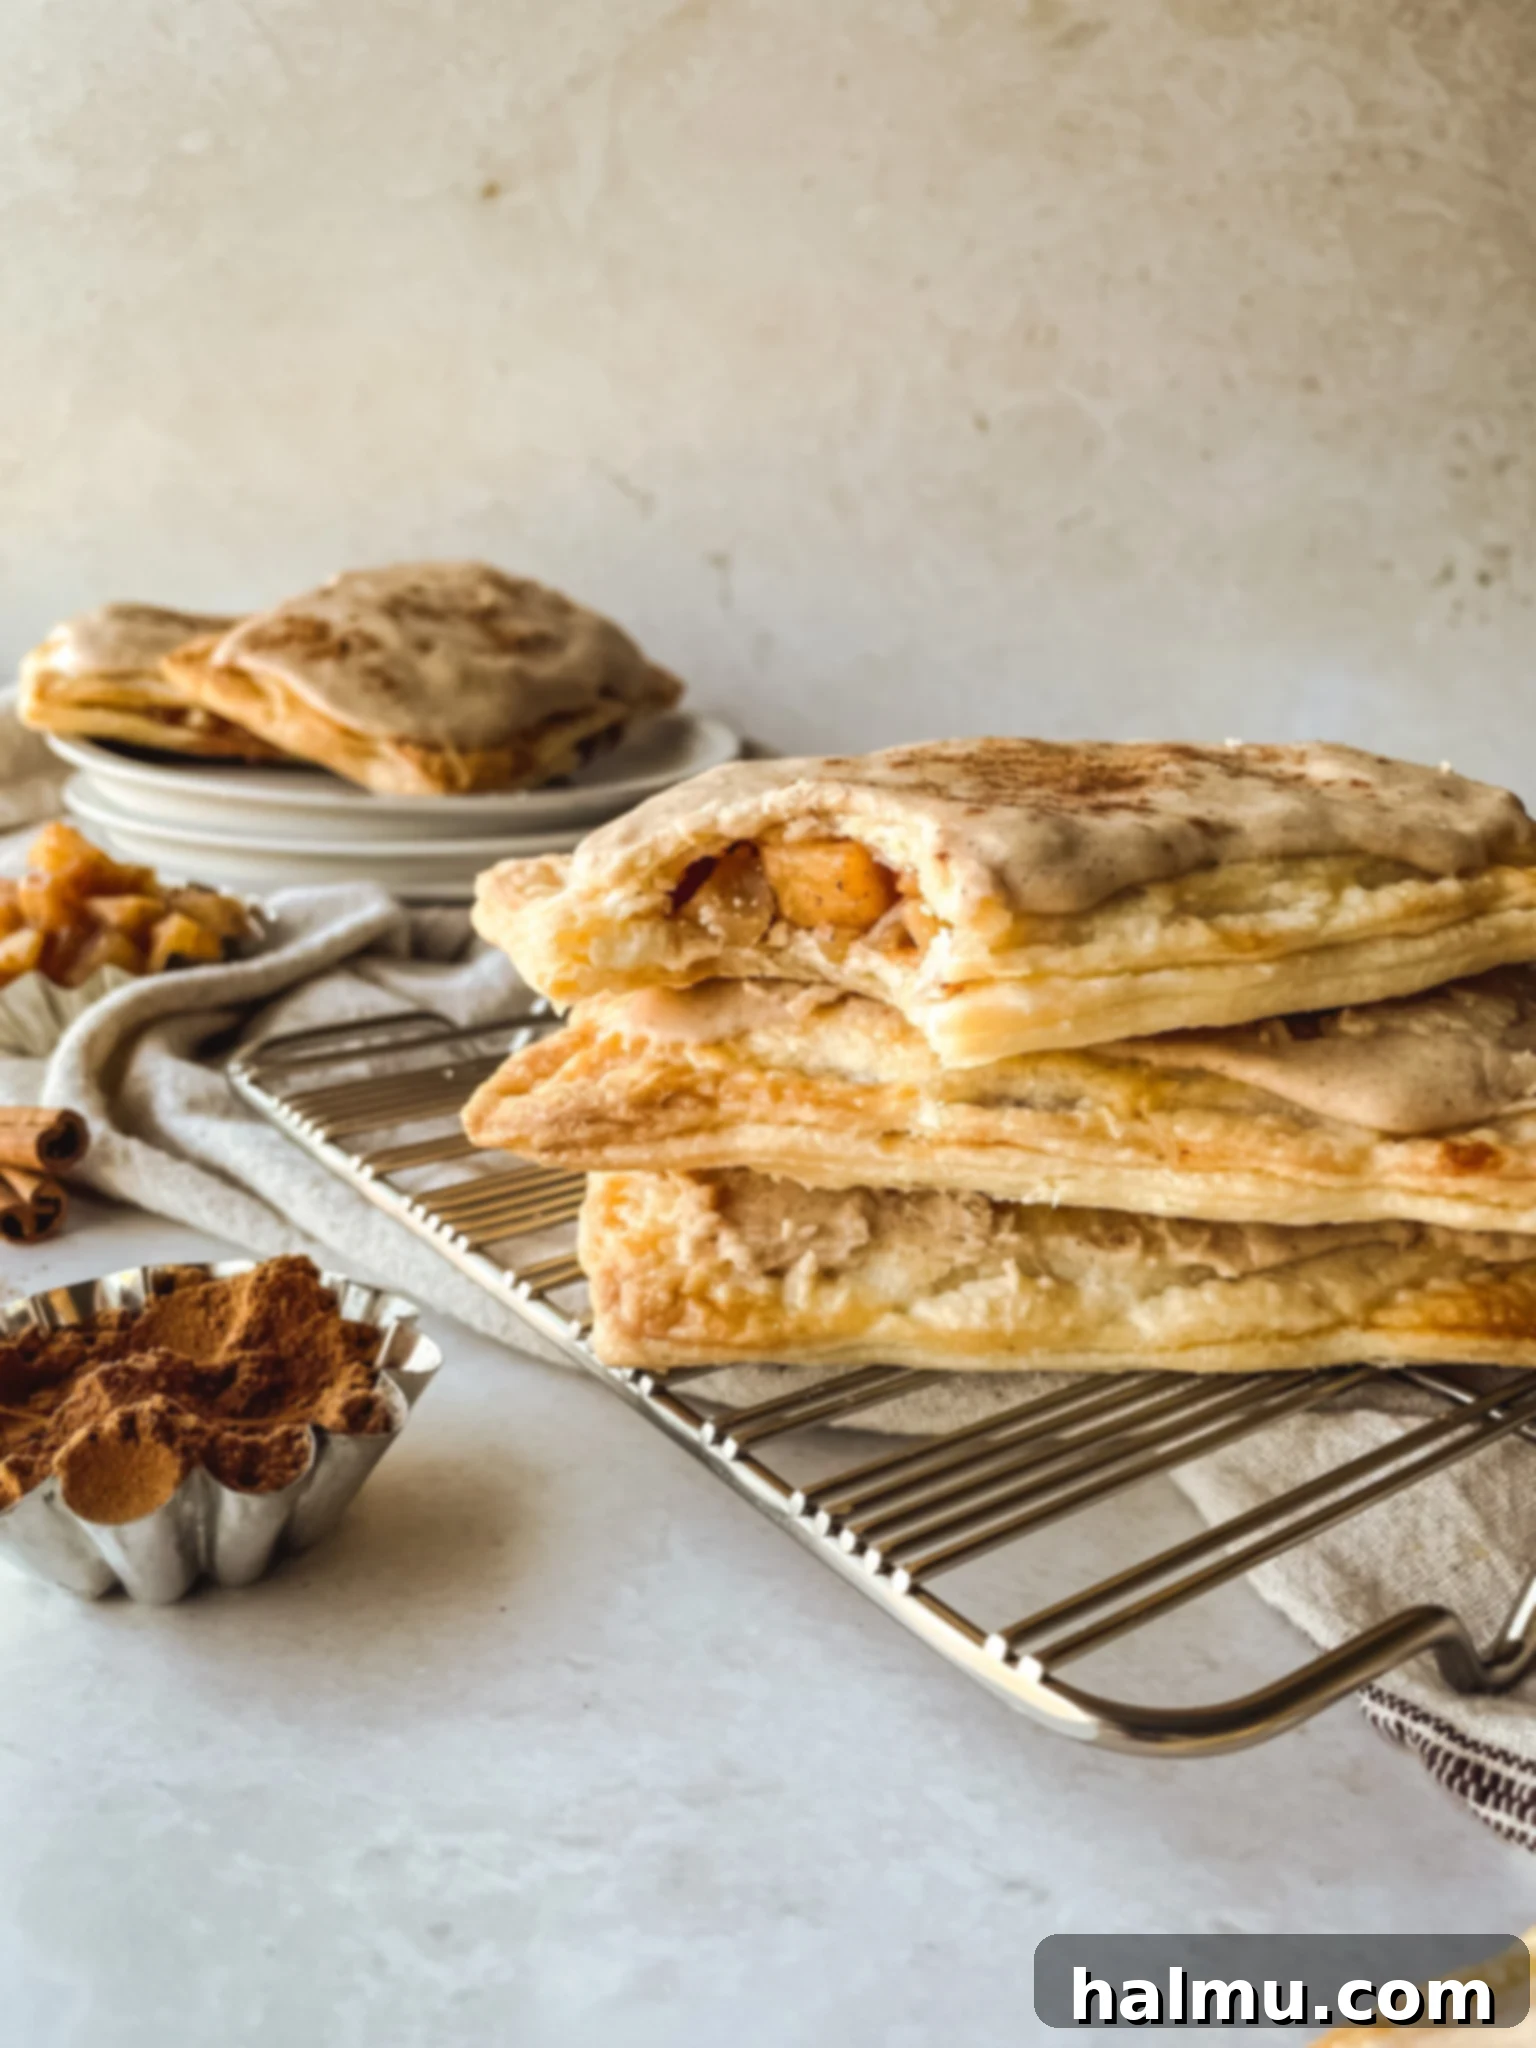
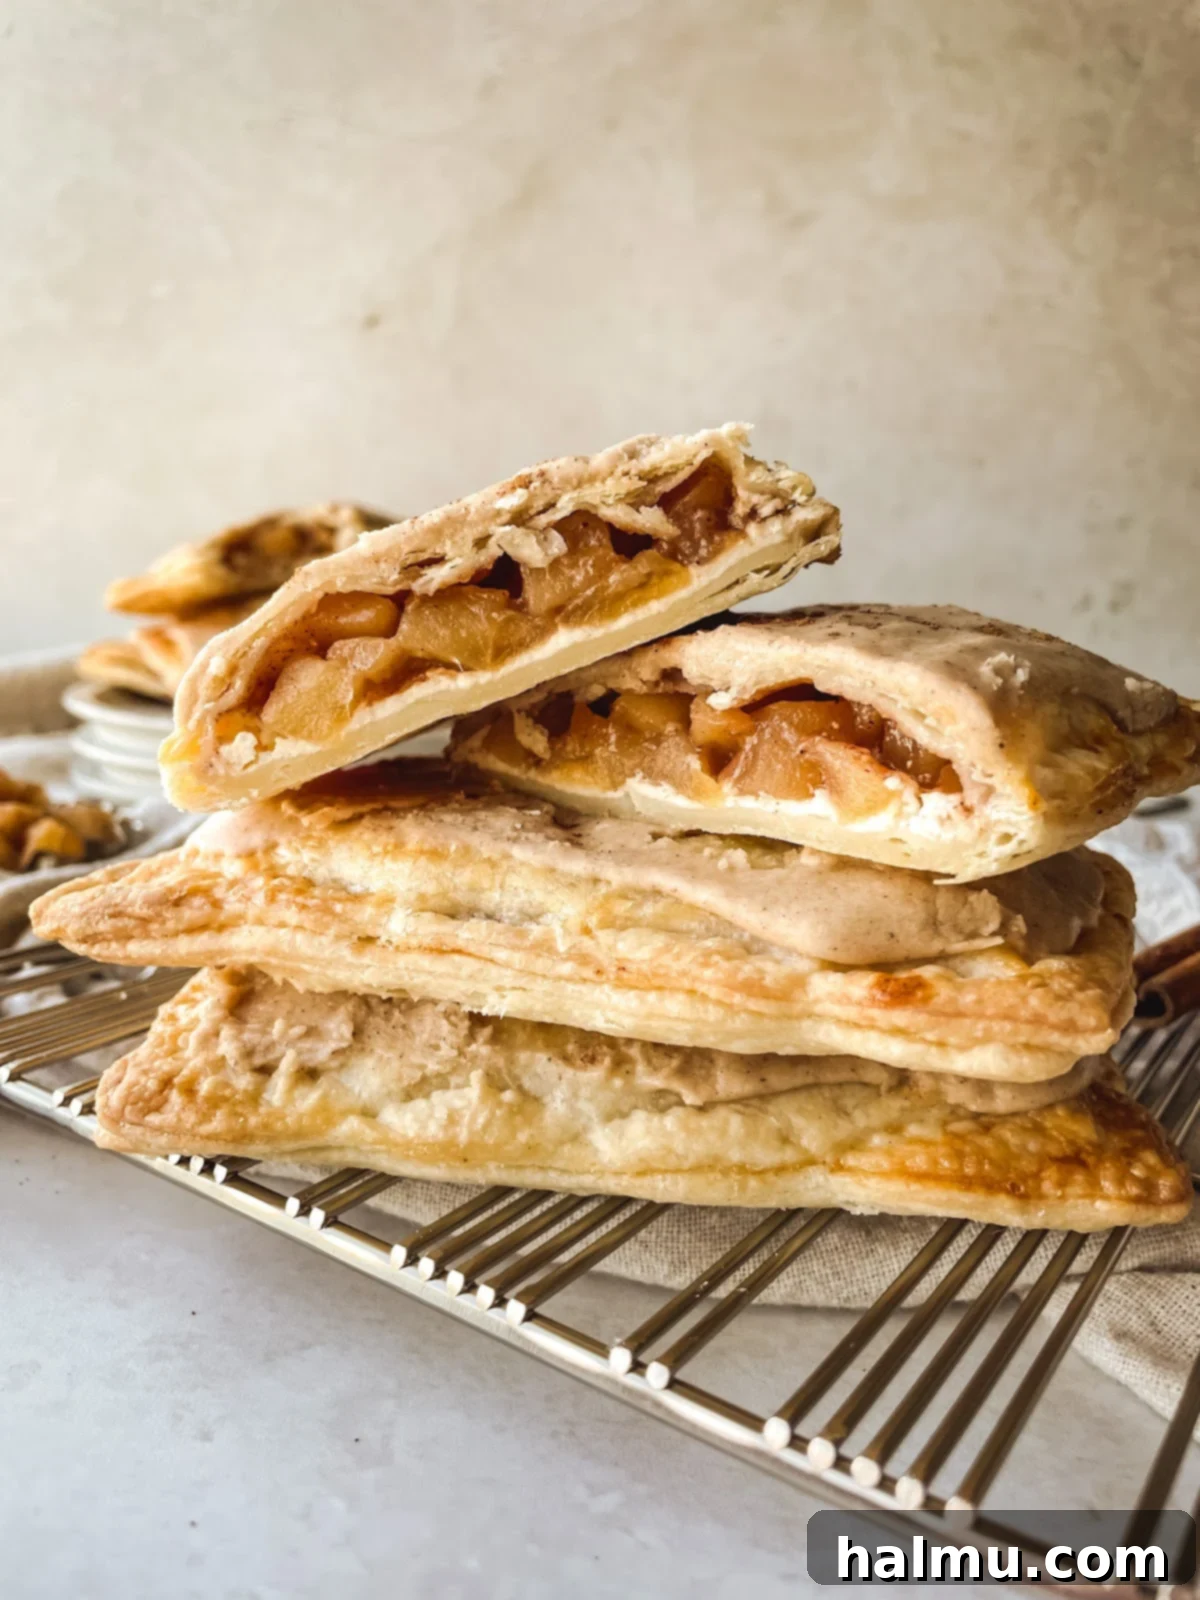
What sets these pop-tarts apart is not just one, but two incredible fillings nestled between layers of tender, golden pastry. The first layer is a smooth, sweetened cream cheese, offering a delightful tang and creamy texture. On top of this, a generous portion of homemade apple pie filling bursts with cozy, fall flavors. Made with fresh apples and a warm blend of cinnamon, this combination is the perfect way to utilize your seasonal apple haul, delivering a comforting and utterly delicious bite every time. Each element is carefully crafted to create a symphony of textures and tastes, making these pop-tarts far superior to any pre-packaged alternative.
Essential Ingredients for Perfect Pop-Tarts
Creating these heavenly apple cheesecake pop-tarts requires a selection of readily available ingredients, many of which you likely already have in your pantry. However, a few key components demand specific attention to ensure your pastries achieve that perfect flaky texture and rich flavor. Understanding the nuances of these ingredients is crucial for baking success.
- Flour: Standard all-purpose flour is ideal for this recipe, but precise measurement is paramount. Too much or too little flour can drastically alter the dough’s consistency, impacting the flakiness of your pastry. For consistent and accurate results, we highly recommend using a kitchen scale. This eliminates variability, as a cup of flour can weigh differently depending on how it’s scooped. If a scale isn’t an option, use the “fluff and spoon” method: gently fluff your flour with a spoon, then lightly spoon it into your measuring cup, and level off the excess with a straight edge. Never pack down the flour, as this can lead to a dense, tough crust.
- Butter: Butter is a star ingredient, featured in the pastry dough, apple filling, and glaze. Its temperature is especially critical for the dough. You need very cold, unsalted butter, cut into small cubes. Chilling the cubed butter further in the fridge (or even freezer for 10-15 minutes if it starts to soften) ensures it remains firm. When incorporated into the flour, these cold butter pieces create pockets of steam during baking, which are essential for developing the incredibly flaky layers of the pastry. Skipping this step can compromise the delicate texture of your pie dough, resulting in a less airy and crispy finish.
- Ice Water: Complementing the cold butter, ice-cold water is vital for the pie dough. It helps maintain the butter’s firmness and prevents the development of too much gluten, which can lead to a tough crust. The recipe calls for ¼ cup of ice water, but you might not need all of it. Prepare it by measuring out ¼ cup of cold water, adding several ice cubes, and then straining out the ice just before adding the water to the dough. Drizzle the water in slowly, adding only enough until the dough just comes together into a cohesive, soft (but not sticky) ball. Over-hydrating the dough can make it difficult to work with and alter the final texture.
- Apples: The choice of apples significantly influences the filling’s flavor and texture. Most apple varieties will work, but for optimal results, select apples that hold their shape well when cooked and offer a balance of sweetness and tartness. Honeycrisp are often a favorite for their crisp texture and balanced flavor, as are Fuji apples. If you prefer a tarter filling to cut through the richness of the cream cheese, Granny Smith apples are an excellent choice due providing a bright, tangy counterpoint. Consider using an apple you enjoy snacking on raw, as its cooked flavor will be amplified in the filling.
Crafting Your Homemade Apple Cheesecake Pop-Tarts
Creating these delightful pop-tarts is a rewarding process, broken down into manageable steps that yield spectacular results. Patience and attention to detail are your best allies in achieving that perfect balance of flaky crust and luscious filling.
- Prepare the Pop-Tart Pastry Dough: The journey to a perfect pop-tart begins with a tender, flaky dough. Combine your measured flour, sugar, and salt in a food processor, pulsing briefly to mix. Add the cold, cubed unsalted butter and pulse a few times until the mixture resembles coarse crumbs, with some butter pieces still visible (about the size of small peas). With the food processor running, gradually drizzle in the ice water. Watch the dough carefully; you might not need the entire ¼ cup. Stop adding water as soon as the dough begins to come together into a soft, cohesive ball. The goal is a dough that’s pliable but not sticky. Avoid overworking it. Gently flatten the dough into a rectangle, wrap it tightly in plastic, and refrigerate for a minimum of 2 hours, or ideally, overnight. Chilling is crucial for both flavor development and ease of handling.
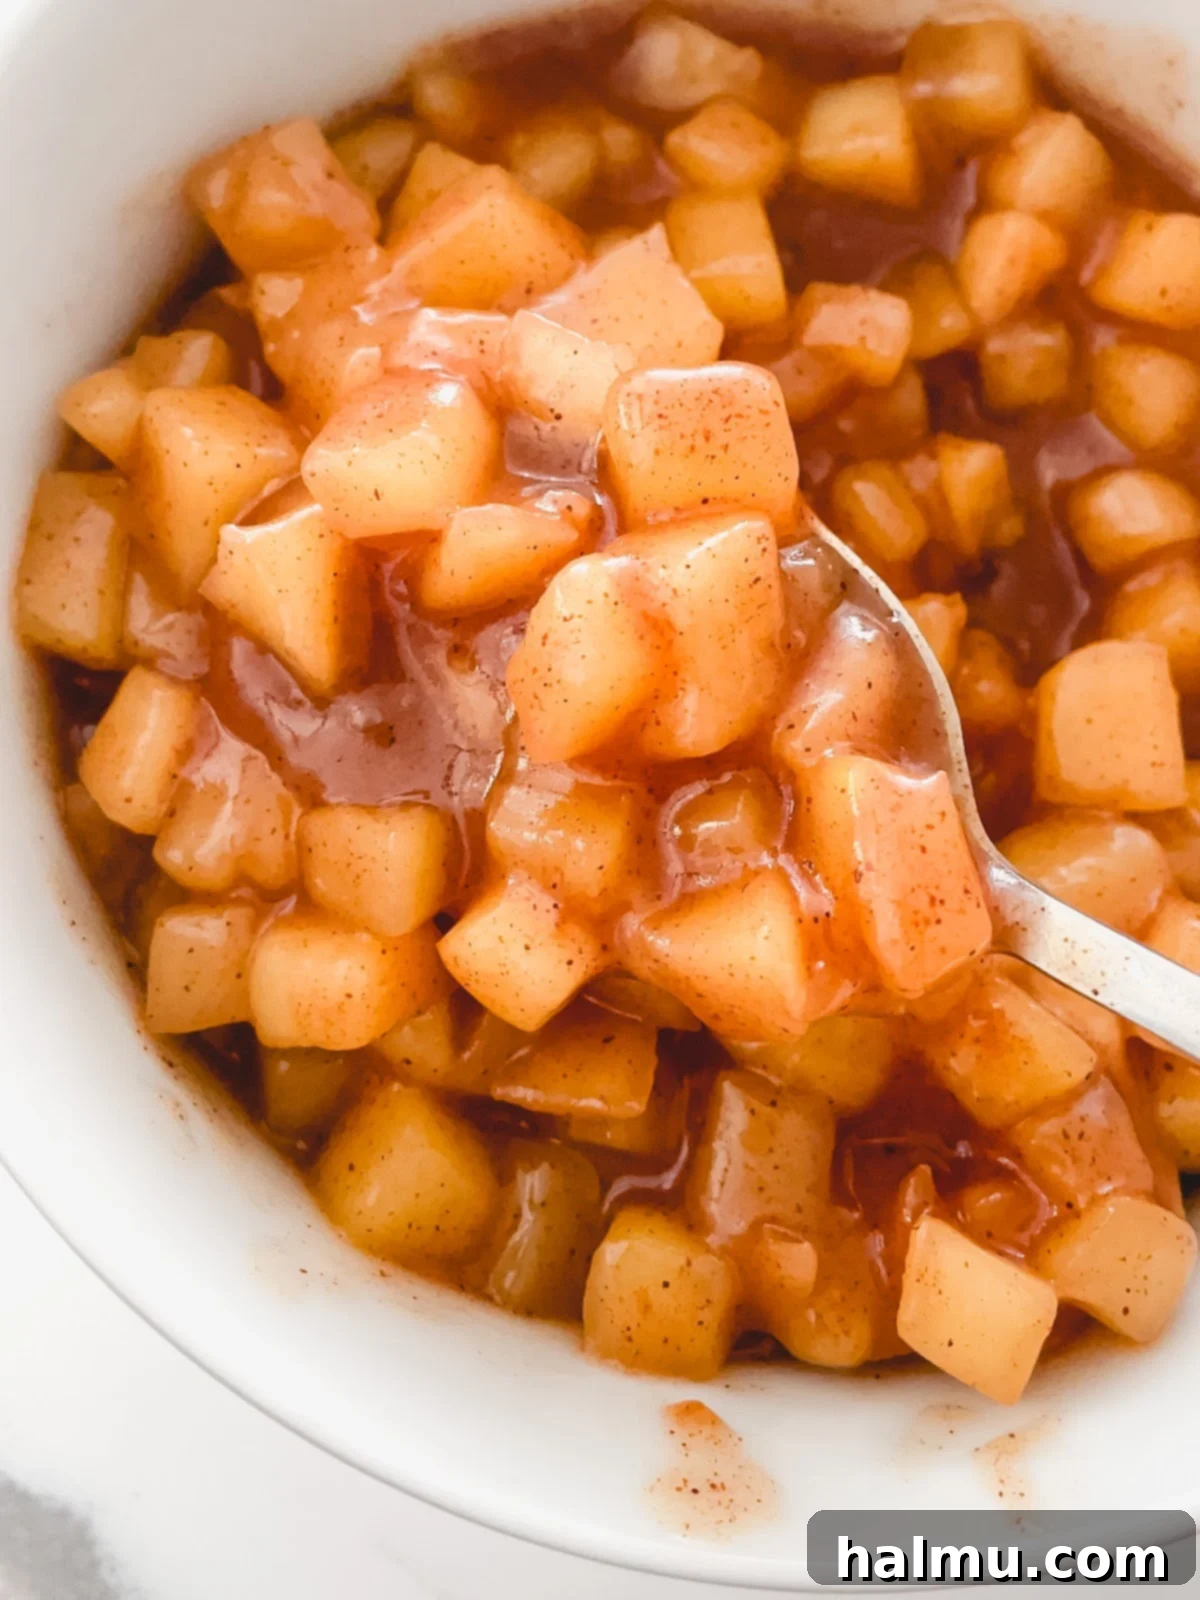
- Craft the Apple Cinnamon Filling: While your dough chills, prepare the aromatic apple cinnamon filling. Begin by peeling, coring, and dicing your chosen apples into small, uniform cubes. In a medium saucepan, melt the butter over medium-low heat. Add the diced apples, brown sugar, granulated sugar, fresh lemon juice, and a generous teaspoon of cinnamon. Stir to combine, ensuring the apples are well coated. Cook the mixture for about 10 minutes, stirring occasionally, until the apples soften. Meanwhile, whisk together the cornstarch and 1 tablespoon of water to create a slurry. Once the apples are tender and the mixture is gently bubbling, stir in the cornstarch slurry. Continue stirring for about 30 seconds as the mixture thickens into a glossy, saucy apple pie filling. Remove from heat and transfer the filling to a shallow dish, allowing it to cool completely before assembling your pop-tarts. A cool filling prevents the dough from becoming soggy.
- Whip Up the Cream Cheese Filling: This creamy layer adds a delightful tang and richness. Ensure your cream cheese is at room temperature; this is key for achieving a smooth, lump-free filling. In a medium bowl, combine the softened cream cheese, powdered sugar, and vanilla extract. Using an electric mixer, beat the ingredients together until the mixture is light, fluffy, and completely smooth. Set this filling aside. Its spreadable consistency will make assembly much easier.
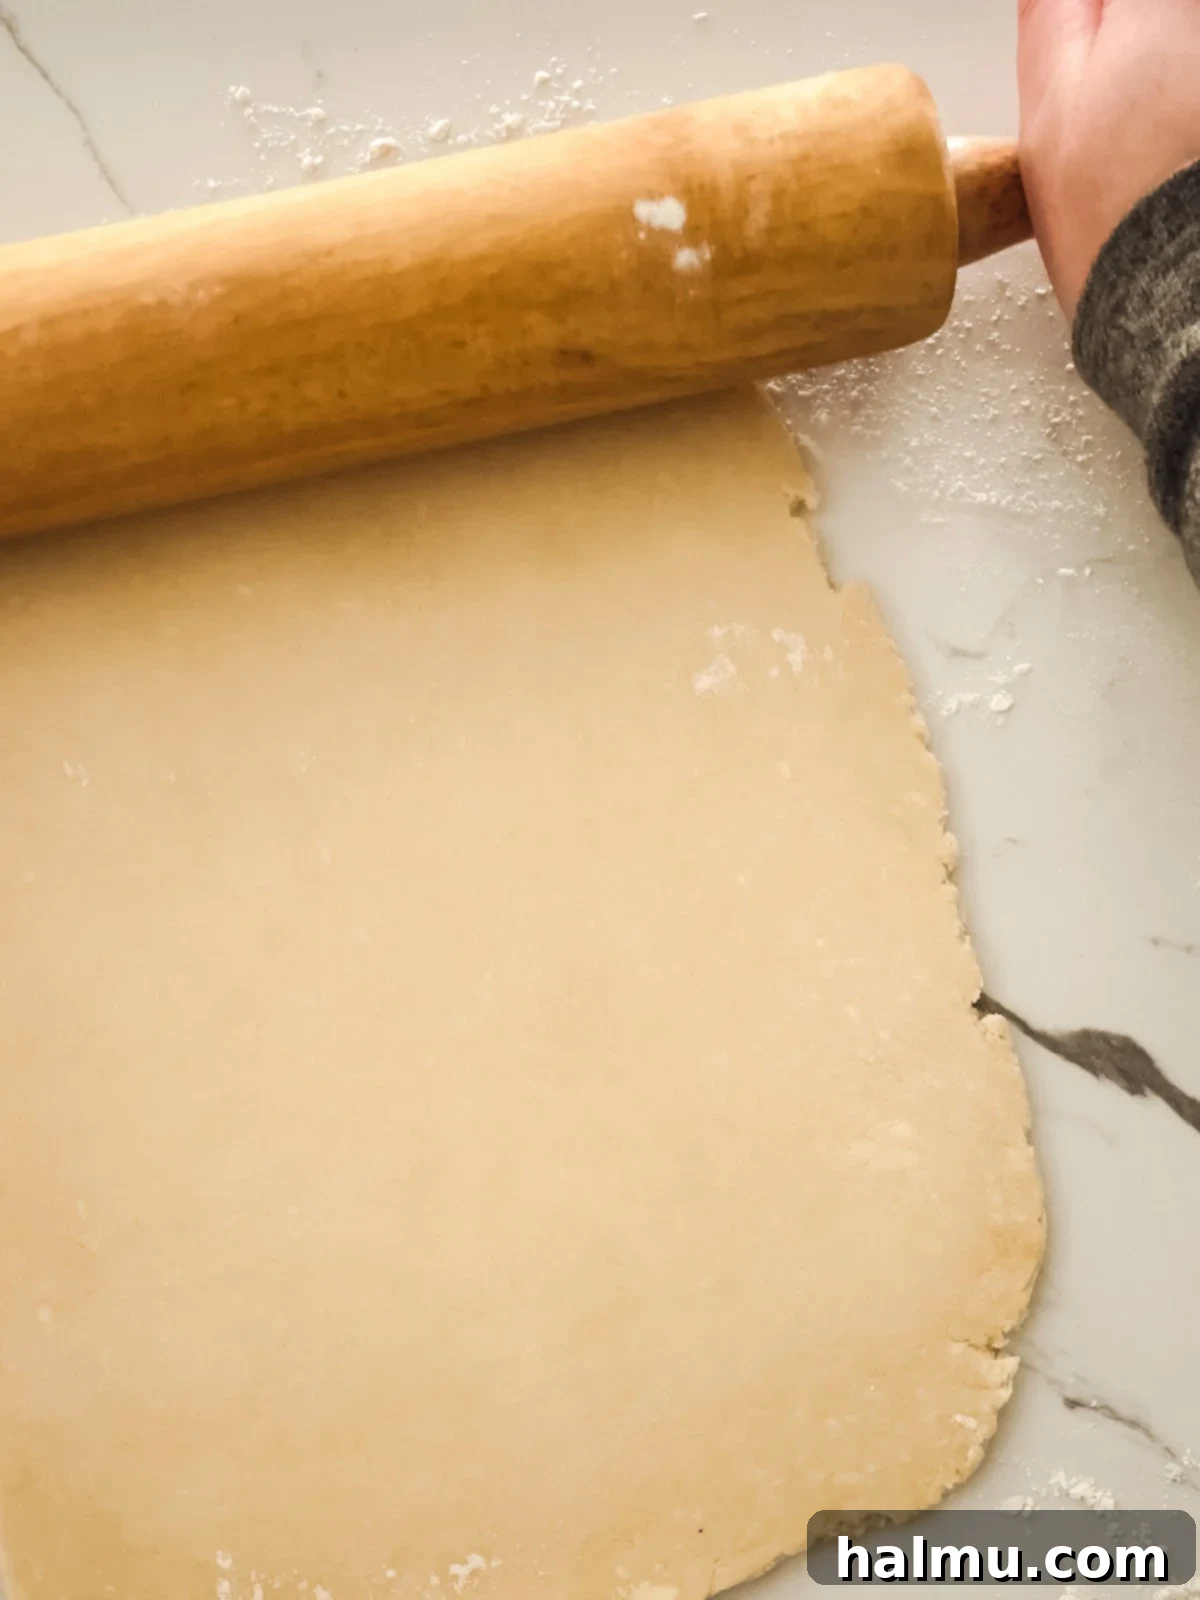
- Roll and Cut the Dough: Once the pastry dough is thoroughly chilled, remove it from the refrigerator and divide it in half. Keep one half wrapped in plastic and return it to the fridge while you work with the first portion. Lightly flour your work surface and rolling pin. Roll out the dough into a large, even rectangle, approximately 11 by 13 inches. Precision is helpful here, so grab a ruler and a pizza cutter or a sharp knife. Carefully trim the edges to create a perfectly even 10 by 12-inch rectangle. Then, cut this larger rectangle into eight smaller, uniform pieces, each measuring 3 by 5 inches. Repeat this process with the second half of the dough to yield another eight rectangles. This careful cutting ensures all your pop-tarts bake evenly and look professional.
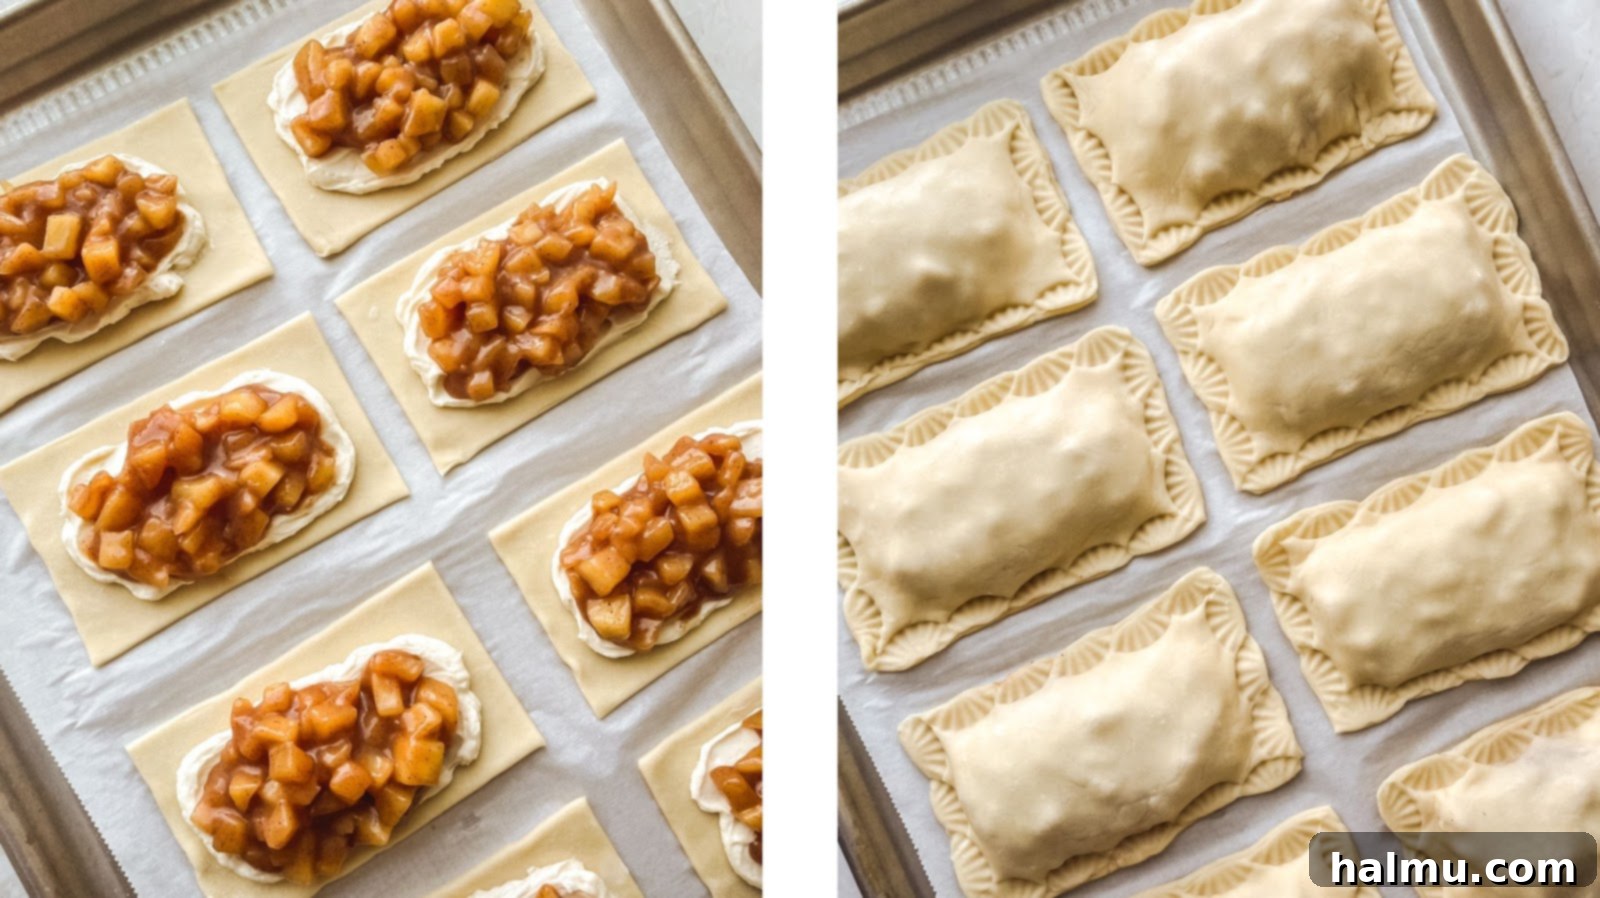
- Assemble Your Apple Cheesecake Pop-Tarts: Arrange eight of your dough rectangles on a baking sheet lined with parchment paper. These will form the bases of your pop-tarts. Place a scoop (about 1½ tablespoons) of the cream cheese filling in the center of each dough rectangle, gently spreading it out while leaving at least a ¼-inch border along all sides. Next, add approximately 2 tablespoons of the cooled apple cinnamon filling on top of the cream cheese layer, spreading it evenly. Lightly brush the edges of these filled dough rectangles with the prepared egg wash (one large egg beaten with one tablespoon of water). This egg wash acts as a glue, ensuring a tight seal. Carefully place the remaining eight dough rectangles on top of each filled piece, aligning the edges. Press down firmly with your fingers around the perimeter to seal the two dough layers together. For an extra secure and decorative seal, use the tines of a fork to crimp the edges of each pop-tart.
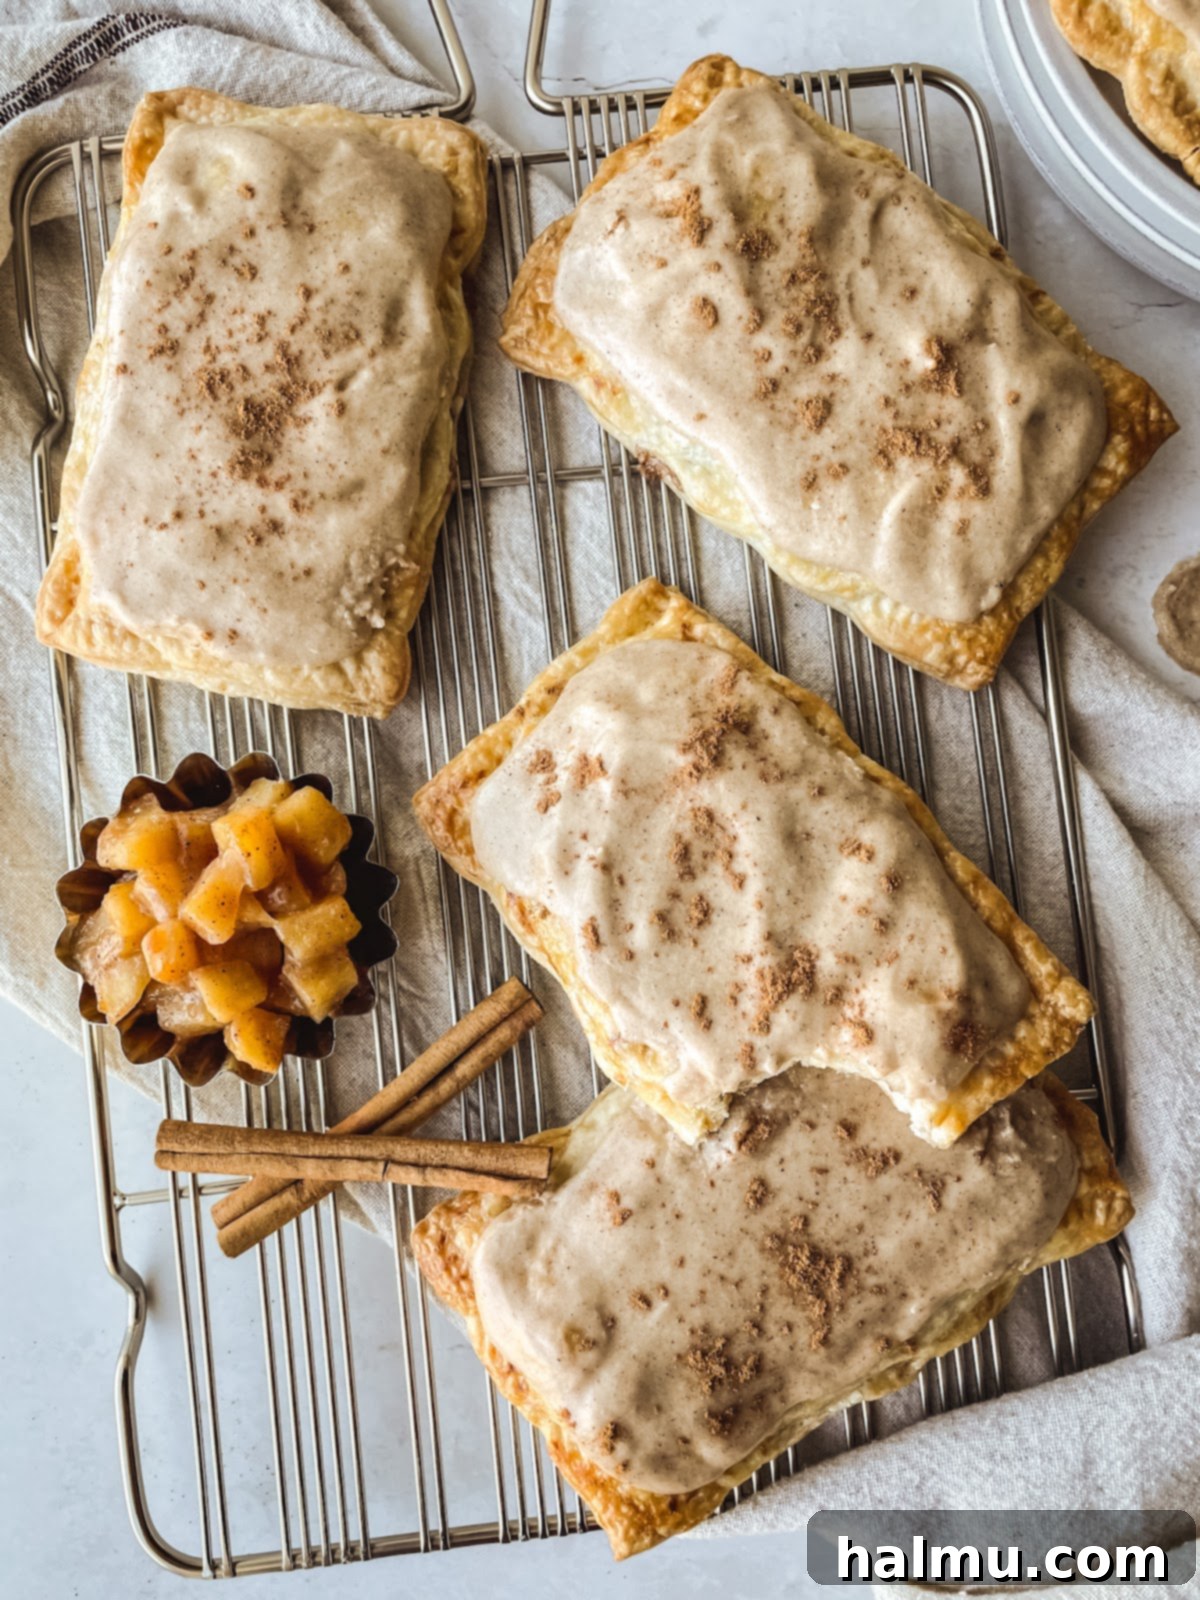
- Chill, Bake, and Glaze to Perfection: Once assembled, return the pop-tarts to the refrigerator to chill for another 30 minutes. This crucial step helps the butter firm up again, preventing the pastry from shrinking too much in the oven and ensuring maximum flakiness. While they chill, preheat your oven to 350°F (175°C). After chilling, gently poke three sets of holes into the top of each pop-tart with a fork; this allows steam to escape, preventing the pastries from puffing up excessively. Brush the entire top surface of each pop-tart with the remaining egg wash for a beautiful golden-brown finish. Bake for 25-30 minutes, or until they are visibly puffed and deeply golden. Allow the pop-tarts to cool completely on a wire rack before applying the glaze. While they cool, prepare the cinnamon maple glaze by whisking together melted butter, powdered sugar, maple flavoring, cinnamon, and 1-2 tablespoons of milk in a single bowl until smooth and spreadable. Spoon the glaze generously over the cooled pop-tarts, spreading it with the back of a spoon. A final sprinkle of cinnamon is optional but adds a lovely touch. Serve at room temperature and savor every homemade bite!
Expert Tips for the Best Apple Cheesecake Pop-Tarts
Achieving bakery-quality pop-tarts at home is entirely possible with a few insider tips and tricks. These guidelines will help you navigate the process, ensuring your pastries are consistently delicious and picture-perfect.
- Plan Ahead for Optimal Results: This recipe, while straightforward, involves several chilling periods that contribute significantly to the final texture. For the best outcome, embrace planning ahead. Prepare your pop-tart pastry dough and the apple cinnamon filling the day before. The dough benefits immensely from an overnight rest in the fridge, allowing the gluten to relax and the flavors to deepen. Similarly, the apple filling must be completely cool before assembly to prevent a soggy crust. You can even make the cream cheese filling in advance and refrigerate it; just remember to bring it to room temperature before you start assembling to ensure it’s smooth and easy to spread. A well-rested dough and properly cooled fillings are the secrets to a stress-free assembly and superior texture.
- Master the Art of Chilling the Dough: The secret to truly flaky pie or pastry dough lies in maintaining a cold temperature throughout the process. When butter stays cold, it creates distinct pockets within the dough. As these pockets heat in the oven, the water in the butter turns to steam, pushing apart the layers of dough and creating that coveted flakiness. If your dough becomes too warm or soft at any point during rolling or cutting, don’t hesitate to place it back on a baking sheet and pop it into the fridge for 10-15 minutes to firm up. This is why the initial overnight chill (or at least 2 hours) is so vital before you even begin rolling. Furthermore, chilling the assembled pop-tarts for 30 minutes before baking gives the dough one last chance to rest and the butter to firm up, preventing excessive spreading and ensuring crisp, well-defined edges.
- Perfect the Glaze While Pop-Tarts Cool: Timing your glaze preparation is key to achieving the ideal consistency. The cinnamon maple glaze tends to thicken as it sits, so it’s best made while your pop-tarts are cooling, allowing you to adjust its thickness as needed. Start with the minimum amount of milk and add more gradually, a teaspoon at a time, until you reach a spreadable yet substantial consistency. If your glaze becomes too thin, let it sit for a few minutes; it will naturally thicken. Conversely, if it’s too thick, a tiny splash more milk will loosen it up. Remember, it’s crucial that the pop-tarts are completely cool before glazing. Applying glaze to warm pastries will cause it to melt and run off, leaving you with a sticky mess rather than a beautiful, even coating.
- Savor Freshness and Store Thoughtfully: Like many delicate pastries, these homemade apple cheesecake pop-tarts are truly at their peak the day they are baked. The buttery, flaky crust is incredibly crisp and tender when fresh from the oven. If you plan to enjoy them over a few days, store them in an airtight container in the refrigerator for 2-3 days to maintain freshness. While you can gently reheat them in the oven for a few minutes to crisp up the pastry, be aware that the glaze will likely melt. For longer storage, the unbaked, assembled pop-tarts (without egg wash or glaze) can be frozen for up to one month. Thaw them in the refrigerator overnight before proceeding with the egg wash and baking steps.
Apple Cheesecake Pop-Tart FAQs
Here are answers to some common questions that arise when making these delicious homemade pop-tarts:
Can I use store-bought pie dough?
While we highly recommend making the pie dough from scratch for its superior flaky texture and flavor (it’s surprisingly quick and easy with a food processor!), store-bought refrigerated pie crusts can certainly be used in a pinch. For eight 3-inch by 5-inch pop-tarts, you will likely need two packages of store-bought dough. Follow the package directions for softening the dough, then gently roll out each crust slightly thinner to achieve the desired dimensions. Be mindful that the texture may not be as tender or flaky as homemade, but it will still produce a delicious result.
Can I use store-bought apple pie filling?
Absolutely! If you’re short on time and want to expedite the process, substituting homemade apple cinnamon filling with a can of store-bought apple pie filling is a perfectly acceptable shortcut. One large can should provide sufficient filling. For a more pleasant texture in your pop-tarts, we recommend briefly chopping the canned apple filling in a food processor or with a knife. This breaks down the larger apple chunks into smaller, more bite-sized pieces that are easier to spread and manage within the pastry.
How do you crimp the edges of the pop-tarts?
Crimping the edges not only seals the pop-tarts securely but also adds a lovely decorative finish. A simple dinner fork is an excellent tool for this. Position the tines of the fork about ¼ inch in from the edge of the pop-tart and press down firmly to merge and seal the two pieces of dough together. Repeat this around the entire perimeter of each pastry. For a unique and playful pattern, you can also experiment with a fluted pastry wheel. Instead of cutting with it, turn it on its side and press it gently along the edges to create a pretty, scalloped pattern.
Do I need any special tools to make these?
Not at all! While some tools can make the process more efficient, you likely possess everything you need. Essential basics include a rolling pin for shaping the dough and baking sheets for baking. A food processor is highly recommended for quickly making the pie dough, as it keeps the butter cold and mixes efficiently, but you can certainly mix the dough by hand in a large bowl. For accurate and clean cuts in the dough, a ruler and a pizza cutter or a sharp chef’s knife are incredibly helpful, but no fancy equipment is strictly necessary. Creativity and patience are your most valuable tools!
More Delicious Breakfast Pastries You’ll Love
- Almond Cream Brioche Buns
- Pumpkin Cinnamon Streusel Muffins
- Cinnamon Sugar Donut Muffins
- Blueberry Streusel Coffee Cake Loaf
We hope you enjoy baking these incredible Apple Cheesecake Pop-Tarts as much as we do! If you whip up a batch, don’t forget to share your creations. Be sure to leave a comment below and tag @sweetkitchencravings on Instagram or TikTok. If Pinterest is more your style, you can save our recipes to your collection there. Happy pop-tart making, and enjoy this delightful treat!
Apple Cheesecake Pop-Tarts
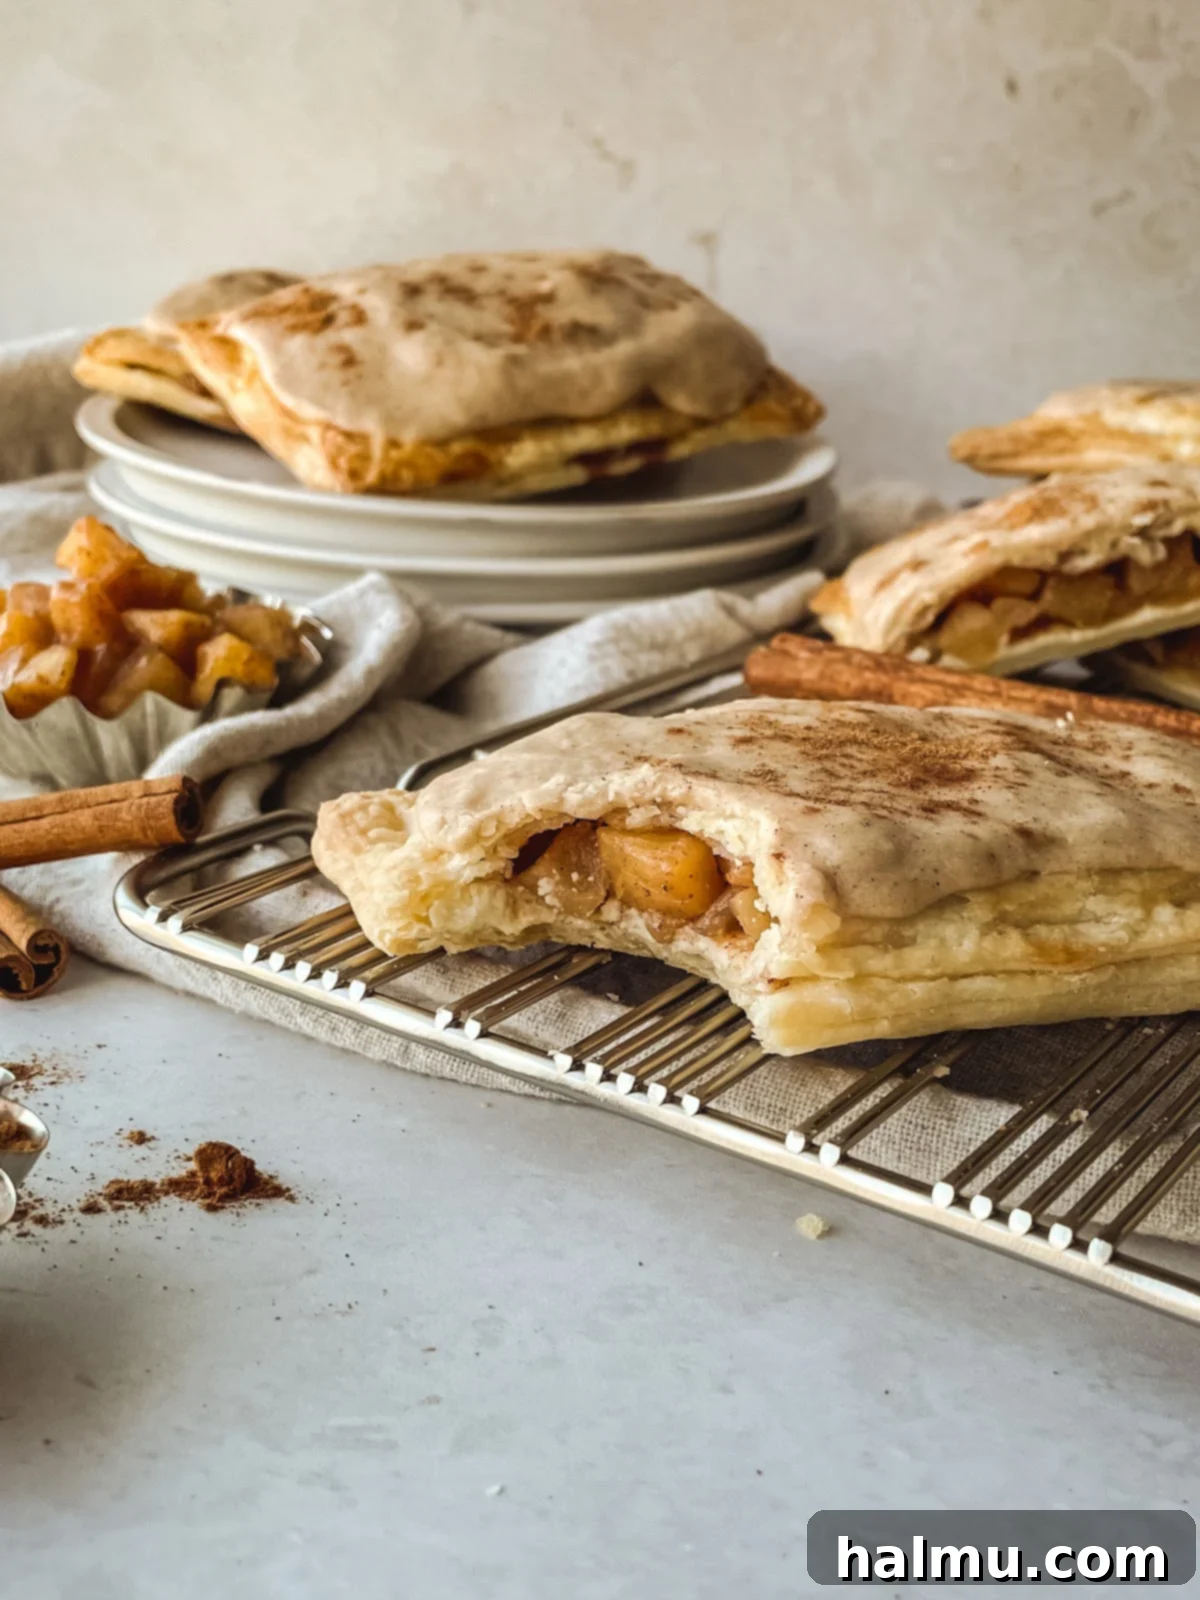
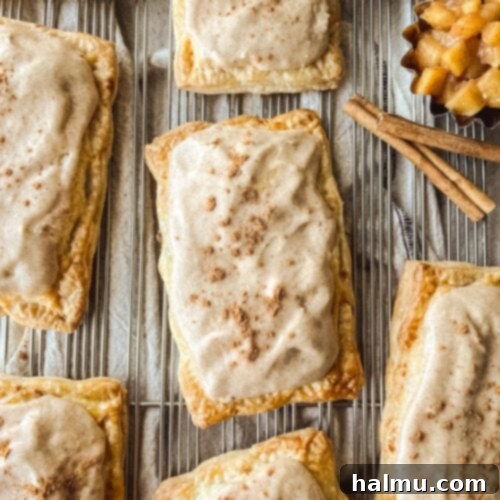
These Apple Cheesecake Pop-Tarts feature a sweet cream cheese layer and a homemade apple pie filling, all encased in two layers of buttery, flaky pastry dough. Finished with a thick cinnamon maple glaze, they are perfect for a cozy treat, especially after a day of apple picking!
Author: Rachel
Print Recipe
Rate This Recipe
Prep Time: 1 hr
Cook Time: 40 mins
Chill Time: 2 hrs
Total Time: 3 hrs 40 mins
Yield: 8 pop-tarts
Ingredients
For the Pop-Tart Pastry Dough
- 2 ½ cups (314g) all-purpose flour
- 2 teaspoons sugar
- ½ teaspoon salt
- 1 cup (2 sticks or 226g) unsalted butter, cold and cut into cubes
- ¼ cup (60g) ice water
- 1 large egg beaten with 1 Tablespoon water, for egg wash
For the Apple Cinnamon Filling
- 3 medium apples, peeled and cored
- 2 Tablespoons (28g) unsalted butter
- ¼ cup (56g) brown sugar
- 2 Tablespoons (26g) granulated sugar
- 1 Tablespoon (14g) lemon juice
- 1 teaspoon cinnamon
- 2 teaspoons cornstarch
- 1 Tablespoon water
For the Cheesecake Filling
- 8 oz (1 block or 227g) cream cheese, at room temperature
- ¼ cup (28g) powdered sugar
- 1 teaspoon vanilla extract
For the Cinnamon Maple Glaze
- ¼ cup (57g) butter, melted
- 1 cup (120g) powdered sugar
- 1 teaspoon maple flavoring
- ½ teaspoon cinnamon
- 1-2 Tablespoons milk
Instructions
- Pop-Tart Pastry: In a food processor, pulse together the flour, sugar, and salt until combined. Add the cold cubed butter and pulse a few times, until the mixture resembles coarse crumbs and the butter chunks are pea-sized.
- With the processor running, slowly start to drizzle in the cold water. Only use as much as needed for a dough to form, which may be less than the full ¼ cup. As soon as the dough comes together and forms a ball, do not add any more water. The dough should be soft but not too sticky. Flatten the dough into a rectangle and wrap it in plastic. Refrigerate for at least 2 hours, but preferably overnight.
- Apple Cinnamon Filling: Chop the apples into small cubes. In a medium saucepan, melt the butter then add the apples, sugar, lemon juice, and cinnamon. Stir to combine and cook over medium-low heat until the apples are tender, about 10 minutes. Combine the cornstarch and water. Once the apples are soft and the mixture is bubbling, stir in the cornstarch mixture and continue to stir while the mixture thickens, about 30 seconds. Remove from heat and set aside to cool.
- Cream Cheese Filling: Using an electric mixer, combine the cream cheese, powdered sugar, and vanilla and mix until smooth. Set aside.
- Assembly: Once the pastry dough is chilled, remove from the fridge and divide it in half. Wrap one half back in the plastic and place it back in the fridge while you roll out the other half. Place the dough on a generously floured surface and roll it into a large rectangle, measuring roughly 11” x 13”. Using a ruler and a pizza cutter or sharp knife, trim the edges to create a rectangle that measures exactly 10” x 12”. Then cut that piece into eight equal pieces, each measuring 3” x 5”.
- Place the rectangles onto a baking sheet lined with parchment. They won’t spread much in the oven so these can be fairly close together. Set aside and repeat the same process with the other half of the dough to create eight more rectangles.
- Scoop about 1½ Tablespoons of the cream cheese filling in the center of half of the rectangles and spread it out slightly, leaving at least a ¼” border on all sides. Add about 2 Tablespoons of the apple filling on top of the cream cheese. Lightly brush the edges of the rectangles with egg wash. Place the remaining rectangles over the filling and press the edges of the two rectangles together with your fingers. Using a fork, press down on the edges to seal the dough. Refrigerate the pop-tarts for 30 minutes. Preheat the oven to 350°F.
- Once the pop-tarts are chilled, use a fork to poke 3 sets of holes in the dough to allow steam to escape. Brush the entire top of each pop-tart with egg wash. Bake for 25-30 minutes, or until the pop-tarts are puffed and golden brown. Allow to cool completely before glazing.
- Cinnamon Maple Glaze: While the pop-tarts cool, make the glaze. Whisk together the melted butter, powdered sugar, maple flavoring, cinnamon, and 1 Tablespoon of milk. Add more milk as needed until you have a spreadable consistency. The glaze will thicken as it sits so you may need to add more right before spreading it on the pop-tarts.
- Spoon the glaze onto the top of the pop-tarts, using the back of a spoon to spread it out. Serve at room temperature and enjoy!
Notes
Pop-Tart Dough: The pastry dough can be stored in the fridge for up to 5 days or in the freezer for up to 3 months.
Storing: These pop-tarts are best enjoyed the same day they are baked. If you’re keeping them longer, store them in an airtight container in the fridge for 2-3 days.
Did you make this recipe?
Be sure to tag @sweetkitchencravings on Instagram!
