This post may contain affiliate links. Please read my full disclosure policy.
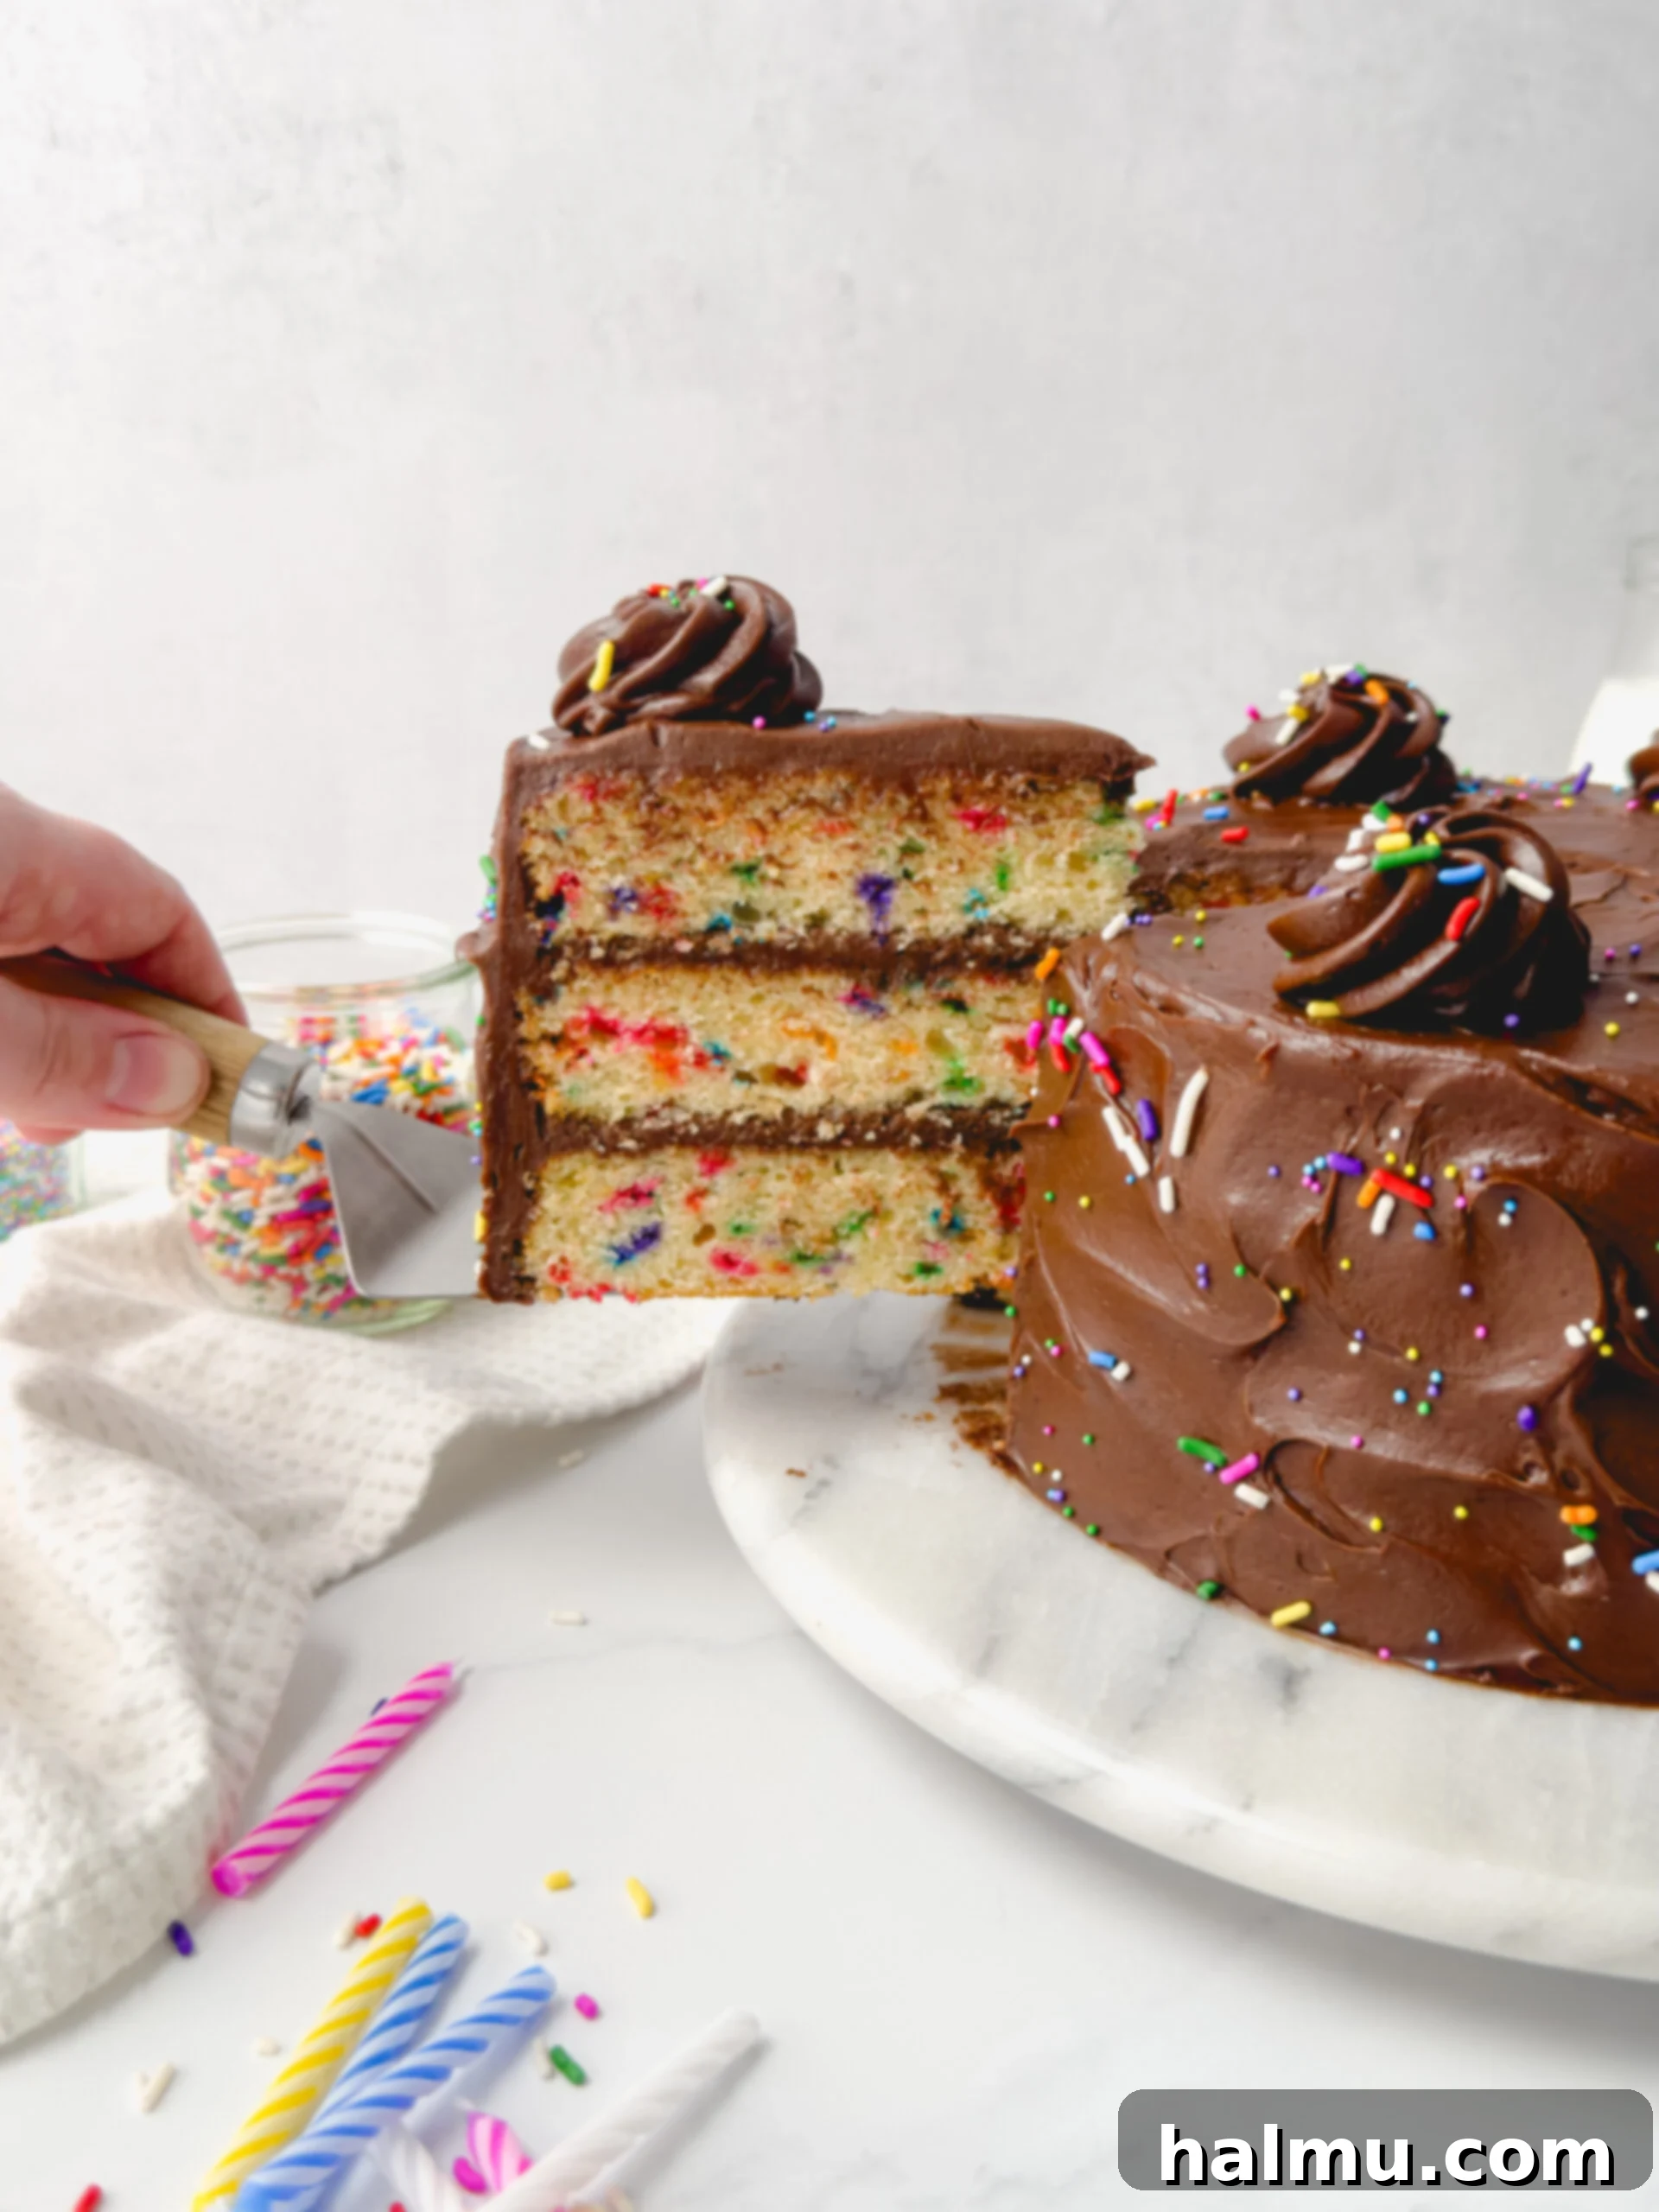
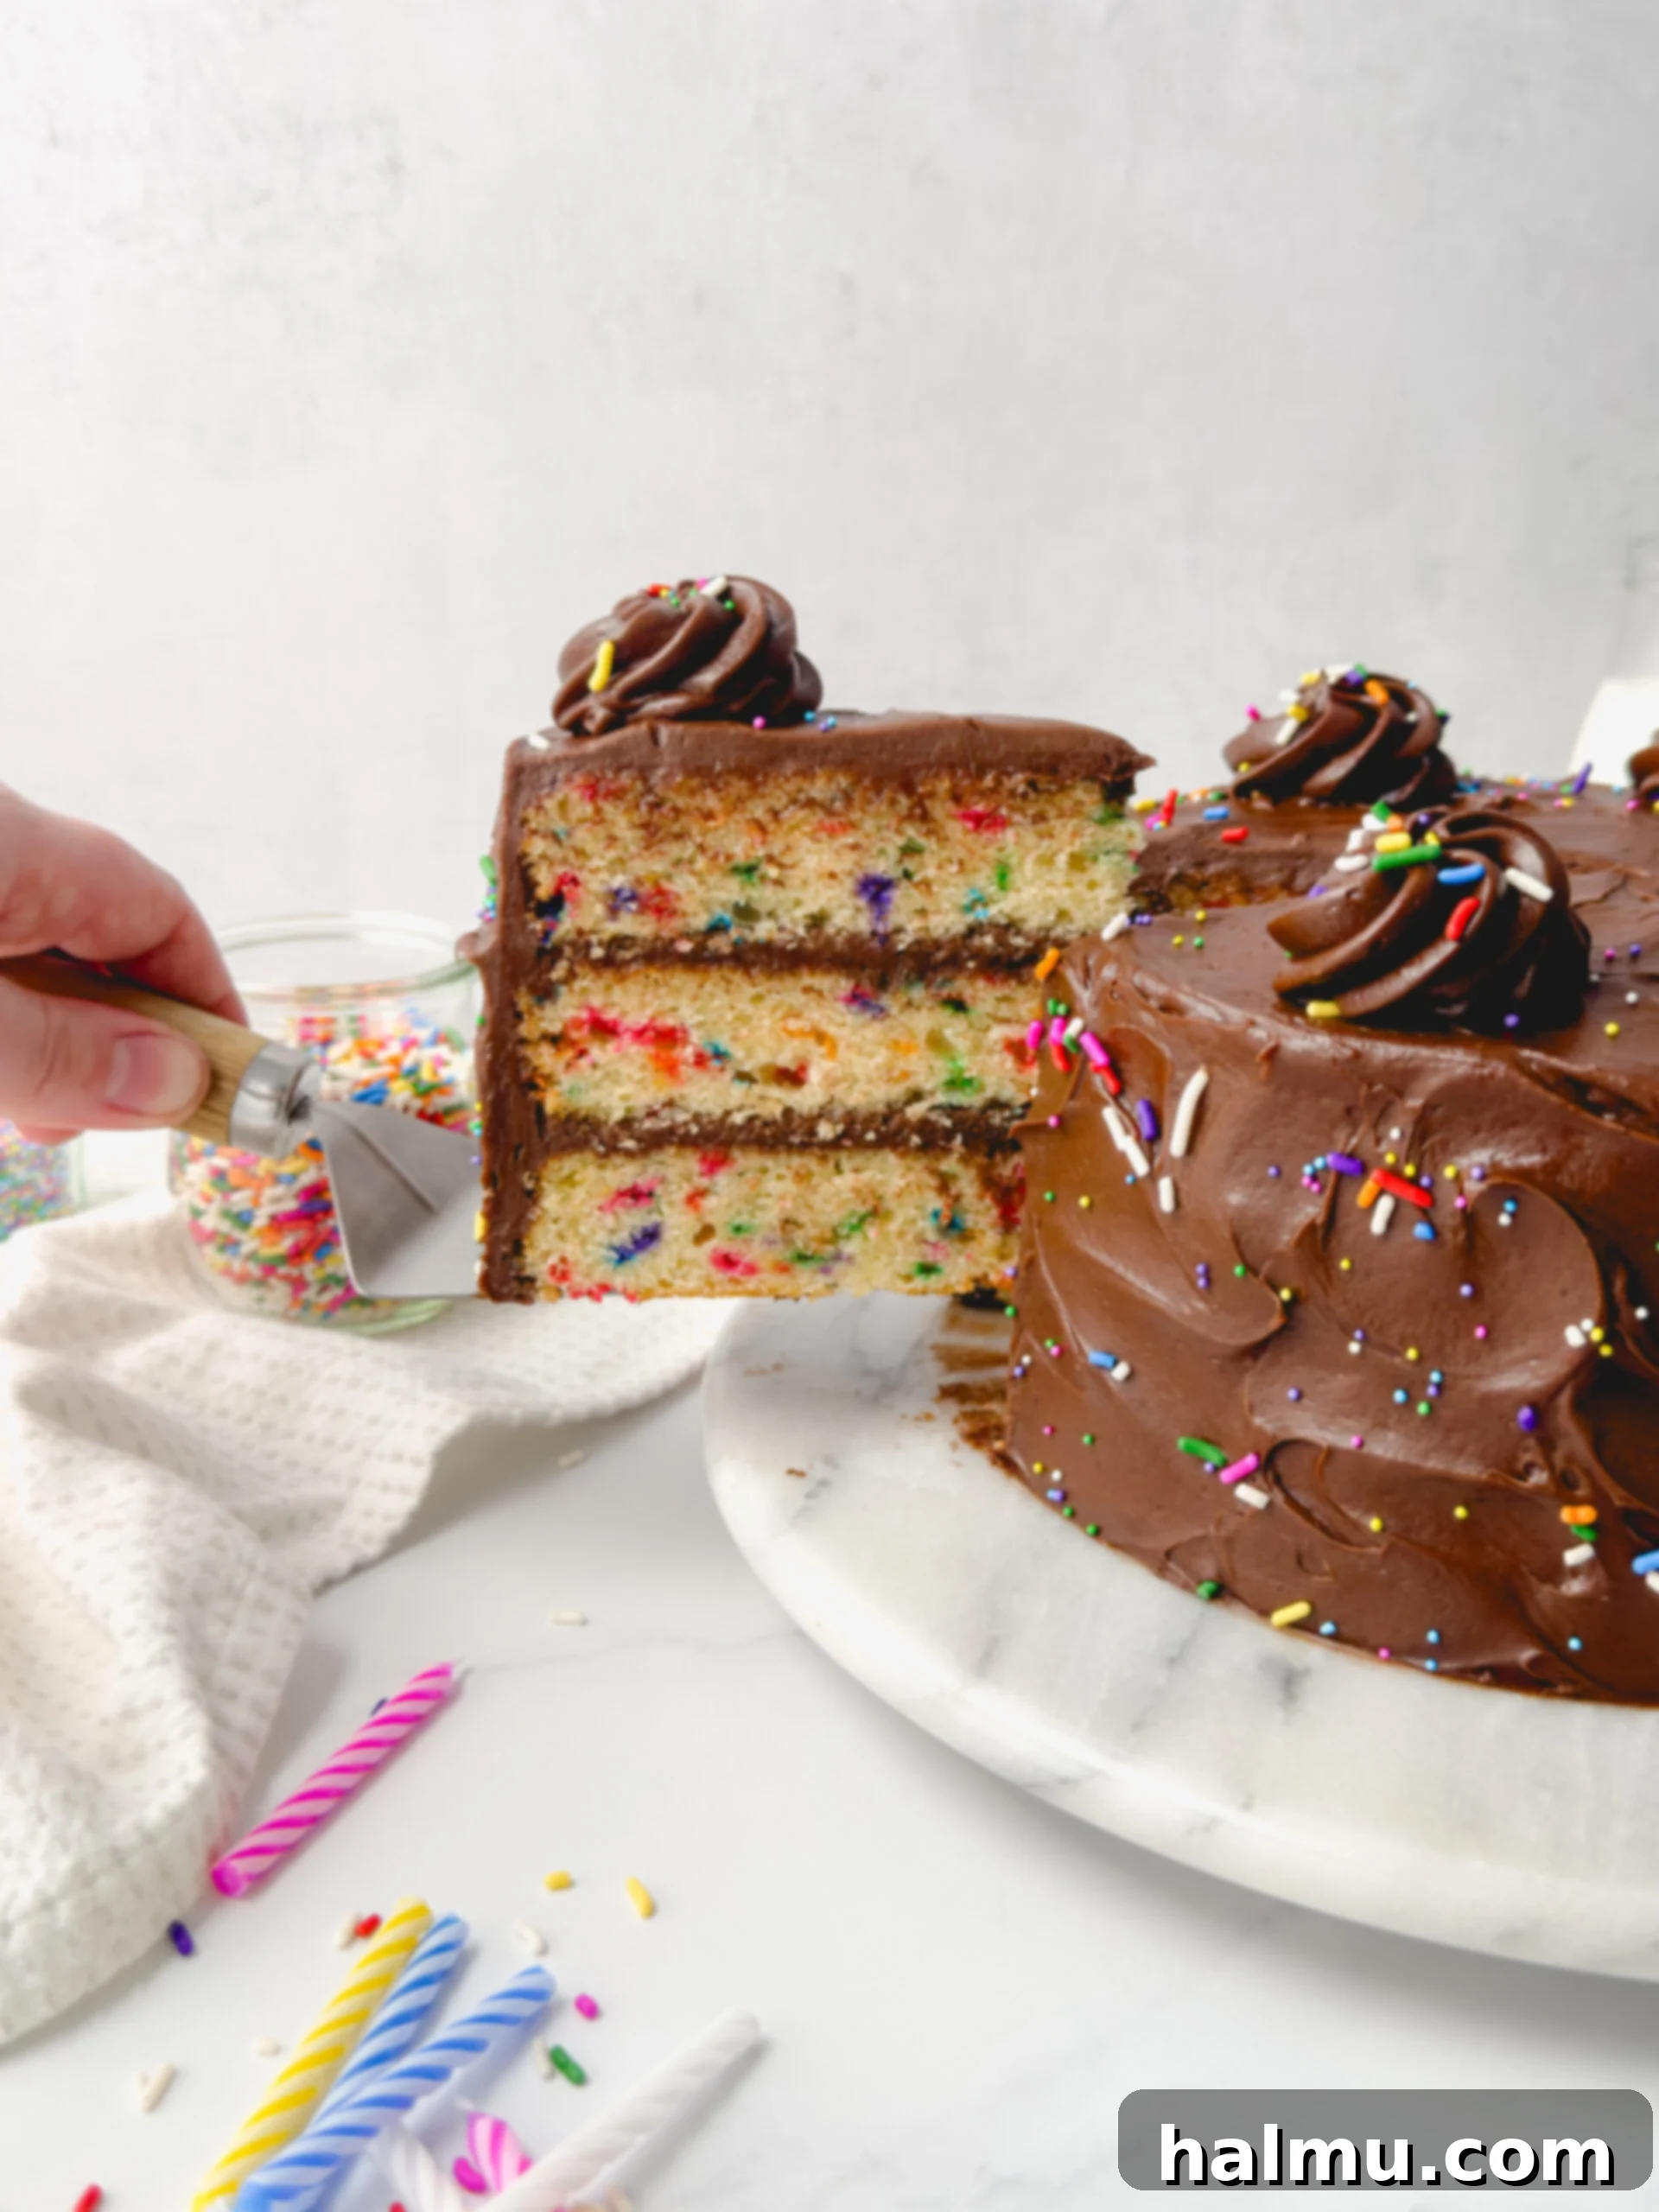
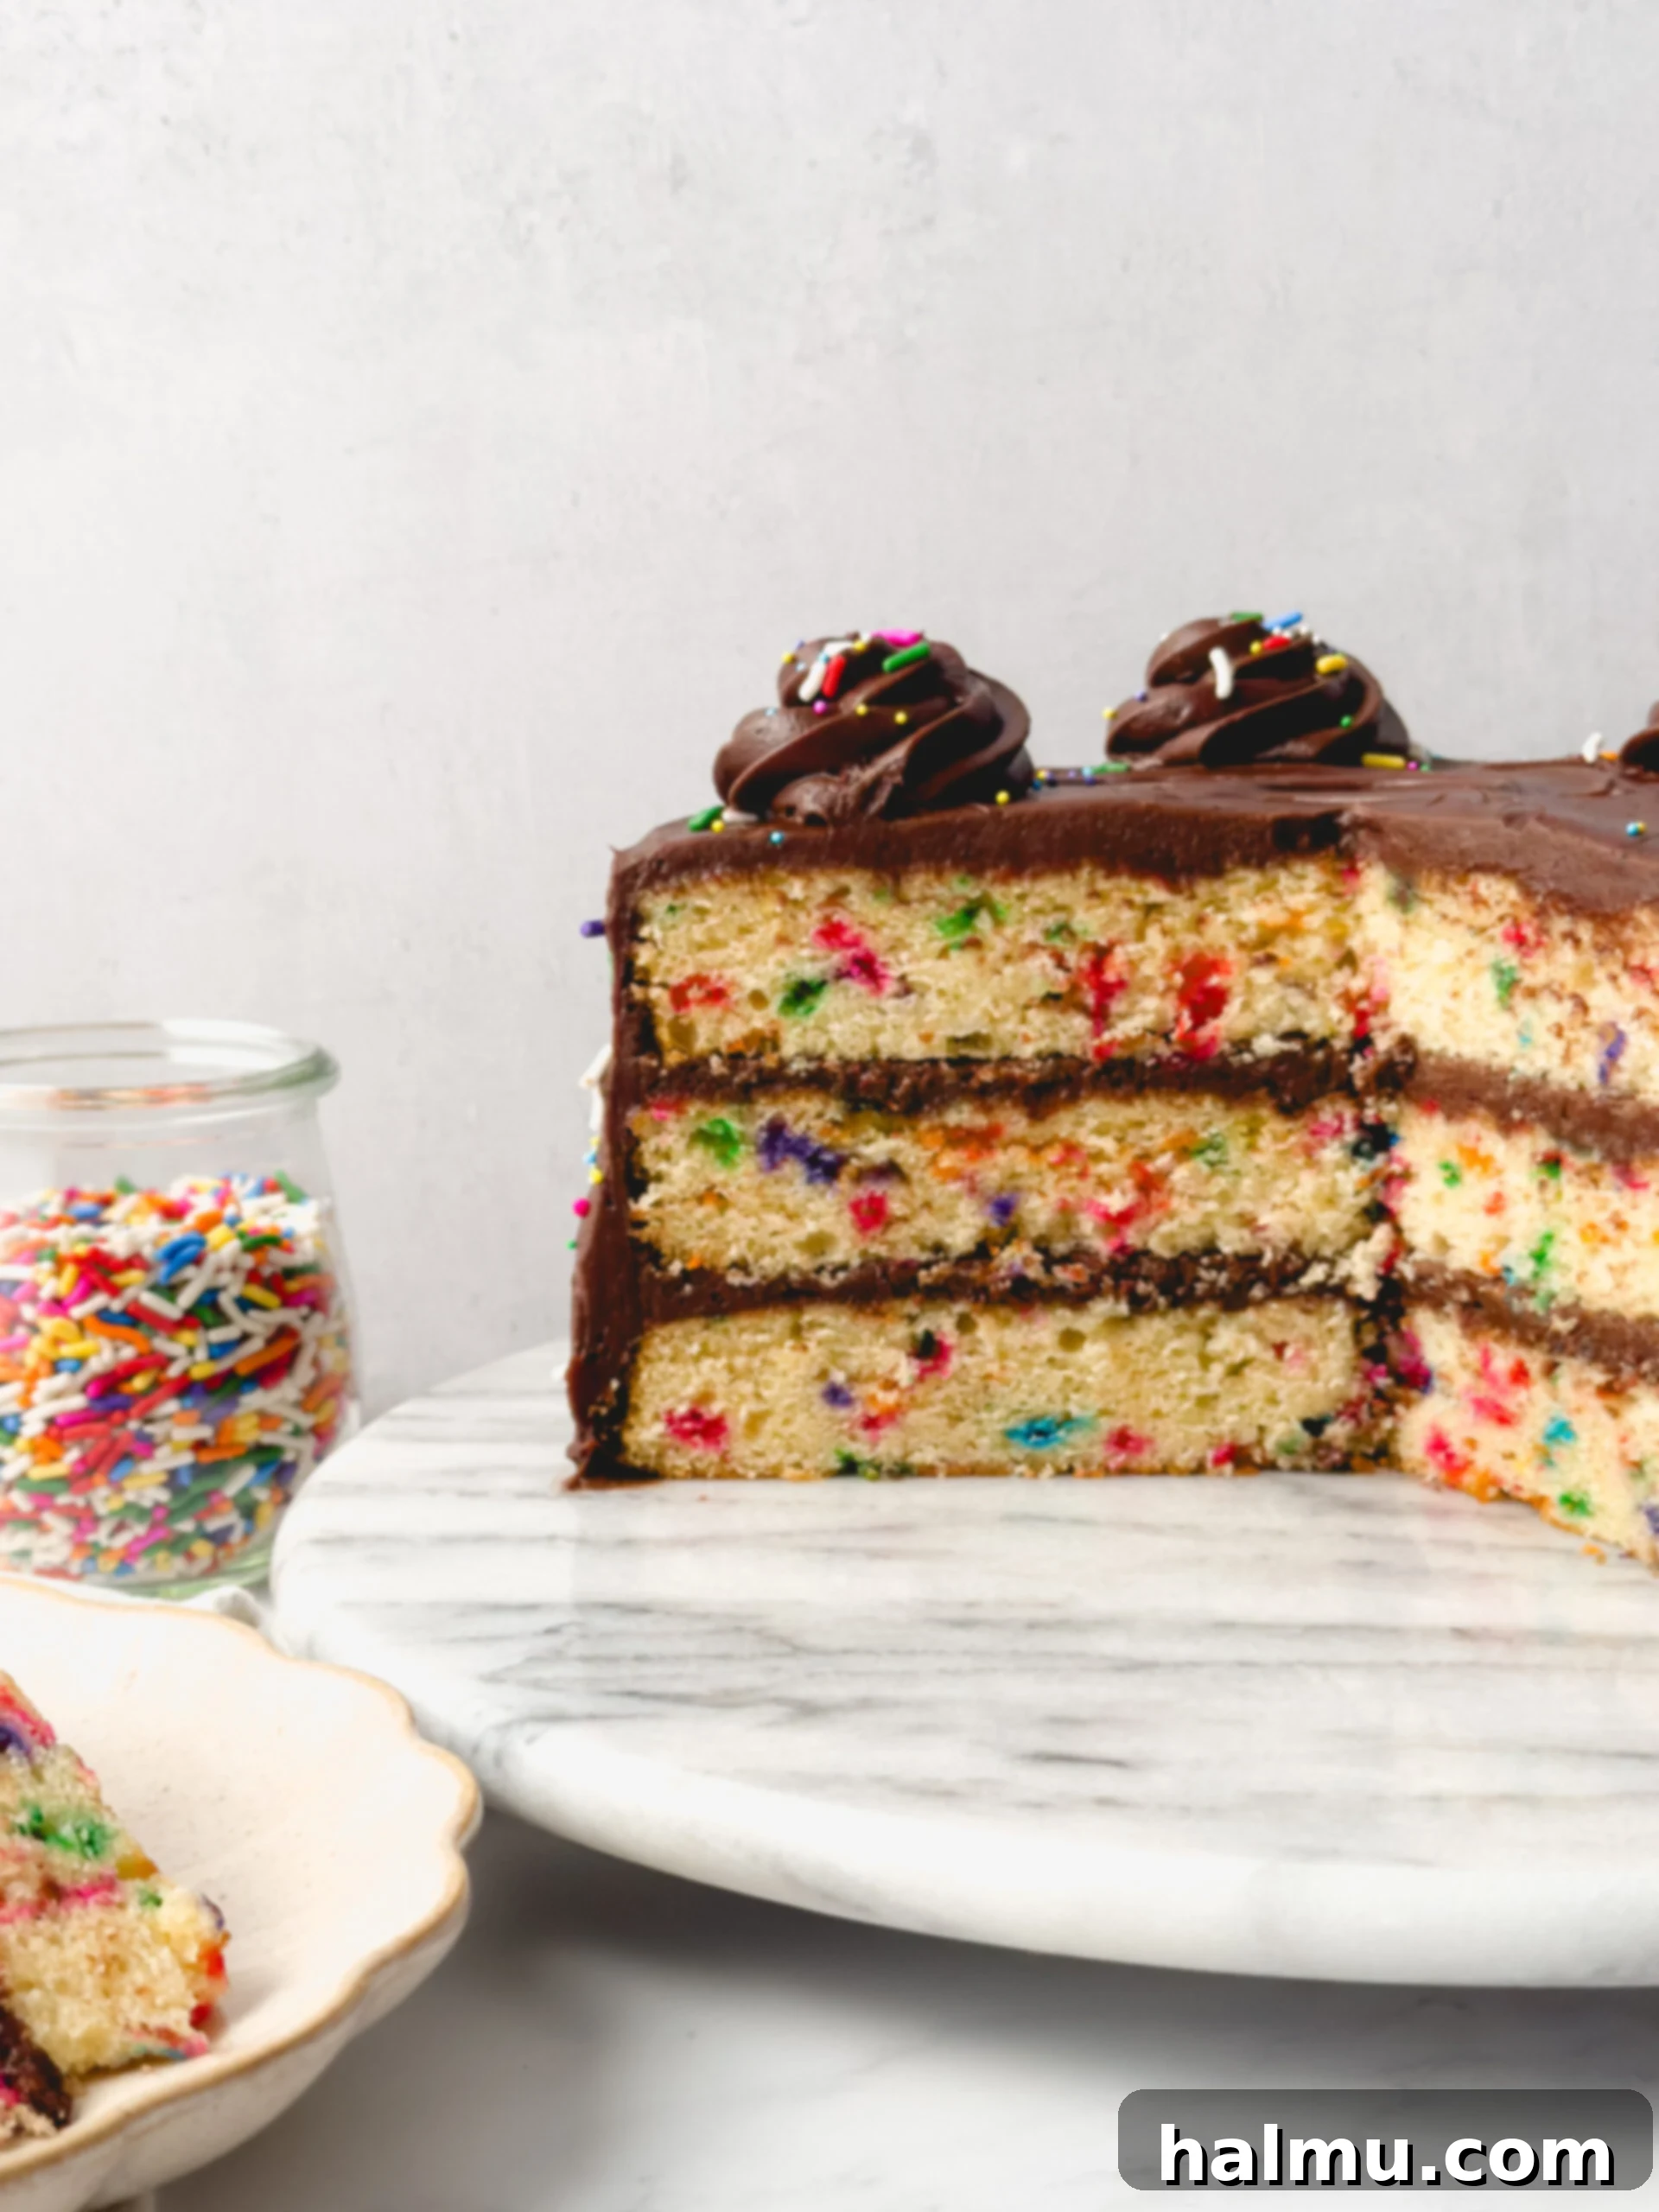
There’s nothing quite like celebrating a special occasion, and for my recent birthday, I indulged in one of my all-time favorite dessert combinations: a vibrant confetti cake generously adorned with rich chocolate frosting! This celebratory cake features three exquisitely moist and tender layers of vanilla confetti cake, each bursting with cheerful sprinkles. It’s then lavishly filled and coated with the most decadent and utterly delicious chocolate cream cheese frosting, creating a symphony of flavors and textures that’s truly unforgettable. This ultimate guide will walk you through creating a show-stopping confetti cake that’s perfect for birthdays, anniversaries, or any moment that calls for a touch of joy and sweetness. Prepare to delight your taste buds and impress your loved ones with this classic dessert, reimagined for modern bakers.
The Ultimate Confetti Cake: A Celebration in Every Bite
Often referred to as funfetti cake, this scratch-made vanilla cake is a true masterpiece of texture and taste. What makes it so special is the infusion of rainbow sprinkles directly into the batter, transforming each slice into a joyful, colorful experience. Unlike many boxed mixes, this homemade version boasts a depth of flavor and a superior texture that simply can’t be replicated. To achieve its signature super-soft and wonderfully moist crumb, our recipe cleverly combines both butter for its rich, dairy-forward flavor and a touch of vegetable oil. This thoughtful blend ensures the cake remains incredibly tender and moist throughout, without compromising any of that delightful vanilla essence. The oil contributes to a lighter texture and helps the cake stay fresh longer, while the butter provides an irreplaceable richness. For an extra layer of “birthday cake” nostalgia, a hint of cake batter extract is added to the mixture. While entirely optional, this subtle inclusion perfectly complements the robust flavor of the chocolate frosting, elevating the entire dessert to a new level of festive deliciousness. This confetti cake isn’t just a dessert; it’s a celebration baked into every single bite, promising smiles and sweet memories.
The magic truly happens with the sprinkles. We’ll dive deeper into sprinkle selection in our FAQ section, but for now, know that choosing the right type ensures your cake remains vibrant and beautiful, even after baking. This cake recipe is designed to be approachable for home bakers while delivering professional-quality results, ensuring your special moments are accompanied by a truly spectacular dessert.
Decadent Chocolate Cream Cheese Frosting: A Velvety Dream
Prepare yourself for an unparalleled frosting experience! This chocolate cream cheese frosting isn’t just good; it’s my absolute favorite of all time, and for very good reason. It strikes a perfect balance between being incredibly rich, subtly tangy, and intensely chocolatey, offering a flavor profile that is both complex and comforting. While it shares a foundational similarity with my classic Cream Cheese Frosting, the thoughtful addition of premium unsweetened cocoa powder and a touch of heavy cream elevates it beyond expectation. The cocoa powder infuses a deep, authentic chocolate taste, far superior to artificial chocolate flavors. The heavy cream is the secret to its luscious texture, transforming it into a frosting that is unbelievably fluffy, exquisitely silky, and utterly decadent. Each spoonful offers a smooth, melt-in-your-mouth experience that perfectly counterpoints the tender confetti cake, making every bite a luxurious treat. The signature tanginess of the cream cheese cuts through the sweetness and richness of the chocolate, ensuring a perfectly balanced flavor profile that will leave you craving more. This frosting is not just an accompaniment; it’s a star in its own right, completing the confetti cake experience.
Simple Yet Elegant Decorating Ideas for Your Confetti Masterpiece
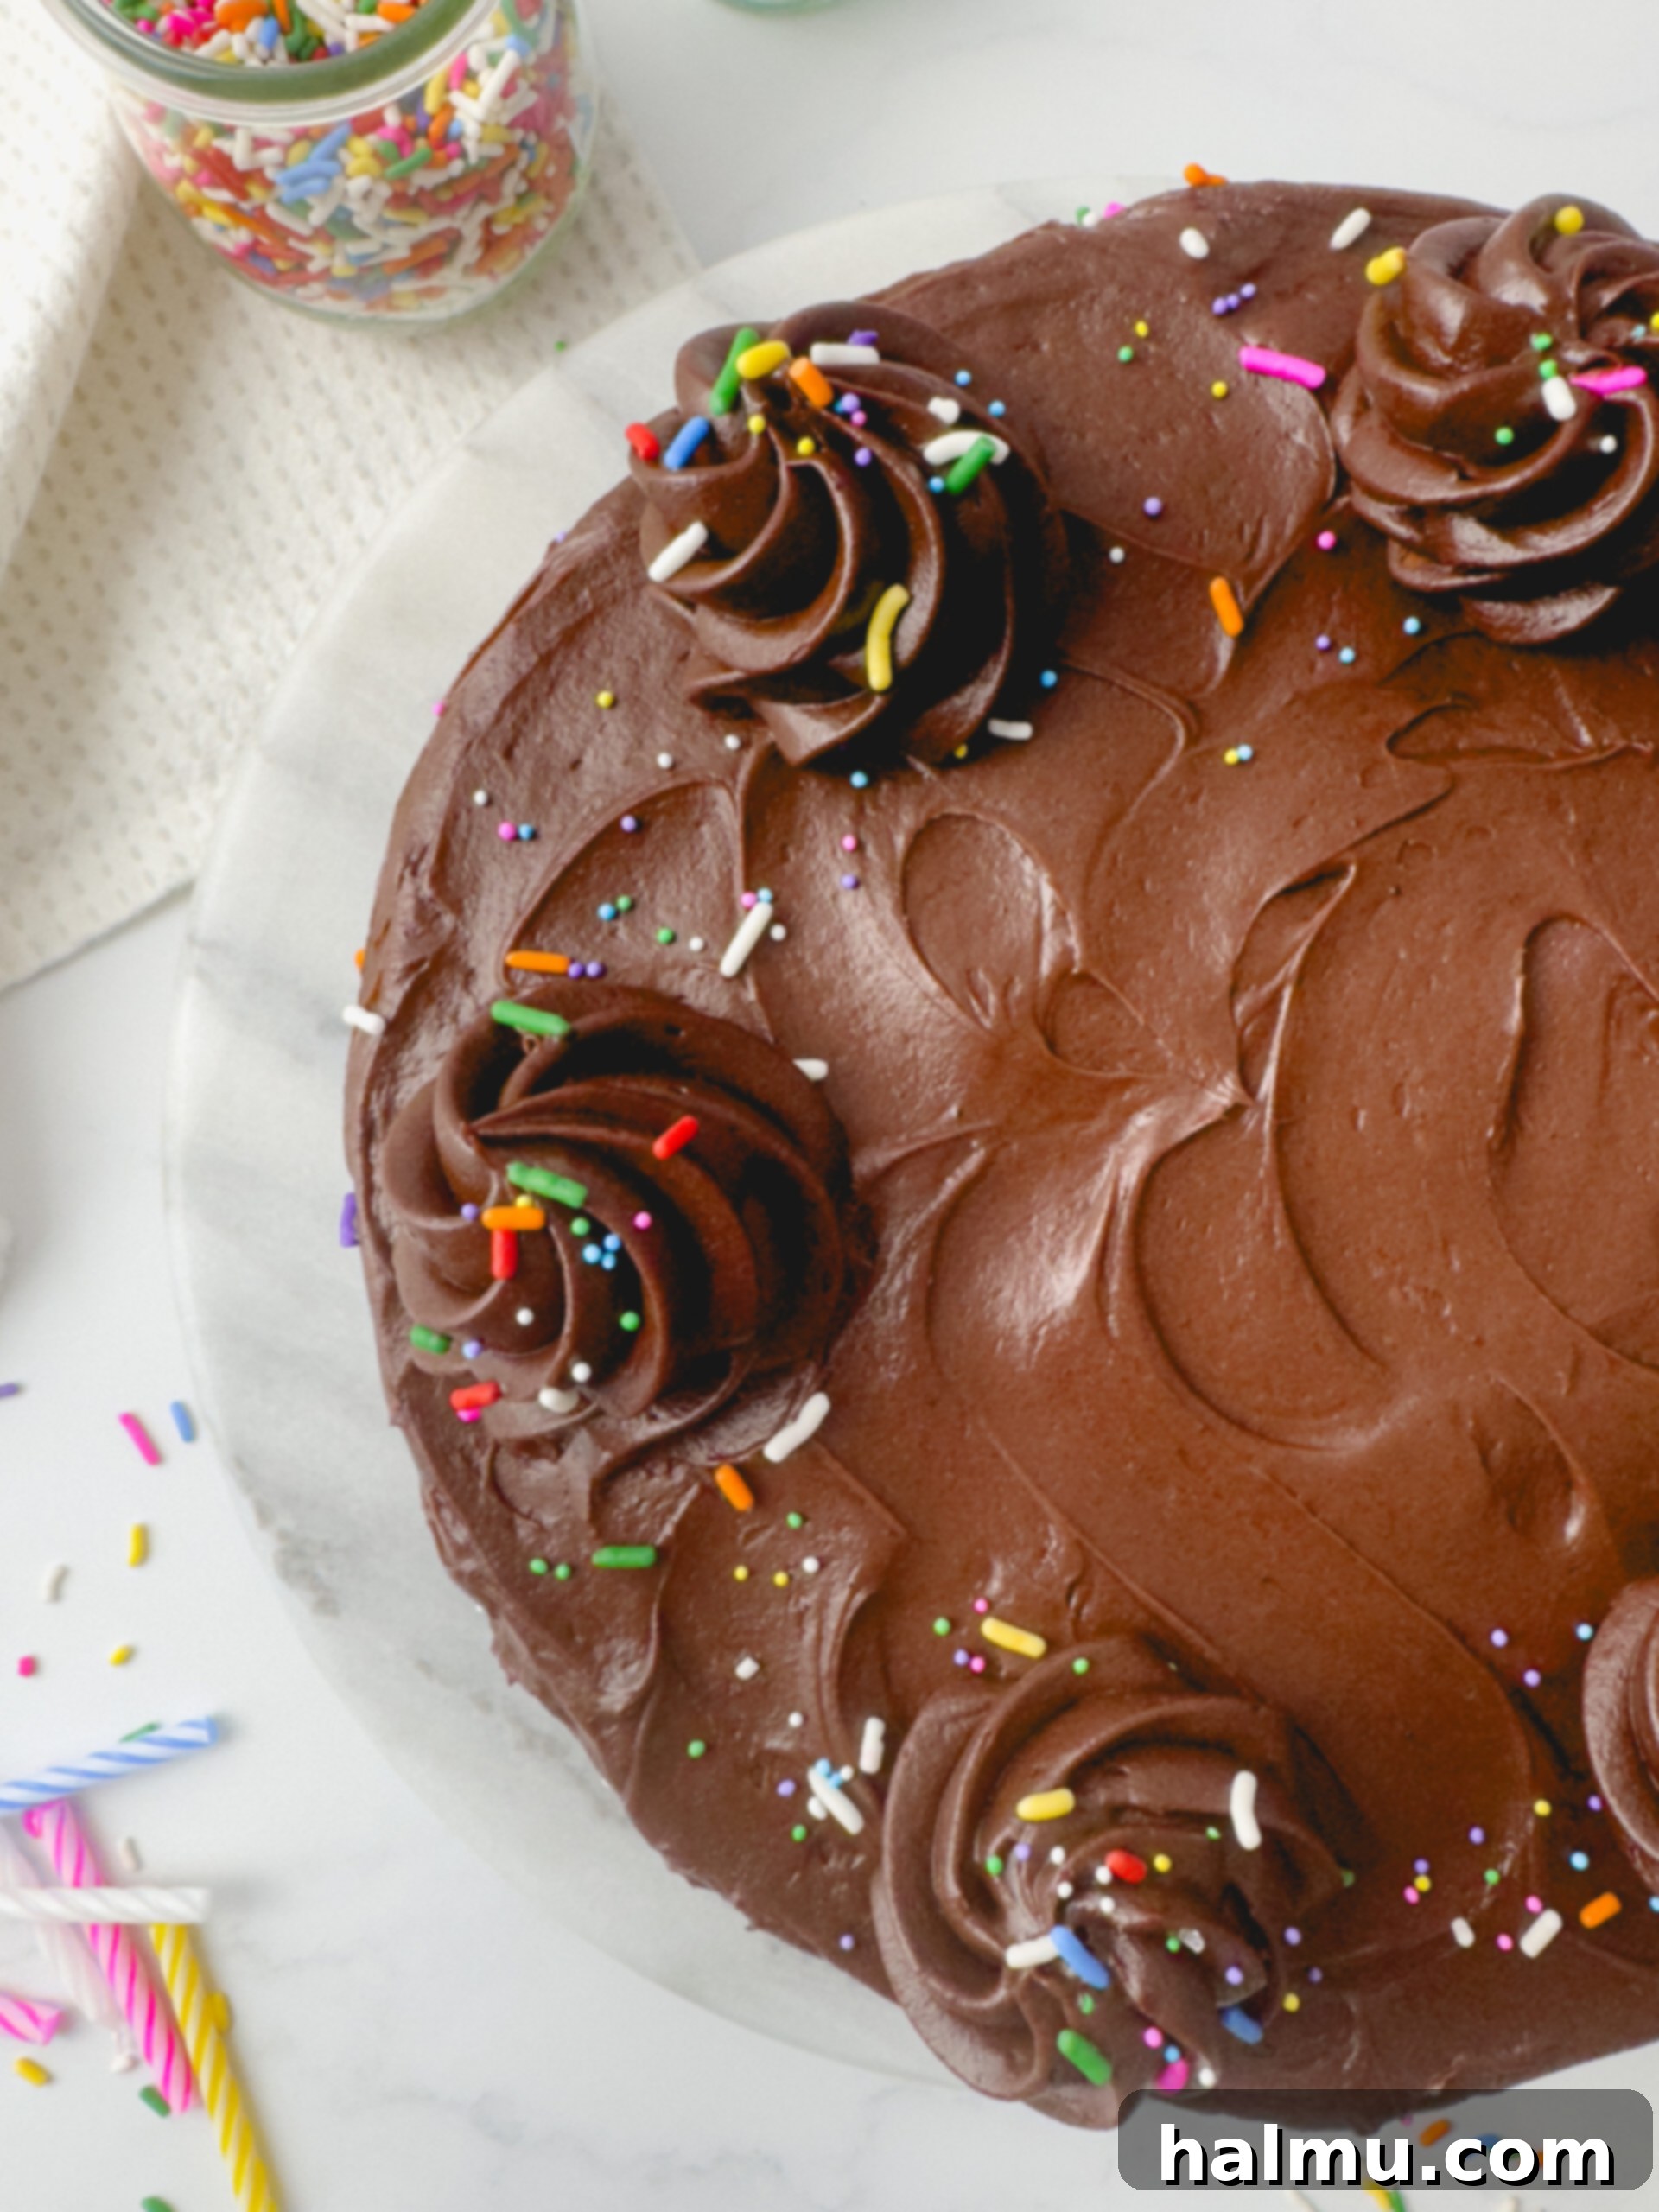
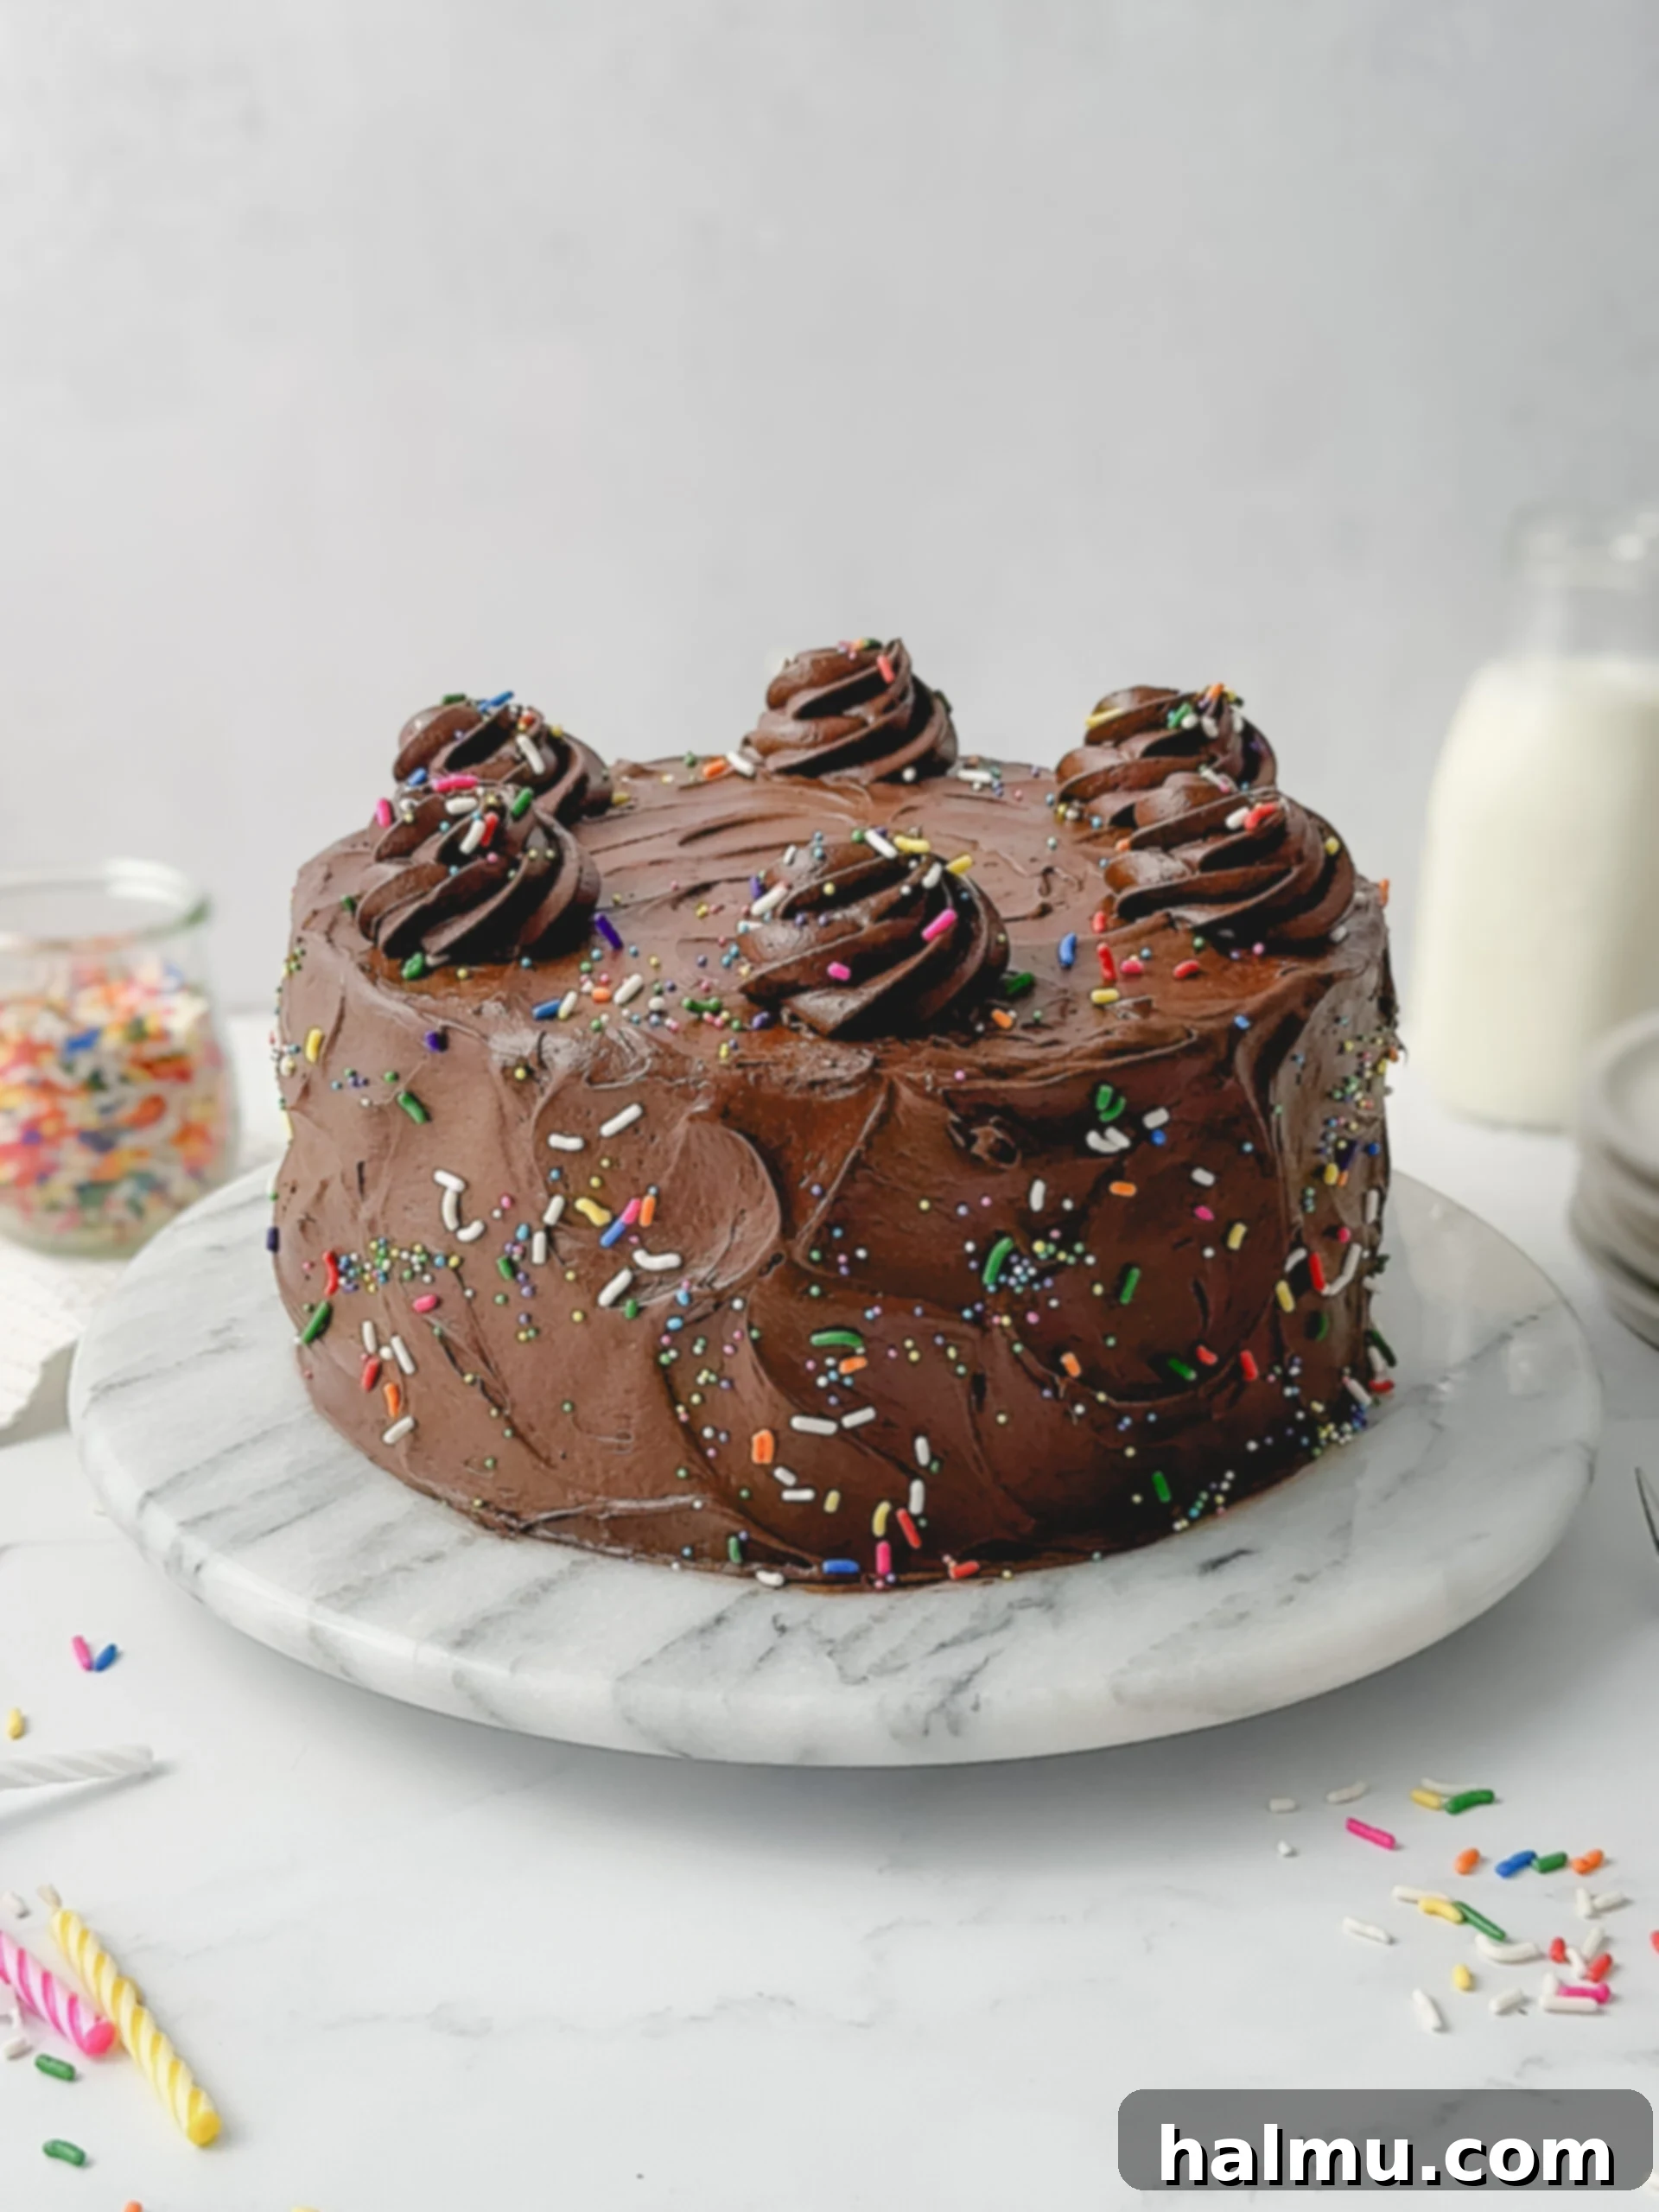
When it came to decorating this celebratory cake, I aimed for an aesthetic that was both simple and elegant, avoiding anything overly elaborate. My goal was to highlight the cake’s festive nature without excessive fuss, allowing the vibrant confetti within to shine. I achieved a charming, random wavy and swirl texture on the frosting using a small offset spatula, which adds a beautiful artisanal touch without requiring advanced piping skills. This technique creates visual interest and depth with minimal effort. To further enhance its playful appeal, I generously adorned the top and sides of the cake with a mix of rainbow jimmies (the same delightful sprinkles used within the cake layers) and some vibrant nonpareil sprinkles. The combination of different sprinkle shapes and sizes adds both texture and a burst of color, making the cake look even more inviting. The final flourish involved piping a few elegant rosettes on top using a large star tip (Ateco 846). These rosettes provide a classic, polished finish. However, the true beauty of cake decorating lies in personal expression; feel free to unleash your creativity and decorate your confetti cake in any way that brings you joy and showcases your unique style!
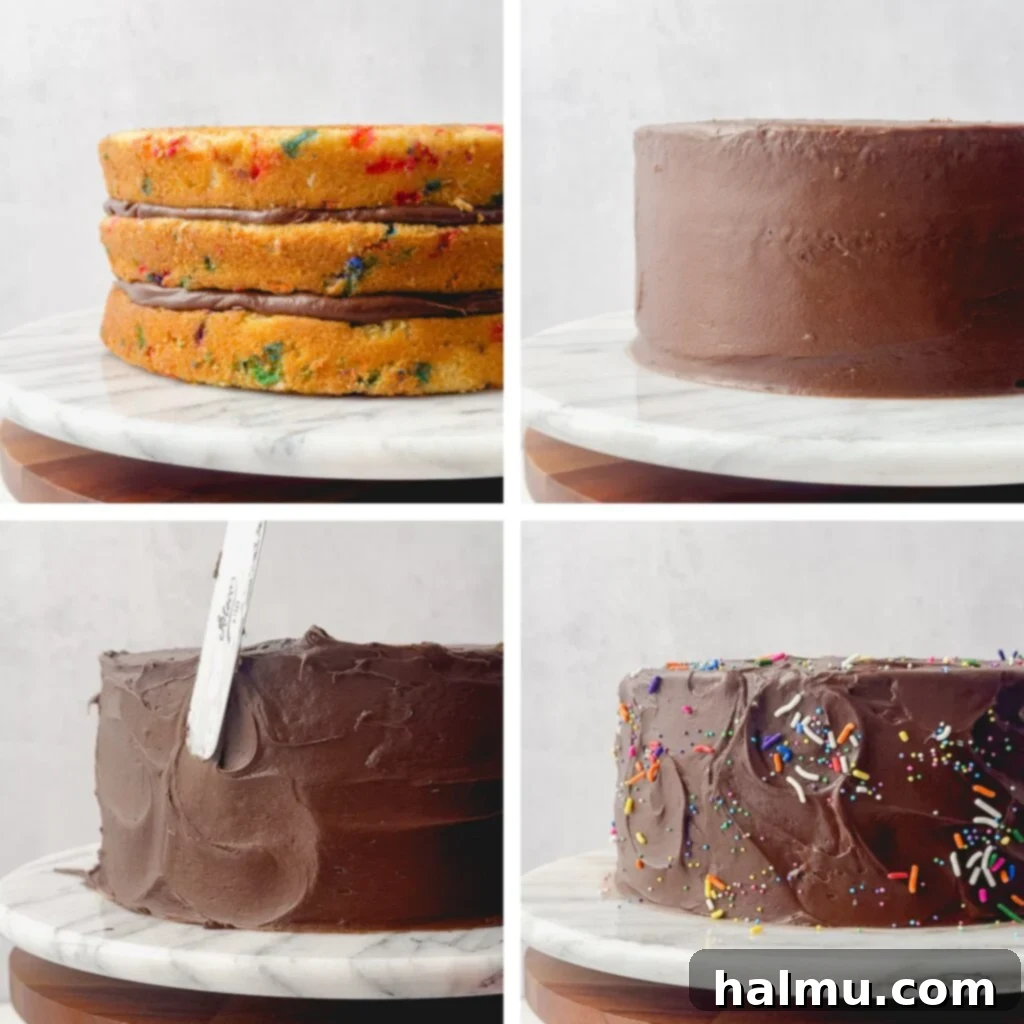
Whether you opt for elaborate piping, a rustic, effortless look, or something entirely unique, the most important ingredient in your decoration is your personal touch. Consider adding edible glitter for extra sparkle that catches the light beautifully, creating a chic drip effect with a simple ganache, or arranging fresh berries for a contrasting pop of color and natural sweetness. Even a simple, artistic scattering of extra sprinkles can make a stunning statement, highlighting the cake’s fun theme. You could also experiment with different piping tips to create various borders or patterns, or even incorporate small edible decorations like sugar flowers or chocolate shards. Remember, this cake is a celebration, and its decoration should reflect that joyous spirit. Don’t be afraid to experiment with different colors, textures, and patterns to make your confetti cake truly your own and a memorable centerpiece for your gathering.
Frequently Asked Questions About Baking Confetti Cake
What are the best sprinkles to use for confetti cake?
For incorporating into the cake batter, it’s crucial to select the right type of sprinkles to ensure a vibrant and unblemished result. I strongly recommend using “jimmie” sprinkles, which are also known as rod-shaped sprinkles. These elongated, rod-shaped sprinkles are specifically designed to be more stable and durable, allowing them to withstand the heat of the baking process without melting, bleeding their colors into the cake batter, or dissolving. This stability is key to achieving those distinct, colorful specks throughout your cake. To further guarantee bright, distinct colors, I also advise avoiding natural-colored sprinkles, as their dyes tend to be less stable and can fade or dull significantly when exposed to oven temperatures. However, when it comes to decorating the exterior of your cooled cake, you have complete freedom! You can use any type of sprinkles you adore, including nonpareils, confetti quins, sanding sugar, or even edible glitter. For my cake, I enjoyed combining classic rainbow jimmies with some cheerful, bright nonpareil sprinkles to achieve a wonderfully festive and varied look on the outside.
Can I substitute all-purpose flour for cake flour in this recipe?
While it might be tempting to use what you have on hand, I cannot emphasize enough how highly I recommend using cake flour for this particular recipe. Cake flour is a low-protein flour, typically containing 7-9% protein, which is significantly less than the 10-12% found in all-purpose flour. This lower protein content is precisely what gives the cake its incredibly tender, delicate, and fine crumb – a hallmark of a truly exceptional confetti cake. Less protein means less gluten development during mixing, resulting in a lighter, softer texture that practically melts in your mouth. I have exclusively tested this recipe with cake flour, and therefore, I cannot guarantee or vouch for the texture or quality of the cake if all-purpose flour is used. Substituting all-purpose flour will likely result in a denser, chewier cake with a more robust crumb, deviating significantly from the intended moist and tender outcome. If you absolutely must substitute, you can attempt to make a homemade cake flour substitute by replacing 2 tablespoons of all-purpose flour per cup with cornstarch, but the results may still vary.
What is the best way to store the confetti cake?
To maintain its freshness and deliciousness, both a whole cake and individual slices should be stored in an airtight container in the refrigerator. This method will keep your cake fresh and moist for up to 5 days. Cream cheese frosting, by nature, requires refrigeration due to its dairy content, so keeping the entire cake chilled is essential for food safety and flavor preservation. For any cut sides of the cake, it’s a good practice to press plastic wrap directly against the exposed surfaces before placing it in the container. This prevents the cake from drying out and helps maintain its moist texture by locking in humidity. For the optimal tasting experience, I highly recommend removing the cake from the refrigerator at least 30 minutes to an hour before you plan to serve it. Allowing it to come closer to room temperature enhances the subtle flavors of both the cake and frosting and softens the frosting to its ideal creamy consistency, making each bite even more enjoyable and luxurious.
Can the cake layers be prepared in advance?
Absolutely, preparing the cake layers ahead of time is not only possible but often preferred! It can significantly streamline your baking process, allowing you to break up the work and reduce stress on baking day. If you plan to assemble the cake the following day, simply wrap each cooled cake layer tightly in several layers of plastic wrap to prevent any air exposure and store them at room temperature. For longer storage, you can make these layers even further in advance and freeze them. Wrap each layer meticulously in several layers of plastic wrap, then place them in an airtight freezer bag or container. Frozen cake layers can be stored for up to 3 months without compromising flavor or texture. When you’re ready to assemble, simply defrost the cake layers at room temperature for a couple of hours. Don’t worry if they are still slightly chilled when you begin assembling the cake; a slightly firm and cool cake is often easier to handle, level, and frost, as it minimizes crumbling and holds its shape better.
Does the chocolate cream cheese frosting require refrigeration?
Given that the frosting contains cream cheese, which is a dairy product, it absolutely needs to be stored in the refrigerator to ensure food safety and prevent spoilage. To ensure the frosting is at its softest and fluffiest consistency for easy spreading and piping, I personally like to prepare it right before I’m ready to assemble and frost the cake. Freshly made, it’s perfectly pliable. Once chilled, cream cheese frosting will naturally firm up significantly due to the butter and cream cheese solidifying. This will make it less pipeable or spreadable straight from the fridge. If you choose to make the frosting ahead of time, allow it several hours (typically 1-2 hours) to sit at room temperature before using, and then give it a thorough stir with a spatula or even a quick whip with your mixer until it regains its smooth and spreadable consistency. For those moments when time is short, you can carefully warm the frosting in the microwave on the defrost setting, stirring every 15-20 seconds, until it reaches a workable consistency. Be very cautious not to overheat it, as excessive heat can cause the butter and cream cheese to melt and separate.
Can I bake this cake in a 9-inch pan instead of 8-inch pans?
Yes, this versatile recipe can indeed be adapted for three 9-inch round cake pans, just as it works for three 8-inch round layers. This offers flexibility depending on the bakeware you have available. However, there are a couple of important considerations to keep in mind when making this adjustment. When using 9-inch pans, the cake batter will naturally be spread into thinner layers compared to 8-inch pans. This means they will require a shorter baking time. It’s crucial to keep a close eye on them during the baking process and perform a doneness test (like the toothpick method) a few minutes earlier than suggested in the recipe. Baking times can vary based on oven calibration and pan material, so vigilance is key. Additionally, because the batter will be more spread out in larger pans, your finished cake will naturally be slightly shorter in height than the one pictured, which was made with 8-inch pans. While the flavor and deliciousness will remain absolutely the same, the overall presentation and stack height might differ slightly. Ensure your 9-inch pans are also properly greased and lined as per the recipe instructions.
Essential Baking Tools for Your Kitchen
Having the right tools can make all the difference in your baking journey. These are some of my favorite and most-used items that help me achieve perfect results every time, ensuring your baking experience is as smooth and enjoyable as possible:
These professional-grade anodized aluminum pans ensure even heat distribution for perfectly baked layers, consistent rise, and an incredibly clean, effortless release every time.
A sturdy and smooth-spinning decorating turntable is invaluable for effortlessly frosting and decorating your cakes with precision, allowing for smooth, even finishes and intricate designs.
High-quality disposable piping bags make intricate decorating, precise frosting application, and filling cake layers simple, hygienic, and mess-free, perfect for both beginners and pros.
Essential for spreading frosting smoothly and evenly across cake layers and sides. Their angled blade provides excellent control, ensuring a flawless and professional appearance.
Achieve perfectly smooth, sharp, and straight sides on your frosted cakes with this simple yet incredibly effective tool, creating a polished, bakery-quality finish.
See more in my Amazon Storefront →

Baking Tip: Embrace Accuracy and Weigh Your Ingredients!
For truly consistent and successful baking results, I cannot stress enough the importance of using a kitchen scale to weigh your ingredients rather than relying on volume-based measuring cups. Weighing ingredients provides unparalleled accuracy, eliminating variables that can arise from how flour is sifted or how sugar is packed, which can lead to vastly different amounts in a “cup.” This precision leads to more consistent outcomes with all your recipes, significantly improving your success rate every time you bake by ensuring the correct ratios of ingredients. Beyond accuracy, using a scale also remarkably cuts down on the number of dishes you use, making cleanup much easier and faster! You’ll find yourself reaching for fewer measuring cups and spoons. I make it a point to provide gram measurements in all my recipes, and this is the reliable kitchen scale I personally love and use in my kitchen for all my baking endeavors.
Expert Tips for Crafting the Perfect Scratch-Made Confetti Cake
- Ensure All Ingredients Are at Room Temperature: This is a golden rule in baking and one of the most critical steps for success! Allowing ingredients like butter, eggs, sour cream, and buttermilk to sit out and reach room temperature (typically 68-72°F or 20-22°C) before mixing is absolutely vital. Room temperature ingredients emulsify more effectively, meaning they blend together smoothly and evenly, creating a much more stable and uniform batter without lumps. This leads to a finer crumb, a more tender texture, and a better-risen cake. For the frosting, having cream cheese, butter, and heavy cream at room temperature ensures a silky, lump-free, and perfectly whipped consistency that is easy to spread and pipe, avoiding a curdled or grainy texture.
- Scrape the Mixing Bowl Thoroughly: Don’t underestimate the power and importance of your rubber spatula! Throughout the entire cake batter preparation process and during frosting creation, make it a consistent habit to frequently stop your mixer and thoroughly scrape down the sides and bottom of your mixing bowl. This seemingly small step ensures that all ingredients are fully incorporated into the mixture, preventing pockets of unmixed butter, flour, or sugar from forming. It’s a small but crucial detail that guarantees a consistent texture and even baking in your finished cakes, and contributes significantly to achieving a truly silky-smooth, homogenous frosting without streaks or unmixed components.
- Weigh Your Cake Batter for Perfectly Even Layers: For a professional-looking cake with perfectly even, level layers, a kitchen scale is your best friend and an indispensable tool. After preparing your entire cake batter, weigh the total amount of batter. Then, divide that total weight by three (or the number of layers you’re making) and use the scale to pour precisely that calculated amount of batter into each of your prepared cake pans. This meticulous approach guarantees that each cake layer will bake to the exact same thickness and height, resulting in a beautifully level and stable cake that is much easier to stack, fill, and decorate, giving your final creation a polished, bakery-quality appearance.
- Freeze Cake Layers for Effortless Assembly: Once your cake layers have baked and cooled completely to room temperature, I highly recommend wrapping them individually and freezing them for a brief period, ideally about 30 minutes. A firm, slightly chilled cake layer is much easier to handle, level, and stack. It significantly simplifies the entire assembly process, making it far less prone to tearing or crumbling as you work. Furthermore, chilled layers help to minimize crumbs from mixing into your pristine frosting during the crumb coat and final frosting stages, ensuring a cleaner, smoother finish and a more professional presentation as you ice the cake.
- Avoid Overmixing the Batter: Once you’ve added the dry ingredients to the wet, mix just until they are barely combined. Overmixing is a common pitfall that can lead to disappointing results. Excessive mixing develops the gluten in the flour too much, which can result in a tough, dense, and dry cake texture. A few small lumps or streaks of flour in the batter are perfectly fine and often preferred over an overmixed, heavy batter. Stop mixing as soon as no dry streaks of flour are visible to preserve the cake’s tender crumb.
- Don’t Peek Too Early: Resist the urge to open the oven door during the first two-thirds of the baking time. Oven doors opening allow cold air to rush in, causing sudden temperature drops that can make your delicate cake layers sink dramatically in the middle. Trust your oven and the specified baking time. Only check for doneness towards the very end of the suggested baking window, and do so quickly.

More Irresistible Cake Recipes You’ll Love
- Coconut Layer Cake
- Vanilla Cupcakes with Chocolate Frosting
- Chocolate Pudding Cake
- Old Fashioned Red Velvet Cake
- Chocolate Chip Banana Cake
If you have the pleasure of making this recipe and find yourself loving it as much as I do, please don’t hesitate to share your thoughts and leave a comment below. Your feedback and creations truly make my day. Happy baking!
Confetti Birthday Cake
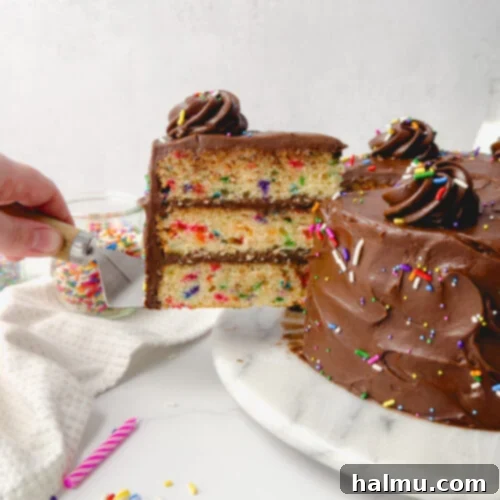
Confetti Birthday Cake is made with three layers of moist vanilla sprinkle cake surrounded by silky, rich chocolate cream cheese frosting. This cake calls for a celebration!
Author: Rachel
Print Recipe
Rate This Recipe
Prep Time: 50 mins
Cook Time: 30 mins
Chill Time: 30 mins
Total Time: 1 hr 50 mins
Yield: 14 servings
Ingredients
For the Confetti Cake
- 1 cup (2 sticks or 226g) unsalted butter, at room temperature
- 1½ cups (310g) granulated sugar
- 2 Tablespoons (28g) vegetable or canola oil
- 2 large eggs, at room temperature
- 2 large egg whites, at room temperature
- 1 Tablespoon (15mL) vanilla extract
- 1 teaspoon cake batter extract, optional
- 3 cups (370g) cake flour
- 2 teaspoons baking powder
- ½ teaspoon baking soda
- ½ teaspoon salt
- ½ cup (120g) sour cream, at room temperature
- 1 cup (240mL) buttermilk, at room temperature
- ¾ cup (140g) rainbow sprinkles*, plus more for decorating
For the Chocolate Cream Cheese Frosting
- 16 oz (2 blocks or 452g) cream cheese, at room temperature
- 1 cup (2 sticks or 226g) unsalted butter, at room temperature
- 6 cups (680g) powdered sugar
- 1 cup (86g) unsweetened cocoa powder
- ¼ cup (60mL) heavy cream or milk
- 1 teaspoon vanilla extract
- pinch of salt
Instructions
Confetti Cake Preparation
- Preheat oven to 350°F (175°C). Lightly grease three 8-inch round cake pans with non-stick cooking spray and line the bottoms with parchment paper circles to ensure easy release.
- In the bowl of a stand mixer fitted with a paddle attachment, cream together the room temperature butter and granulated sugar until the mixture is fluffy and light in color, typically taking about 3 minutes. With the mixer running on a low speed, slowly stream in the vegetable or canola oil. Stop the mixer, use a rubber spatula to thoroughly scrape the bottom and sides of the bowl, then continue beating for one additional minute to ensure everything is well combined.
- Add the large eggs and egg whites one at a time, ensuring each is fully incorporated before adding the next. Follow with the vanilla extract and the optional cake batter extract, mixing well after each addition. Remember to scrape the bowl as needed to maintain a consistent batter.
- In a separate bowl, sift together the cake flour, baking powder, baking soda, and salt. This step helps prevent lumps and ensures an even distribution of leavening agents. Add half of this dry flour mixture and the sour cream to the wet ingredients. With the mixer running on low speed, slowly stream in approximately half of the buttermilk. Mix just until combined then stop and scrape the bowl thoroughly. Add the remaining flour mixture and slowly stream in the remaining buttermilk, continuing to mix on low speed only until combined. Finally, gently fold in the rainbow sprinkles until they are evenly distributed throughout the batter, being careful not to overmix.
- Evenly divide the prepared batter among your three greased and lined cake pans. For perfectly uniform layers, I highly recommend using a kitchen scale to weigh the batter into each pan. Bake for 25-30 minutes, or until the centers of the cakes spring back lightly when touched, or a toothpick inserted into the center comes out with only a few moist crumbs attached.
- Allow the baked cakes to cool in their pans on a wire rack for at least 30 minutes. This cooling period helps the cakes to firm up. After 30 minutes, run a small, thin spatula carefully around the sides of each pan to help release the cakes. Invert the cakes onto the wire rack to finish cooling completely before frosting.
Chocolate Cream Cheese Frosting Preparation
- Using either a stand mixer fitted with a paddle attachment or a hand mixer, cream together the room temperature cream cheese and unsalted butter until the mixture is smooth and lump-free, which usually takes about 2 minutes. Stop the mixer and use a rubber spatula to scrape down the sides and bottom of the bowl thoroughly.
- In a separate bowl, sift together the powdered sugar and unsweetened cocoa powder. Add half of this sifted powdered sugar and cocoa mixture to the creamed butter and cream cheese. Follow this with the heavy cream (or milk), vanilla extract, and a pinch of salt. Mix on low speed until the ingredients are mostly incorporated, then add the remaining half of the powdered sugar and cocoa. Scrape the bowl once more, then continue mixing until the frosting is completely combined, smooth, and wonderfully fluffy.
Cake Assembly & Decoration
- Once the cake layers are completely cool (and ideally, slightly chilled from a brief freeze as per our tip), use a large serrated knife to carefully level the tops of each cake layer, creating a flat, even surface for easy stacking.
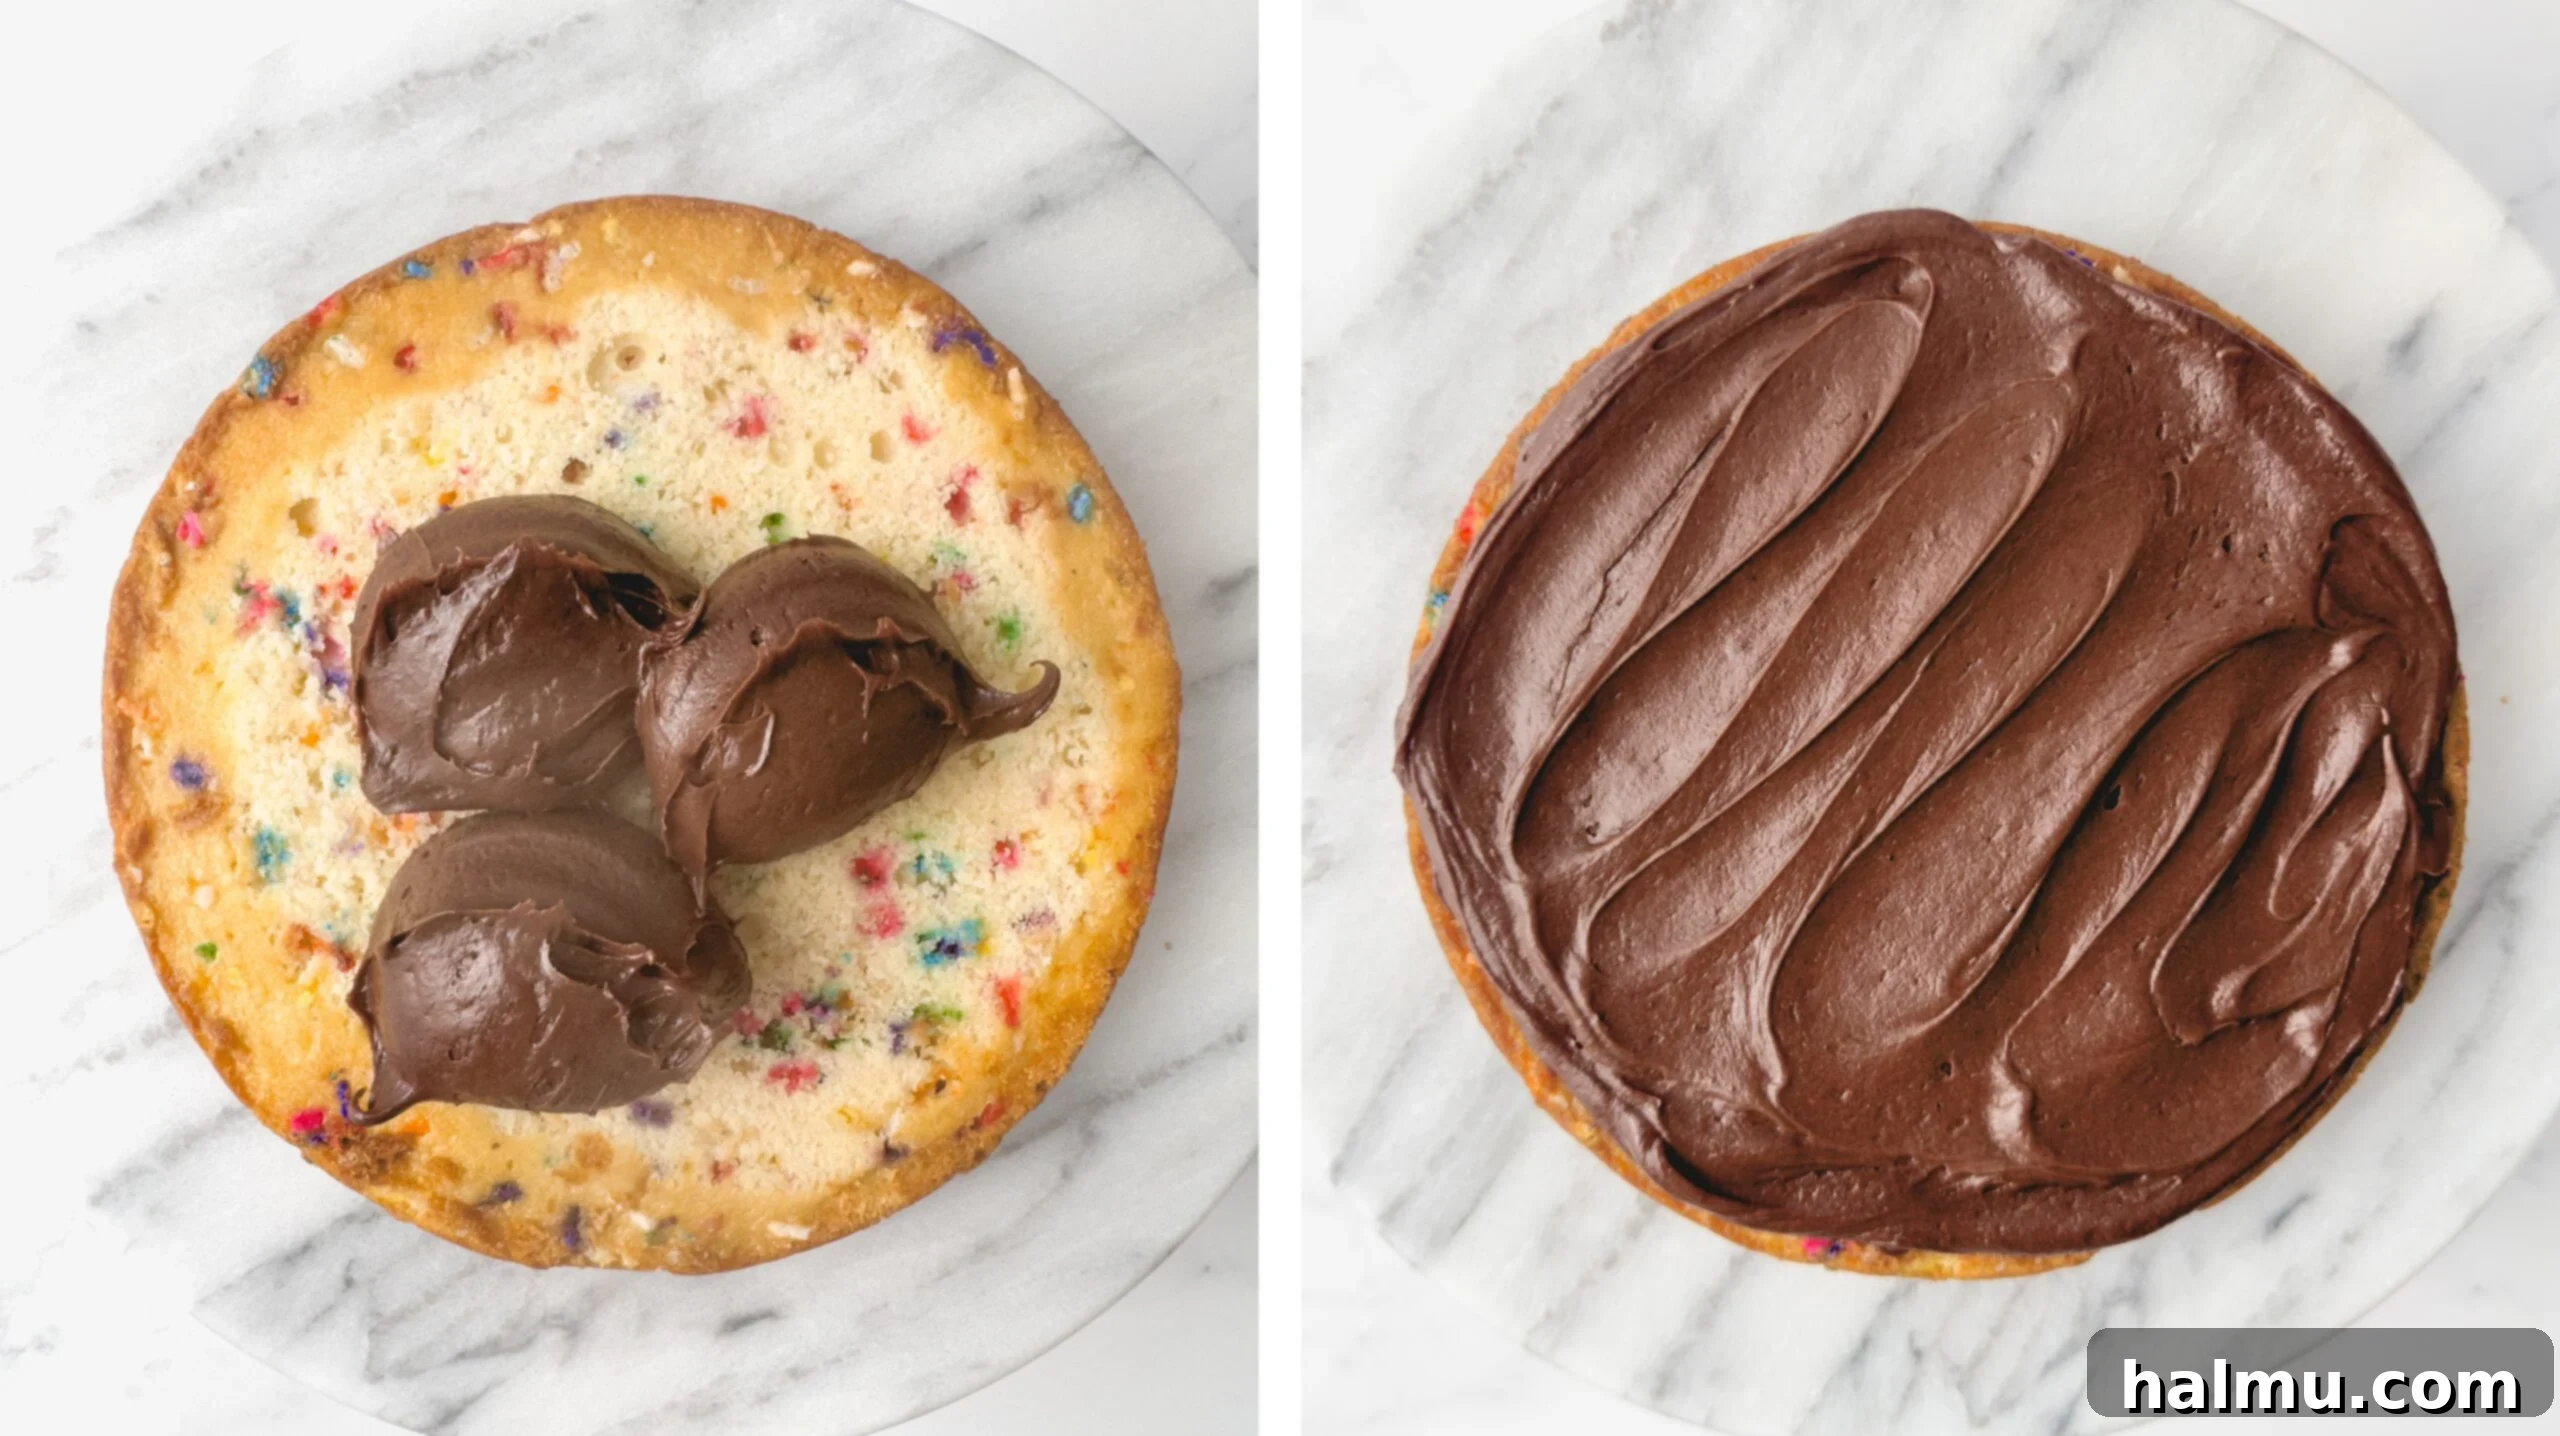
- Place the first cake layer, cut side up, onto your chosen cake board or serving stand. Dollop about ½ cup of the prepared chocolate cream cheese frosting onto this layer and use an offset spatula to spread it evenly all the way to the edges. Carefully place your next cake layer on top, cut side down, and gently press down to ensure it is level. Repeat this process with another ½ cup of frosting. For the final cake layer, place it cut side down on top.
- Using an offset metal spatula, apply a thin, even layer of frosting to the top and sides of the entire cake. This “crumb coat” traps any loose crumbs, creating a smooth base for your final frosting layer. For an extra smooth finish, you can use a straight-sided icing comb. Chill the crumb-coated cake in the refrigerator for at least 30 minutes to allow the frosting to set.
- After chilling, spread a generous final layer of chocolate cream cheese frosting all over the cake, smoothing it to your desired finish. Decorate your cake with the additional rainbow sprinkles, or any other decorations you prefer. If desired, fit a piping bag with a large star tip, fill it with any leftover frosting, and pipe beautiful rosettes or decorative borders on the top of the cake. Slice up your magnificent Confetti Birthday Cake and enjoy every delicious bite!
Notes
- *For the cake batter, I specifically recommend using rainbow “jimmie” sprinkles. These hold their shape and vibrant colors much better during baking and are less likely to bleed compared to other sprinkle varieties. You have more flexibility for decorating the outside of the cake; feel free to use any type of sprinkle you like to add a personalized touch.
Did you make this recipe? Be sure to tag @sweetkitchencravings on Instagram!

HI THERE!
I’m Rachel
I’m the passionate dessert lover, dedicated recipe developer, and creative content creator behind Sweet Kitchen Cravings. Here, you’ll discover a delightful collection of classic yet special recipes that are thoughtfully crafted to impress your loved ones and bring joy to your kitchen. My mission is to inspire confidence in your baking journey, making every recipe approachable and deliciously rewarding!
MORE ABOUT RACHEL →
TikTok
