
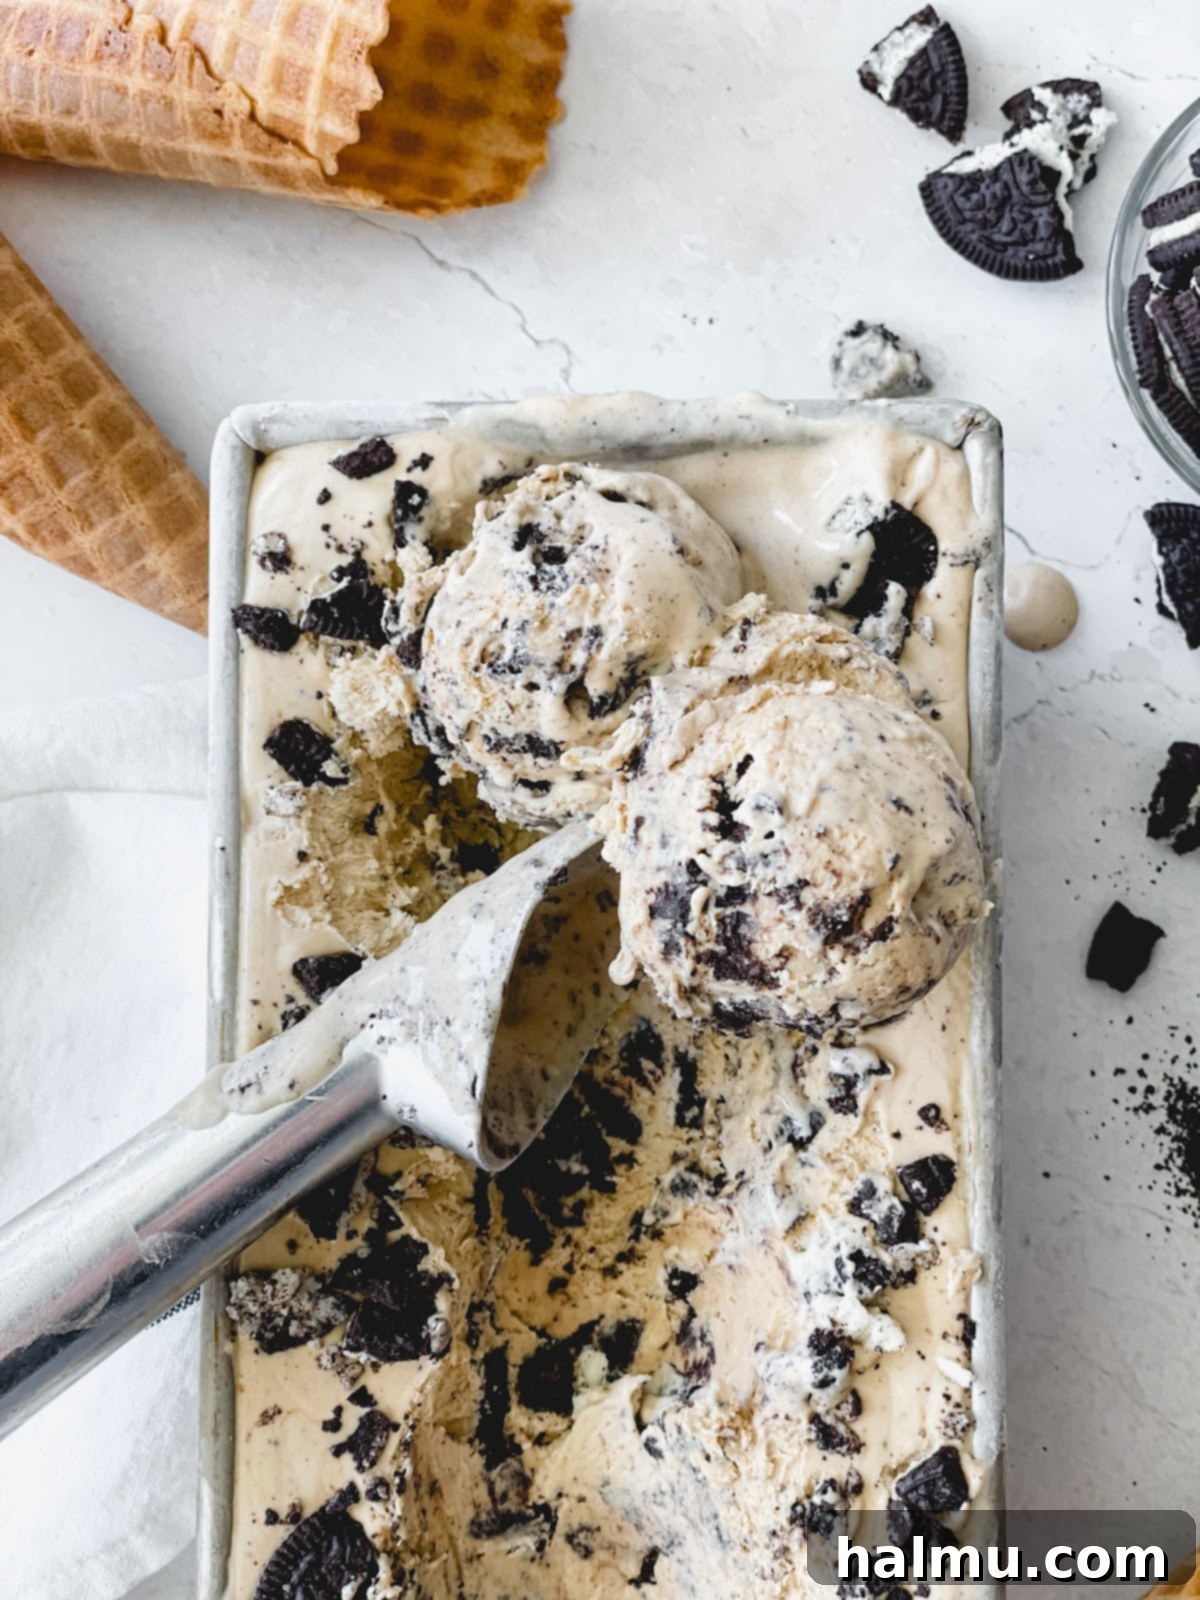
Prepare to fall in love with this incredibly simple and irresistibly delicious No-Churn Espresso Oreo Ice Cream. This homemade dessert requires minimal effort, takes just about 10 minutes to prepare, and calls for only 5 essential ingredients. The best part? You won’t need any special or expensive ice cream maker, making it accessible for everyone to create creamy, dreamy ice cream right in their kitchen. Initially, I approached the concept of no-churn ice cream with a hint of skepticism, never having made or even tasted it before. However, the results completely surpassed my expectations – the method proved flawless, the flavors harmonized perfectly, and the texture was absolutely amazing.
This remarkable no-churn ice cream boasts a beautifully creamy yet surprisingly light texture. The combination of rich espresso and classic Oreos has quickly become my new favorite flavor pairing. It’s truly astonishing that I hadn’t discovered this magical duo sooner! My mind is already buzzing with ideas for incorporating espresso and Oreos into a variety of future desserts. But for now, I’m content to savor every spoonful of this luscious, smooth ice cream, especially as we enjoy these final, scorching days of summer.
Unlocking the Magic of No-Churn Ice Cream
For those unfamiliar, “no-churn” ice cream represents a revolutionary approach to homemade frozen desserts, offering a simpler alternative to traditional methods. Conventional ice cream typically starts with a rich custard base, known as crème anglaise, created by cooking milk, cream, sugar, and egg yolks over gentle heat. This base is then transferred to an ice cream machine, which continuously churns and freezes the mixture, gradually incorporating air and preventing large ice crystal formation, resulting in that signature thick, smooth, and creamy consistency we all adore.
In contrast, no-churn ice cream streamlines this process significantly. It primarily relies on just two key ingredients: heavy cream and sweetened condensed milk. When whipped heavy cream is folded with sweetened condensed milk and then frozen for several hours, it transforms into a light, soft, and remarkably creamy mixture that closely mimics the texture of its traditional counterpart. This ingenious method eliminates the need for an expensive ice cream maker, complex cooking techniques, or constant monitoring. It’s a fantastic solution for home cooks looking for an easy, delicious, and versatile way to enjoy homemade ice cream with endless possibilities for flavor customization.

The Quintessential 5 Ingredients for Supreme Creaminess
One of the many charms of this recipe is its simplicity, built upon just five powerhouse ingredients. Should you prefer a classic taste, you can easily create a delightful vanilla ice cream using only the first three components. However, for all the coffee and cookie aficionados out there, I wholeheartedly urge you to experience the Espresso Oreo version – it’s a game-changer and still incredibly straightforward with just five items. Let’s delve into what makes each ingredient indispensable:
- Heavy Cream: This is the backbone of your no-churn ice cream, providing the essential richness and volume. When selecting, look for labels that explicitly state “heavy cream” or “heavy whipping cream.” The key is its high-fat content, typically 36% or more, which allows it to whip up into stable soft peaks, creating a light, airy base for your ice cream. Avoid “whipping cream” or “light whipping cream,” as these contain a lower fat percentage and won’t achieve the desired airy texture, leading to a softer, looser, and potentially icier final product. For the best results, opt for reputable dairy brands known for quality.
- Sweetened Condensed Milk: This magical ingredient plays a dual role, contributing both sweetness and an incredibly smooth, thick texture to your no-churn ice cream. It’s far superior to other substitutes I’ve tested because it provides the perfect balance of sugar and body, preventing the mixture from becoming grainy or developing undesirable ice crystals. The natural sugars in condensed milk also help lower the freezing point of the mixture, contributing to that desirable scoopable consistency straight from the freezer.
- Vanilla Extract: While seemingly a small addition, the quality of your vanilla extract significantly impacts the overall flavor profile, especially in recipes with few ingredients like this one. Always opt for pure vanilla extract over imitation varieties. Pure vanilla offers a deep, complex, and aromatic warmth that beautifully complements both the espresso and the Oreos, elevating the entire dessert.
- Espresso Powder: For an authentic and robust coffee flavor that truly stands out, instant espresso powder is crucial. Unlike finely ground coffee, espresso powder dissolves completely into the mixture, imparting a concentrated coffee essence without any grittiness. It also has a remarkable ability to enhance chocolate flavors, making the Oreos taste even richer. My personal favorite, and one I consistently recommend for its superior flavor and easy solubility, is this brand, which is readily available in most grocery stores’ coffee aisles.
- Oreos: What’s not to love about classic Oreos? They add a delightful crunch, a familiar chocolatey sweetness, and a playful element to this ice cream. I tend to be generous with the Oreos to ensure a satisfying chunk in every bite, but feel free to adjust the quantity based on your preference for mix-ins or if you want the espresso flavor to be more dominant. For those with dietary restrictions, simply swap in gluten-free Oreos to make this a delicious, inclusive treat!
Crafting Your Dreamy Espresso Oreo Ice Cream
Making this incredible Espresso Oreo No-Churn Ice Cream is a straightforward process that comes together quickly, leaving you with a sophisticated dessert with minimal fuss. Here’s how to achieve perfection:
- Whip the Cream to Perfection: Begin by pouring your cold heavy cream into the bowl of a stand mixer fitted with a whisk attachment. Whip the cream on medium-high speed until it forms soft peaks. This is a crucial step for the final texture of your ice cream. Soft peaks mean that when you lift the whisk, the cream forms a peak that gently curls or flops over on itself. Be careful not to overwhip the cream into stiff peaks, as this can result in a grainy texture in your finished ice cream. If you accidentally go too far, the ice cream may become denser and less airy.
- Combine the Flavorful Base: In a separate mixing bowl, whisk together the sweetened condensed milk, pure vanilla extract, and espresso powder until well combined. Don’t worry if the espresso powder makes the mixture look speckled at first; it will fully dissolve as you incorporate it into the cream. Once whisked, gently fold this flavorful mixture into your whipped heavy cream. Use a spatula to carefully combine, preserving as much of the air in the whipped cream as possible. Stop folding when there are still a few streaks of the sweetened condensed milk mixture visible – overmixing can deflate the cream.
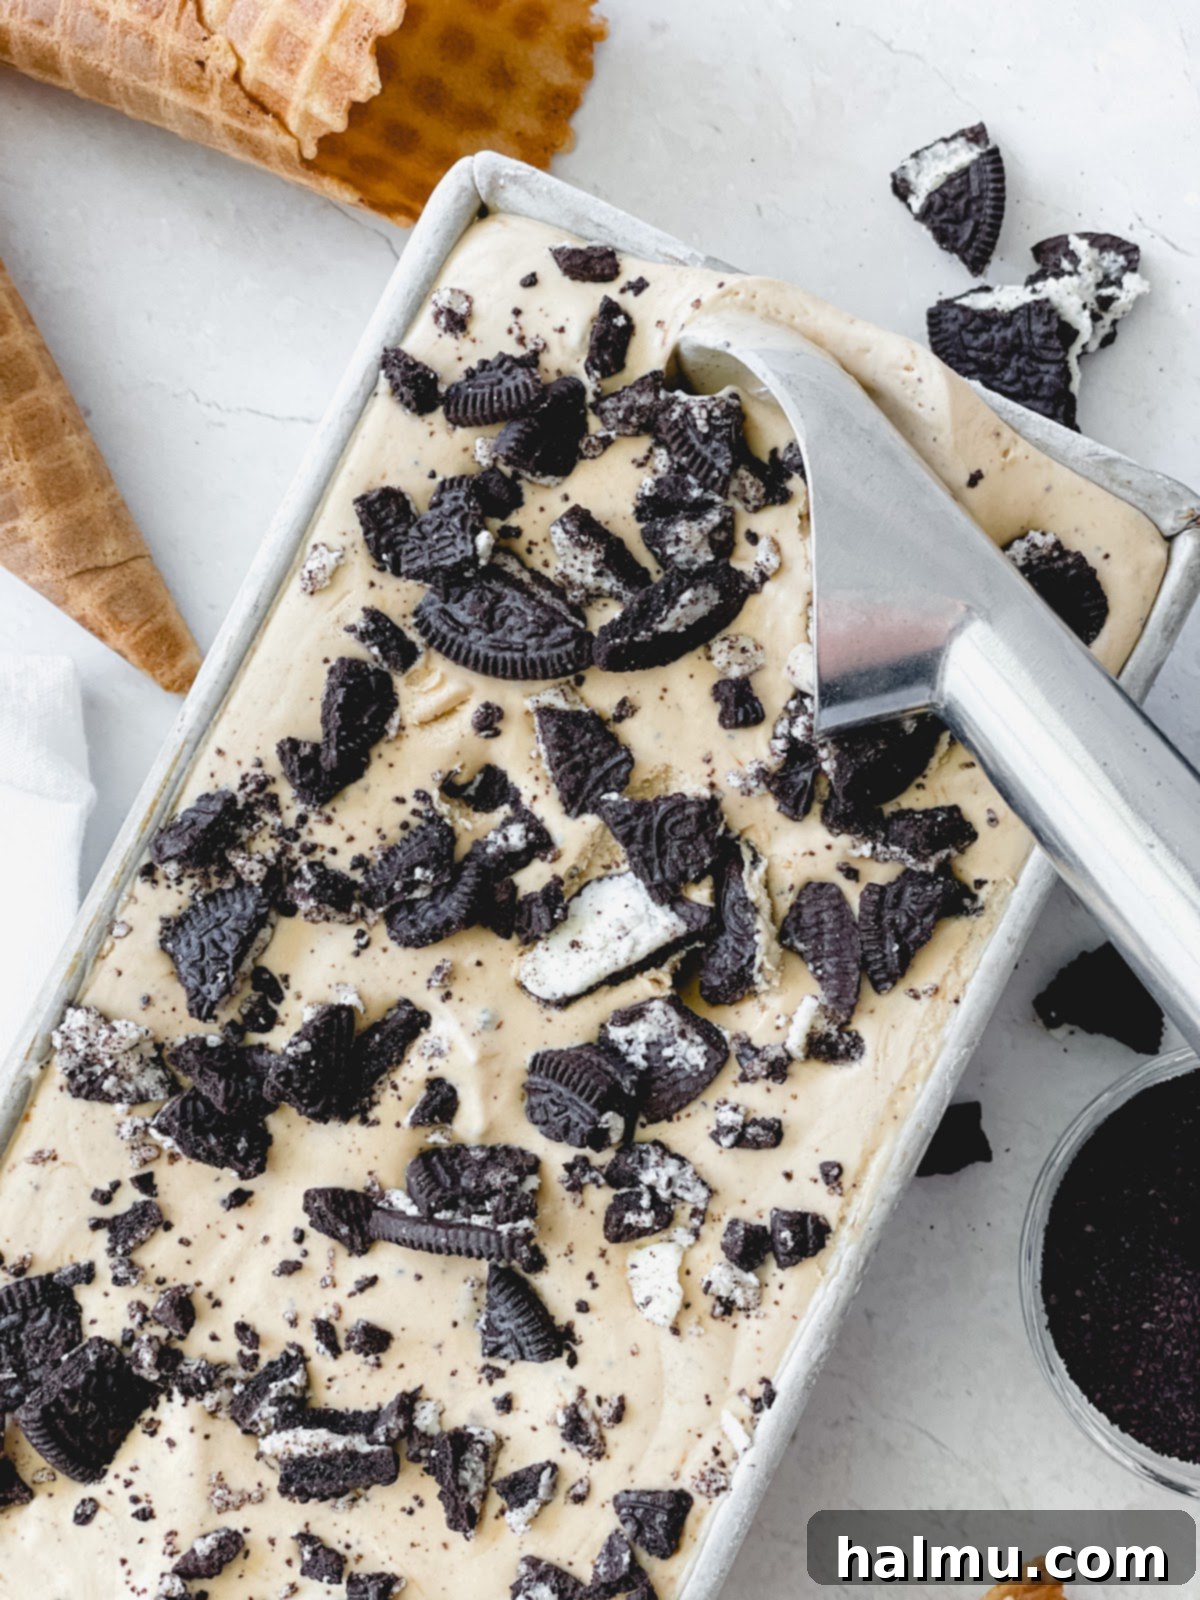
- Incorporate the Irresistible Oreos: Just before the mixture is fully homogenous, gently fold in the crushed or chopped Oreos. Reserving a small amount of crushed Oreos for sprinkling on top can add a lovely visual appeal. Continue folding until the Oreos are evenly distributed throughout the mixture and no more streaks of the condensed milk mixture remain. The goal is to incorporate everything without deflating the airy cream.
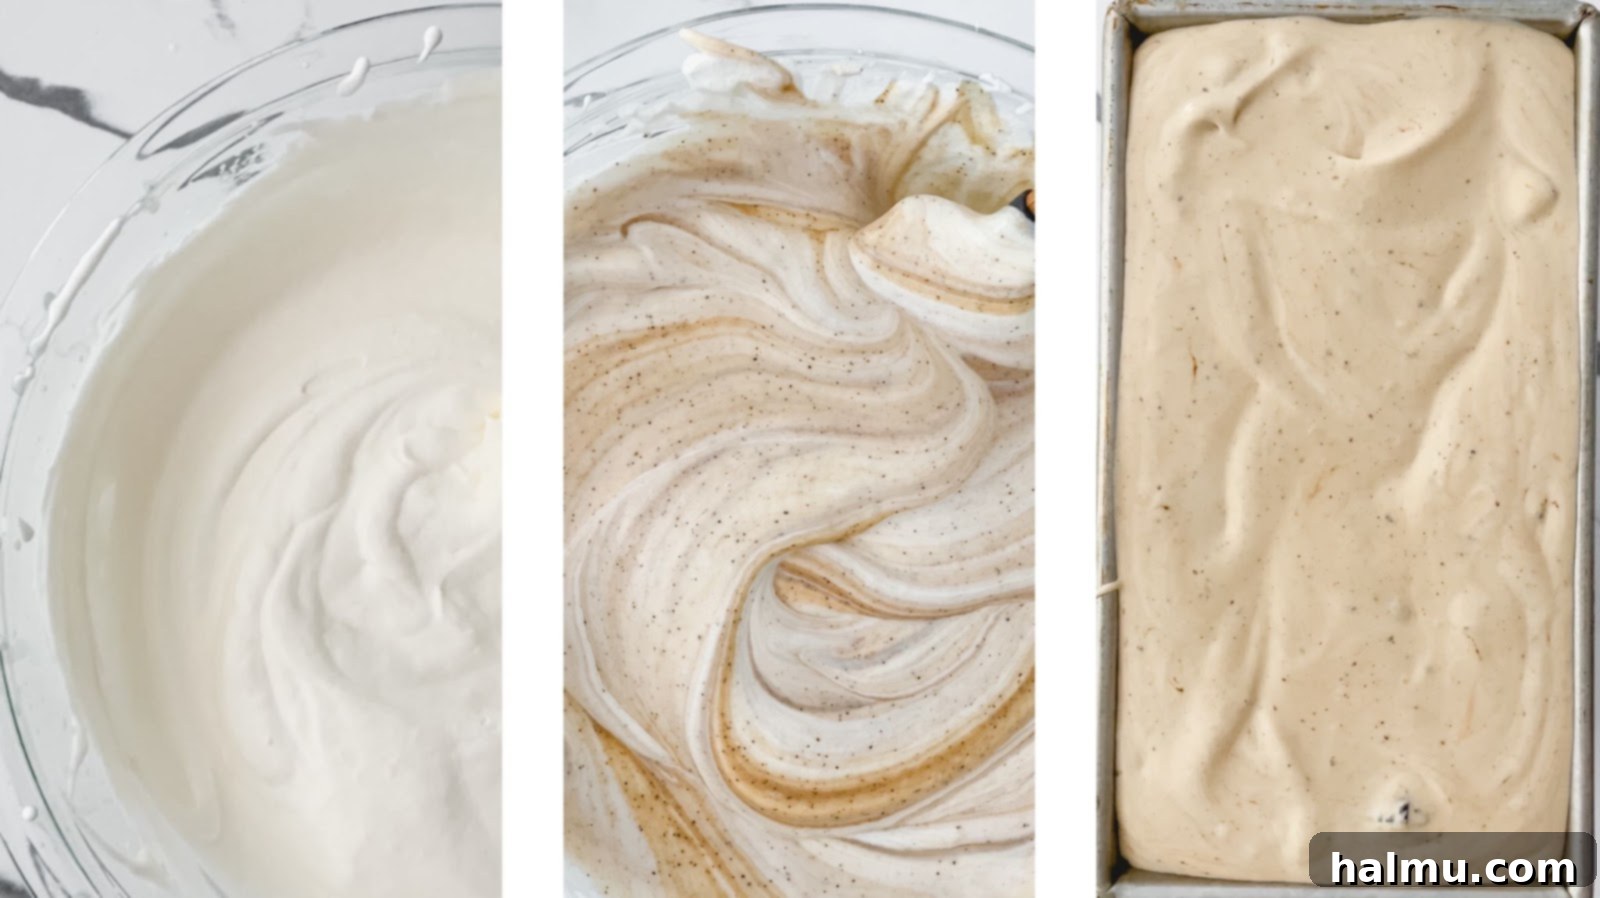
- Prepare for Freezing: Carefully pour the ice cream mixture into your chosen baking pan. An 8.5” x 4.5” loaf pan is ideal for this recipe, providing the perfect depth and shape, but an 8” x 8” square pan or even a round cake pan would work just as well. There’s no need to grease or line the pan – simply pour the mixture directly in. For an extra touch, sprinkle the reserved crushed Oreos evenly over the top of the ice cream mixture.
- The Essential Freeze: Cover the pan tightly with plastic wrap or aluminum foil to prevent ice crystals from forming on the surface. Transfer the covered pan to the freezer. The ice cream needs to freeze for a minimum of 6 hours to set properly. For the best, firmest, and most scoopable texture, I highly recommend freezing it overnight or for at least 12 hours. This extended freezing time ensures the ice cream is perfectly chilled and firm throughout.
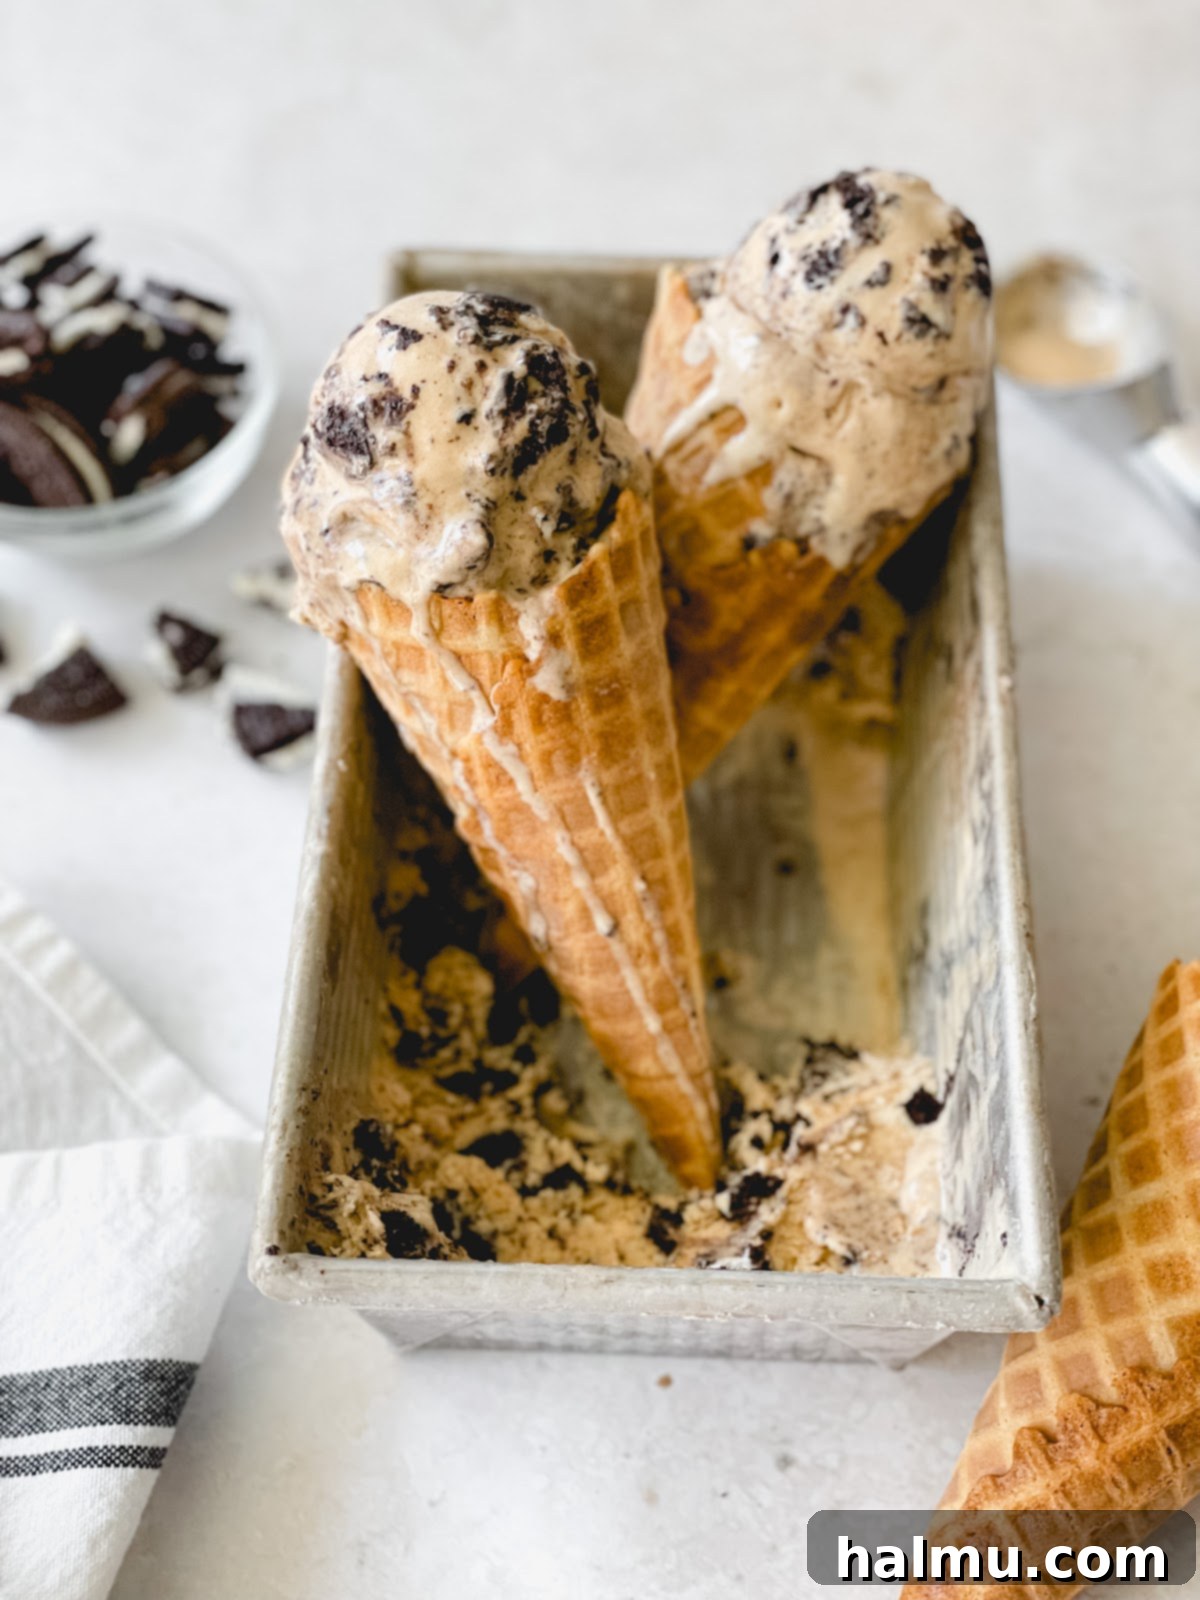
- Scoop, Serve, and Savor: Once thoroughly frozen, remove your homemade Espresso Oreo No-Churn Ice Cream from the freezer. Allow it to sit at room temperature for a few minutes to soften slightly, making it easier to scoop. This ice cream is absolutely divine on its own, offering a rich, creamy, and flavorful experience. For an extra special treat, serve it in a crispy waffle cone, or transform it into an ultimate ice cream sundae. Top with warm hot fudge sauce, a generous dollop of freshly whipped cream, and an additional sprinkle of crushed Oreos for an unforgettable dessert experience!
Tips for Success with Your No-Churn Ice Cream
Achieving perfect no-churn ice cream every time is easy with a few key considerations:
- Cold Ingredients Are Key: Ensure your heavy cream is thoroughly chilled before whipping. Cold cream whips up faster and creates a more stable, voluminous foam, which is essential for the light texture of no-churn ice cream.
- Don’t Overmix: When folding the sweetened condensed milk mixture into the whipped cream, be gentle. Overmixing can deflate the air you’ve worked hard to incorporate, leading to a denser, less creamy ice cream.
- Cover Properly: Always cover your ice cream tightly with plastic wrap or aluminum foil before freezing. Press the wrap directly onto the surface of the ice cream to minimize air exposure, which helps prevent the formation of icy crystals and freezer burn.
- Freezing Time Matters: While 6 hours is the minimum, a longer freeze (8-12 hours or overnight) yields a firmer, more set ice cream that is easier to scoop and has a superior texture.
- Adjust Mix-ins: Don’t be afraid to experiment with the quantity of your Oreos or other mix-ins. For a stronger espresso flavor, reduce the Oreos. For more texture, add extra!
Creative Customization Ideas
This Espresso Oreo No-Churn Ice Cream recipe is a fantastic base for endless variations. Feel free to get creative and make it your own!
- Nutty Indulgence: Add chopped toasted pecans, walnuts, or almonds for extra crunch and a rich, nutty flavor that complements the coffee.
- Chocolate Lover’s Dream: Drizzle in chocolate syrup or add chocolate chips, mini chocolate chunks, or even a swirl of fudge.
- Caramel Swirl: Swirl in a generous amount of salted caramel sauce before freezing for a delightful sweet and salty touch.
- Boozy Treat: For an adult version, a splash of coffee liqueur or Kahlua can add an extra layer of flavor. Add it with the condensed milk mixture.
- Different Cookies: While Oreos are classic, consider other crushed cookies like Biscoff, Nilla Wafers, or even chocolate chip cookies.
- Minty Fresh: Add a touch of mint extract and perhaps some crushed peppermint patties for a refreshing twist.
More Sweet Summer Recipes to Enjoy
- Chocolate Sprinkle Cookie Ice Cream Sandwiches
- Tiramisu Cupcakes
- Strawberry Crunch Cheesecake
- Caramel Cone Crunch Cookies
- Brown Butter Toffee Cookie Skillet
- S’mores Blondies
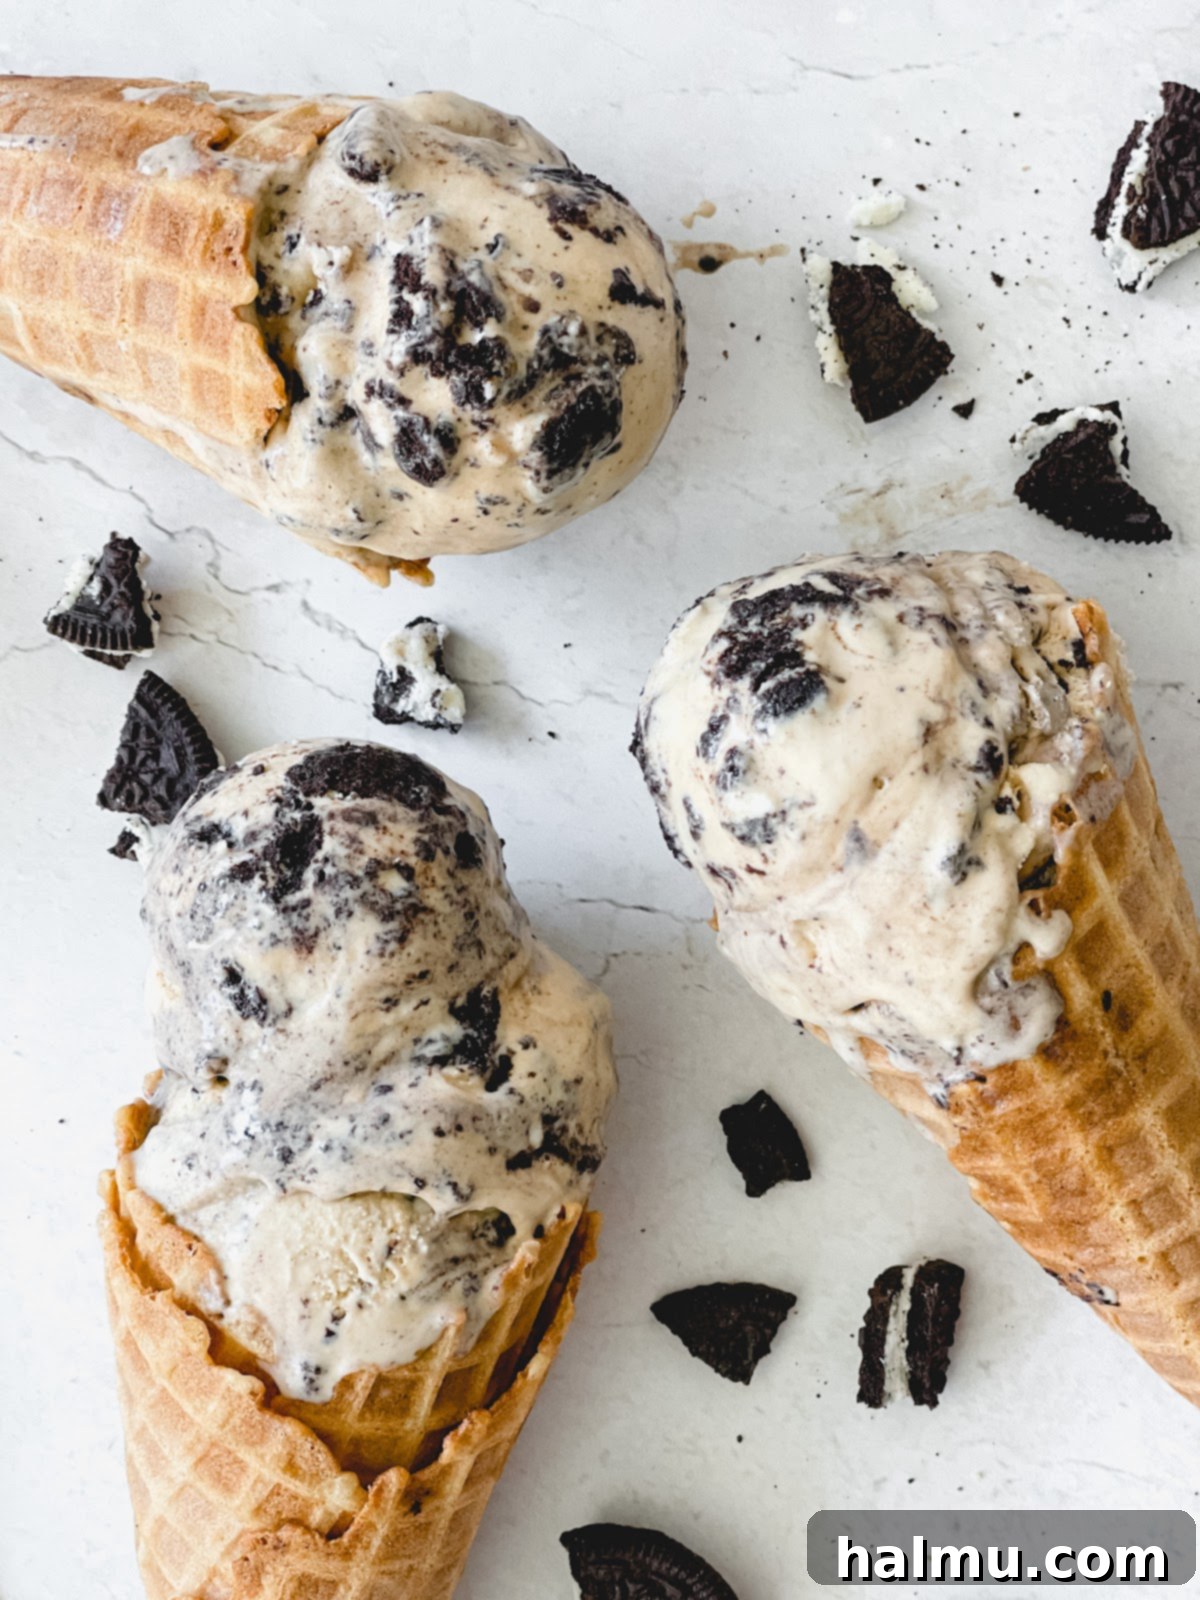
If you’re a newcomer to the world of no-churn ice cream, or even if you’re a seasoned veteran, I wholeheartedly encourage you to give this Espresso Oreo recipe a try. Its ease of preparation and sensational flavor profile are sure to impress, and I’m confident you won’t regret it! Once you’ve whipped up this delightful treat, I’d love to hear about your experience. Please share your creations by leaving a comment below and tagging @sweetkitchencravings on Instagram or TikTok. If Pinterest is more your style, remember you can easily save my recipes to your collection there for future enjoyment. Happy ice cream making!

Espresso Oreo Ice Cream
Print Recipe
RATE THIS RECIPE
Time
Details
Ingredients
- 2 cups (470ml) heavy cream
- 1 (14oz) can sweetened condensed milk
- 1 Tablespoon (13g) vanilla extract
- 4 teaspoons instant espresso powder
- 16 Oreos, chopped or crushed
Instructions
- In the bowl of a stand mixer fitted with a whisk attachment, add the heavy cream and whip until it reaches soft peaks. Set aside.
- In a mixing bowl, whisk together the sweetened condensed milk, vanilla, and espresso powder. Gently fold the mixture into the whipped cream, until only a few streaks remain.
- Add the chopped oreos to the mixture, reserving some for the top, and gently fold until everything is combined.
- Pour the ice cream mixture into a loaf pan measuring 8.5” x 4.5” and sprinkle the top with the reserved Oreos. Freeze for at least 6 hours or until set.
- Once the ice cream is set, scoop and enjoy!
Notes
- Pan Size: If you don’t have a loaf pan, a square or round baking pan works too.
- Freezing: For firmer ice cream, freeze for 8-12 hours.
